
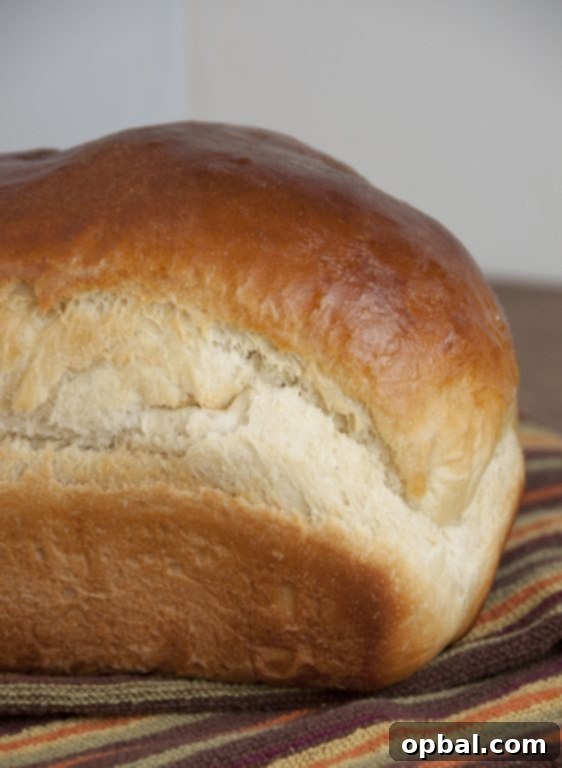
Indulge in Homemade Bliss: The Ultimate Tender Honey Buttermilk Bread Recipe
There’s an unparalleled joy that comes from baking bread at home. The aroma that fills your kitchen, the satisfying process of kneading the dough, and finally, slicing into a warm, crusty loaf you’ve created with your own hands – it’s a truly rewarding experience. Among the vast array of homemade breads, this honey buttermilk bread recipe stands out as a true masterpiece. It’s a remarkably easy yeast bread that consistently impresses with its tender crumb, beautiful rise, and subtle, comforting sweetness. It transforms simple pantry staples into an extraordinary accompaniment to any meal, elevating a regular dinner into a special occasion.
While grabbing a loaf from the grocery store is undeniably convenient, the magic of homemade bread lies in its unmatched freshness, flavor, and the wholesome satisfaction it brings. This recipe, specifically, proves that a little extra effort yields immense rewards. You’ll quickly discover that yeast bread, despite its reputation, is surprisingly forgiving and incredibly straightforward to master. The primary “catch,” if you can even call it that, is simply planning ahead to allow the dough ample time to rise. Beyond that, it’s a delightful process that rewards patience with deliciousness.
The Irresistible Charm of Homemade Yeast Bread
For many, the thought of baking with yeast can seem intimidating, conjuring images of complex techniques and unpredictable outcomes. However, the reality is far simpler and more accessible than you might imagine. Yeast bread is a foundational skill in baking that, once learned, opens up a world of culinary possibilities. It relies on a few basic ingredients – flour, water, yeast, salt, and often a touch of sugar or fat – which most homes already have on hand. The transformation of these humble components into a soft, airy, and flavorful loaf is nothing short of miraculous, driven by the microscopic power of yeast.
Beyond the impressive factor, baking your own bread offers control over ingredients, allowing you to avoid preservatives and artificial additives often found in commercially produced loaves. It also provides an incredible sense of accomplishment. Imagine serving a hearty stew or a fresh salad, and then proudly presenting a basket of your own freshly baked bread – the compliments are sure to flow. This honey buttermilk bread recipe is designed to be your new go-to, demystifying the art of yeast baking and making it an enjoyable, regular part of your culinary repertoire. It’s a recipe that not only delivers on taste and texture but also builds confidence in the kitchen.
Why This Honey Buttermilk Bread Shines
This particular white bread recipe distinguishes itself with a harmonious blend of flavors and an exceptionally tender texture. The addition of buttermilk is the true secret behind its incredible lightness and subtly tangy depth. Buttermilk, with its acidic nature, reacts with the baking soda in the recipe to create a wonderfully soft and airy crumb. It also contributes to a prolonged shelf life, ensuring your loaf stays fresh and delicious for longer. The unique properties of buttermilk also help to tenderize the gluten in the flour, resulting in a bread that is incredibly soft and never dry.
Complementing the buttermilk is the gentle sweetness of honey. While any honey you have on hand will work, using pure raw honey can impart a more complex and nuanced flavor profile, a delightful “country sweetness” that truly elevates the bread. The honey not only provides a pleasant taste but also helps to keep the bread moist and adds to its beautiful golden-brown crust. This combination of buttermilk and honey creates a perfectly balanced loaf that is both comforting and sophisticated, making it ideal for everything from sandwiches to toast or simply served alongside your favorite meal.
The Role of Bread Flour for a Perfect Rise
The choice of flour is critical in achieving the signature rise and structure of this bread. We specifically call for white bread flour, and for good reason. Bread flour has a higher protein content compared to all-purpose flour, typically ranging from 12% to 14%. This higher protein level translates to more gluten development, which is essential for creating a strong, elastic dough that can trap the gases produced by the yeast. The result is a loaf with an impressive volume, a chewier texture, and an open crumb structure that is both appealing to the eye and satisfying to the palate. While you *could* use all-purpose flour in a pinch, you might find the bread doesn’t rise quite as high or have the same tender yet resilient chew. Investing in good quality bread flour is a small step that makes a significant difference in the final outcome of this recipe.
Essential Tips for Yeast Bread Success
Baking with yeast doesn’t have to be a daunting task. With a few key tips and a basic understanding of the process, you’ll be turning out perfect loaves every time. The most important factor is the yeast itself. Ensure your yeast is fresh and active. An easy way to test this is by “proofing” it: mix it with warm water (not hot!) and a pinch of sugar. If it becomes foamy and bubbly after 5-10 minutes, it’s alive and ready to go. If not, it’s best to discard it and get a new packet.
Temperature also plays a crucial role. The water and buttermilk should be warm, not hot, to avoid killing the yeast. Aim for a temperature around 105-115°F (40-46°C), which feels comfortably warm to the touch. The environment for rising is also important; a warm, draft-free spot will encourage a steady rise. If your kitchen is cool, consider placing the covered dough in a slightly warmed (but turned off) oven or near a sunny window.
The Art of Kneading and Rising
Kneading is where the magic happens for gluten development. Whether by hand or with an electric mixer, the goal is to develop the gluten in the bread flour, creating a smooth, elastic, and supple dough. You’ll know it’s adequately kneaded when it passes the “windowpane test” – you should be able to stretch a small piece of dough thin enough to see light through it without tearing. This elasticity is what allows the dough to capture gases and rise beautifully.
The rising process, often called “proofing,” allows the yeast to ferment and create those lovely air pockets. The first rise, or bulk fermentation, gives the dough its primary flavor and structure. The second rise, after shaping, refines the texture and ensures a light, airy loaf. Don’t rush these steps; they are fundamental to the bread’s final texture and taste. Over-proofing can lead to a collapsed loaf, while under-proofing results in dense, heavy bread. Pay attention to the visual cues: the dough should double in size and feel light and springy to the touch.
Note: This recipe yields two generous loaves, perfect for sharing or freezing! If you only need one, simply halve the ingredients. Alternatively, you can freeze one of the formed dough loaves before the second rise. Thaw it in the refrigerator overnight, then let it rise at room temperature before baking as directed.
Crafting Your Loaves: A Step-by-Step Guide
Ready to bring this deliciousness to life? Follow these detailed instructions, and you’ll be rewarded with two loaves of the most tender, flavorful honey buttermilk bread you’ve ever tasted. Remember, baking is an art, but it’s also a science – precise measurements and attention to detail will lead to the best results.
Honey Buttermilk Bread
Cuisine: American
Author: Ashley
Prep time:
Cook time:
Total time:
Serves: 2 loaves, 24 slices
This tender buttermilk bread recipe will be your new go-to yeast bread. It rises beautifully thanks to the bread flour and the honey adds a slight country sweetness.
Ingredients
- 1 envelope active dry yeast (1 tablespoon)
- 1 teaspoon sugar
- ¼ cup warm water (105-115°F / 40-46°C)
- Pinch of ground ginger (helps activate the yeast)
- 2 cups warm buttermilk (105-115°F / 40-46°C)
- ⅓ cup honey
- ¼ cup unsalted butter, melted and cooled to warm (not hot)
- 1 teaspoon salt
- ¾ teaspoon baking soda
- 6 cups white bread flour
Instructions
- In a large mixing bowl, combine the ginger, sugar, yeast, and warm water. Stir gently and let it sit for about five minutes until foamy, indicating the yeast is active.
- To the yeast mixture, add the warm buttermilk, honey, salt, and baking soda. Stir well to combine these wet ingredients.
- Add the first three cups of bread flour to the bowl. Mix until completely smooth. If using an electric mixer with a dough hook, this will take approximately 5 minutes on low speed.
- Incorporate the melted and cooled butter into the batter, mixing until it is fully absorbed and no streaks remain.
- Gradually add the remaining three cups of bread flour, one cup at a time, continuing to mix on low speed until a shaggy dough forms.
- Once the dough begins to pull away from the sides of the bowl, transfer it to a lightly floured surface. Knead the dough by hand for 8-10 minutes, or until it becomes elastic, smooth, and no longer sticky.
- Lightly grease a clean large bowl. Place the dough in the bowl, turning it over once to ensure all sides are coated. Cover the bowl with plastic wrap or a clean kitchen towel and let it rise in a warm, draft-free place for 1½ hours, or until it has doubled in size.
- Gently punch the risen dough down to release the air. Divide the dough into two equal portions and shape each into a loaf.
- Place each shaped loaf into two greased loaf pans. Lightly grease the tops of the loaves as well to prevent a dry crust.
- Cover the loaf pans with plastic wrap or a towel and allow them to rise again for 45 minutes, or until nearly doubled in size.
- Preheat your oven to 400°F (200°C). Bake the loaves for 30 minutes. If the tops begin to brown too quickly, loosely tent them with aluminum foil to prevent over-browning.
- Once baked through (an internal temperature of 200-210°F / 93-99°C indicates doneness), remove the loaves from the oven. Immediately brush the tops with a little extra melted butter for a soft crust and rich flavor.
- Allow the loaves to cool in their pans for 10-15 minutes. This makes them easier to remove and prevents them from sticking.
- Carefully turn the loaves out onto a wire rack to cool completely before slicing and serving. This step is crucial for the bread’s texture.
Serving Suggestions and Storage
This honey buttermilk bread is incredibly versatile. It’s fantastic as a side for any dinner, perfect for making gourmet sandwiches, or simply toasted and spread with butter and jam for breakfast. Its mild sweetness also makes it a wonderful accompaniment to savory dishes, providing a delightful contrast. Try it with a hearty soup, a crisp salad, or as the base for an elegant open-faced sandwich.
To store your homemade bread, ensure it is completely cooled before wrapping. Once cooled, wrap it tightly in plastic wrap or place it in an airtight bread box. It will stay fresh at room temperature for 3-4 days. For longer storage, slice the bread and freeze individual slices in a freezer-safe bag for up to 2-3 months. You can toast slices directly from frozen for a quick and delicious treat.
More Delicious Bread Recipes to Explore
If you enjoyed baking this honey buttermilk bread, you might also love exploring these other delightful bread recipes from our site. Each offers a unique flavor profile and baking experience:
- Coconut Banana Bread
- Louisiana Garlic Bread
- Artisan Rye Bread
Your New Favorite Homemade Bread Awaits!
Baking this honey buttermilk bread is more than just following a recipe; it’s an experience that fills your home with warmth and an irresistible aroma. The tender crumb, the subtle sweetness of honey, and the delicate tang of buttermilk combine to create a loaf that’s both comforting and gourmet. Whether you’re a seasoned baker or just starting your journey with yeast, this recipe is designed for success. It promises to deliver consistently delicious results, making it an instant classic in your kitchen. So roll up your sleeves, gather your ingredients, and prepare to be amazed by the simple magic of homemade bread. Your taste buds, and your guests, will thank you!
Recipe source: restlesschipotle.com