
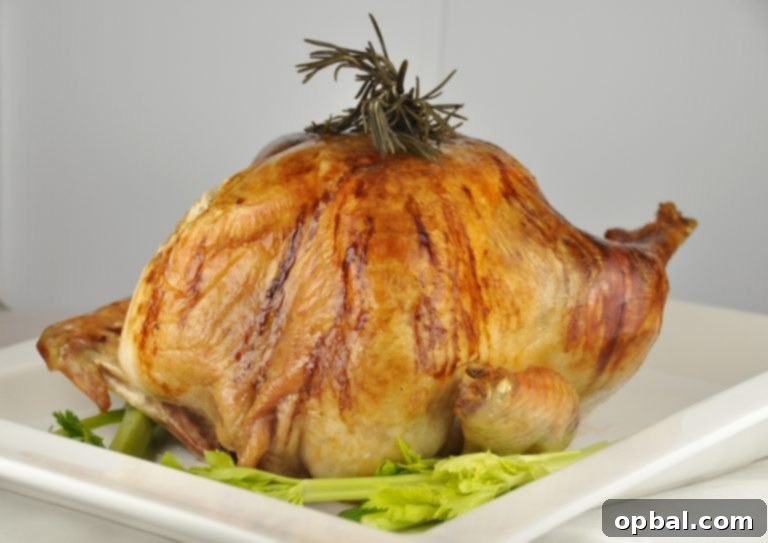
How to Roast the Perfect Turkey: Your Ultimate Foolproof Guide for Thanksgiving & Christmas
The quest for the perfect holiday turkey often feels like an intimidating culinary challenge. Many home cooks approach Thanksgiving or Christmas turkey roasting with a mix of excitement and trepidation, fearing a dry bird, uneven cooking, or a last-minute kitchen catastrophe. But what if we told you that achieving a magnificently golden, juicy, and utterly delicious turkey is not only possible but surprisingly simple? Forget the stress and embrace the aroma of a perfectly roasted turkey filling your home. Today, we’re thrilled to share a method that is not only easy to follow but completely foolproof, guaranteeing rave reviews from your family and guests. This isn’t just a recipe; it’s a pathway to holiday culinary triumph.
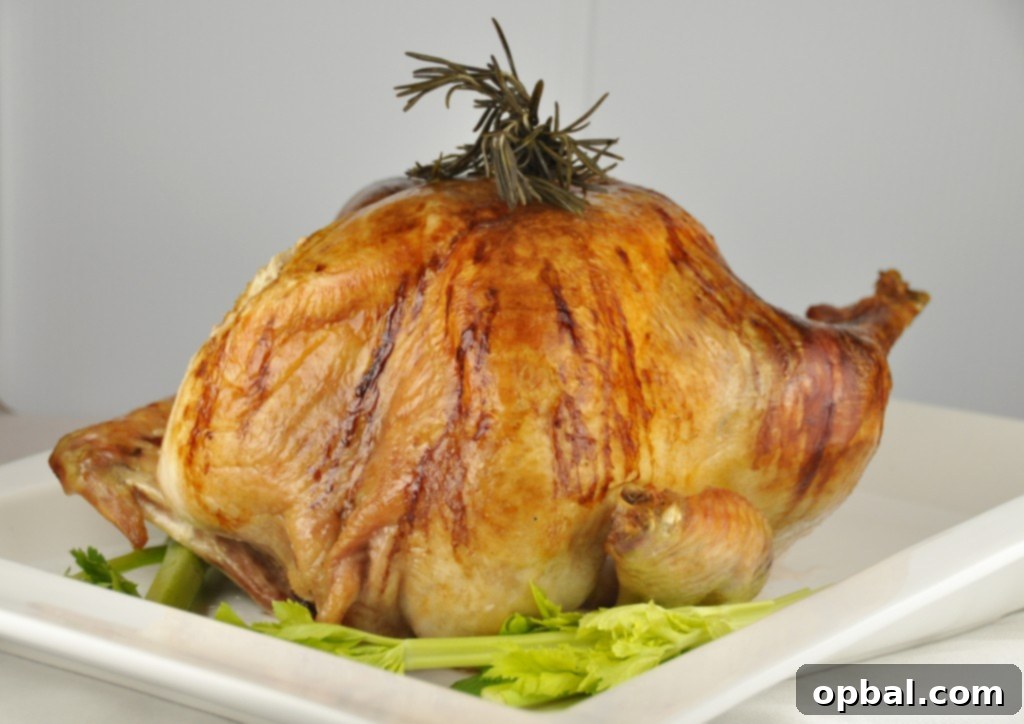
Why This Turkey Roasting Method Works Every Time
After years of holiday meal preparations, we’ve fine-tuned a turkey roasting technique that consistently delivers exceptional results. This method is particularly ideal if you prefer not to cook stuffing inside the bird, allowing for more even heat distribution and a faster cooking time. By focusing on external aromatics and strategic roasting temperatures, we ensure every part of the turkey—from the breast to the dark meat—reaches tender perfection, while the skin crisps up to a beautiful, golden-brown hue. You don’t need to be a seasoned chef; just follow these straightforward steps, and you’ll be amazed at the delicious outcome. The incredible aroma alone, as it fills your kitchen, will be a testament to your success!
Essential Equipment for Turkey Roasting Success
Having the right tools can make all the difference in your turkey roasting journey. While you don’t need a gourmet kitchen, a few key pieces of equipment will elevate your experience and ensure precision:
- Roasting Pan with Rack: A sturdy roasting pan with a V-rack allows air to circulate around the turkey, promoting even cooking and crispy skin. If you’re new to holiday hosting, investing in a good quality pan now will serve you for many years to come.
- Meat Thermometer: This is arguably the most crucial tool. An accurate probe thermometer takes the guesswork out of determining doneness, ensuring your turkey is cooked safely and perfectly.
- Basting Brush or Turkey Baster (Optional): While our method focuses on natural juiciness, some prefer to baste.
- Gravy Separator: A handy tool for separating fat from delicious pan drippings, essential for making a flavorful gravy.
- Sharp Carving Knife and Fork: For effortless carving and presentation.
- Large Cutting Board: With a juice groove to catch any precious drippings.
Choosing the Perfect Turkey for Your Holiday Feast
The journey to a perfect roasted turkey begins with selecting the right bird. Whether you opt for fresh or frozen, a few considerations will help you make the best choice:
- Size Matters: Plan for about 1 to 1.5 pounds of turkey per person to ensure ample servings and delicious leftovers. For a 14-16 pound turkey, expect to serve 10-12 people comfortably.
- Fresh vs. Frozen: Fresh turkeys offer convenience as they don’t require thawing, but they must be purchased close to your cooking date. Frozen turkeys are widely available and cost-effective but demand adequate thawing time.
- Type of Turkey: Consider options like organic, free-range, or heritage turkeys for potentially richer flavor, though a conventional turkey prepared with care will still be wonderfully delicious.
Preparation is Key: Thawing, Rinsing, and Seasoning
Proper preparation lays the groundwork for a successful roast. This multi-day process ensures your turkey is ready to absorb flavors and cook evenly:
- Thawing (2-3 Days Before Roasting): If using a frozen turkey, begin thawing it in the refrigerator (at 38°F or below) or in a cooler. Allow approximately 24 hours of thawing time for every 4-5 pounds of turkey. So, a 14-16 pound bird will need 3-4 days. Do not thaw at room temperature.
- Remove Innards and Rinse: Once thawed, carefully remove the neck and giblets from both cavities of the turkey. Rinse the turkey thoroughly inside and out with cold water. This step helps ensure cleanliness and readies the bird for seasoning.
- Pat Dry, Thoroughly: Place the turkey on your roasting rack inside a half sheet pan or roasting pan. Using plenty of paper towels, thoroughly pat the turkey dry, both inside the cavity and all over the skin. A dry skin is essential for achieving that desirable crispy, golden exterior.
- The Aromatic Foundation: This method focuses on infusing flavor from the inside out using a simple yet powerful blend of aromatics. In a microwave-safe dish, combine sliced red apple, half an onion (sliced in large pieces), and one cinnamon stick with one cup of water. Microwave on high for 5 minutes. This gentle pre-steeping helps release their fragrant oils.
- Stuffing the Cavity (Aromatics Only): Once the aromatics have steeped, carefully transfer them into the turkey’s cavity, along with 4 sprigs of fresh rosemary and 6 fresh sage leaves. These natural ingredients will release incredible flavors and aromas as the turkey roasts, subtly perfuming the meat from within without slowing down the cooking process as traditional stuffing would.
- Prepping for Roasting: Tuck the wings underneath the bird; this prevents them from burning and helps stabilize the turkey. Liberally coat the entire skin of the turkey with canola oil. This creates a barrier that encourages crispiness and a beautiful, even browning. You can also use melted butter or olive oil if preferred.
- Seasoning the Exterior: Beyond the oil, don’t forget a generous seasoning of coarse salt and freshly ground black pepper all over the skin. Some also like to add a sprinkle of garlic powder or paprika for extra flavor and color.
The Roasting Process: Heat, Time, and Precision
This two-stage roasting method combines high heat for a perfect start with a lower, sustained temperature for thorough cooking, ensuring tenderness and juiciness throughout:
- Initial High Heat Blast (30 Minutes): Preheat your oven to a high temperature of 500°F (260°C). Place the prepared turkey on the lowest rack level of the hot oven. Roast at this high temperature for exactly 30 minutes. This initial burst of heat helps to rapidly brown the skin and kickstart the rendering of fat, contributing to an incredibly crispy exterior.
- Reduce Temperature & Monitor (Remaining Cook Time): After 30 minutes, without opening the oven door unnecessarily, reduce the oven temperature to 350°F (175°C). Immediately insert a probe thermometer into the thickest part of the turkey breast, ensuring it does not touch any bone. If your thermometer has an alarm function, set it to 165°F (74°C).
- Anticipate Total Roasting Time: A 14 to 16 pound bird will typically require a total roasting time of approximately 2 to 2.5 hours at 350°F after the initial high-heat blast. However, always rely on the internal temperature rather than time alone. The thermometer is your ultimate guide.
- Doneness Check: The turkey is done when the internal temperature in the thickest part of the breast reaches 165°F (74°C) and the thickest part of the thigh reaches 175°F (79°C). Juices should run clear when a knife is inserted into the thickest part of the thigh.
- To Baste or Not to Baste? With this method, frequent basting is generally unnecessary, as the initial high heat and oil coating help seal in juices. Opening the oven door frequently releases heat, prolonging cooking time and potentially drying out the turkey.
The Crucial Resting Period: Lock in the Juices
Once your turkey has reached the ideal internal temperature, the work isn’t quite done. The resting period is absolutely critical for a juicy, tender bird. Do not skip this step!
- Remove and Rest: Carefully remove the turkey from the oven and transfer it, still on its rack within the pan, to a sturdy carving board or countertop. Loosely tent the turkey with aluminum foil. Do not cover it tightly, as this will steam the skin and make it less crispy.
- Allow Ample Time: Let the turkey rest for a minimum of 15-30 minutes, or even up to 45 minutes for a larger bird. During this time, the internal temperature will continue to rise slightly (carryover cooking), and the juices, which have been driven to the center by the heat, will redistribute throughout the meat. This ensures every slice is moist and flavorful.
Carving and Serving Your Magnificent Turkey
After a perfect roast and a crucial rest, it’s time for the grand finale: carving. A sharp carving knife and fork are your best friends here. Start by removing the legs and thighs, then separate the drumsticks from the thighs. Next, slice the breast meat against the grain for maximum tenderness. Arrange your beautiful turkey slices on a warm platter, ready to be admired and devoured.
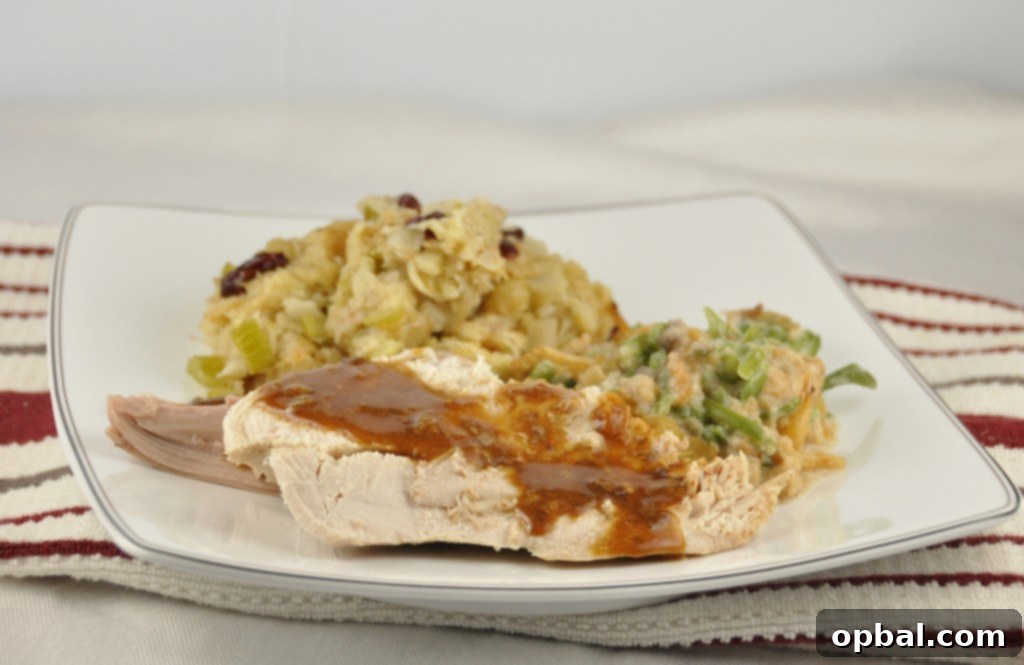
Don’t Forget the Gravy!
A holiday turkey dinner isn’t complete without a rich, savory gravy. While making gravy from pan drippings can sometimes be a bit of an art form, especially if you’re not getting many drippings from a high-heat method, don’t despair! We highly recommend trying our no-drippings turkey gravy recipe. It’s a fantastic alternative that still delivers incredible flavor, ensuring you have a luscious accompaniment for your moist turkey and mashed potatoes. Remember to save any leftover turkey carcass and bones for making a flavorful stock—the foundation for many delicious post-holiday meals.
Recipe: How to Make the Perfect Turkey
The Foolproof Holiday Turkey
Today I am sharing my ultimate method for how to make the perfect turkey for Thanksgiving or Christmas! It’s easy, completely fool-proof, and results in a juicy bird with crispy skin.
Cuisine: American
Author: Ashley
Cook time:
Total time:
Serves: 10-12 people
Ingredients
- 1 (14 to 16 pound) frozen or fresh turkey
- For the aromatic cavity infusion:
- 1 large red apple, sliced into thick wedges
- 1/2 large onion, sliced into large pieces
- 1 whole cinnamon stick
- 1 cup water
- 4 sprigs fresh rosemary
- 6 large fresh sage leaves
- Canola oil (or olive oil), for rubbing generously on the skin
- Coarse salt and freshly ground black pepper, to taste
Instructions
- Thawing & Preparation (2-3 days before roasting): If using a frozen turkey, begin thawing it in the refrigerator. A 14-16 pound turkey typically requires 3-4 days to thaw completely. Once thawed, remove the turkey from its packaging, discard the neck and giblets from both cavities. Rinse the turkey thoroughly inside and out with cold water. Place the turkey on a roasting rack set in a sturdy roasting pan and pat it extremely dry with paper towels, both inside and out.
- Prepare Aromatics: In a microwave-safe bowl, combine the sliced apple, onion, cinnamon stick, and 1 cup of water. Microwave on high for 5 minutes. This steeping process helps to release their aromatic compounds.
- Infuse the Cavity: Carefully transfer the steeped apple, onion, and cinnamon stick into the turkey’s main cavity. Add the fresh rosemary sprigs and sage leaves to the cavity as well.
- Prep for Roasting: Tuck the wing tips underneath the turkey to prevent them from burning. Liberally coat the entire exterior skin of the turkey with canola oil. This is crucial for achieving a beautifully crispy and golden-brown skin. Season generously with salt and black pepper all over the skin.
- Initial High-Heat Roast: Preheat your oven to 500°F (260°C). Place the prepared turkey on the lowest rack level of the preheated oven. Roast at 500°F for exactly 30 minutes.
- Reduce Heat & Monitor: After 30 minutes, reduce the oven temperature to 350°F (175°C). Immediately insert a reliable probe thermometer into the thickest part of the turkey breast, ensuring it does not touch any bone. Set the thermometer alarm (if available) to 165°F (74°C).
- Continue Roasting: A 14 to 16 pound turkey will typically require an additional 2 to 2.5 hours of roasting at 350°F, for a total cook time of approximately 2.5 to 3 hours (including the initial high-heat blast). The turkey is done when the internal temperature in the breast reaches 165°F (74°C) and in the thigh registers 175°F (79°C).
- The Essential Rest: Once the turkey reaches the target temperature, carefully remove it from the oven. Transfer it to a large cutting board and loosely tent it with aluminum foil. Allow the turkey to rest for 15-30 minutes before carving. This critical resting period allows the juices to redistribute throughout the meat, ensuring a moist and tender result.
- Carve and Enjoy: Carve your perfectly roasted turkey and serve immediately with your favorite holiday side dishes and a delicious gravy. Enjoy the fruits of your labor!
Final Thoughts: Your Holiday Culinary Success Story
There you have it—a comprehensive, foolproof guide to roasting the perfect turkey for your Thanksgiving or Christmas celebration. This method simplifies the process without compromising on flavor or texture, delivering a show-stopping centerpiece that will impress everyone at your table. Embrace the joy of holiday cooking and create unforgettable memories with a truly delicious bird. We’re confident that this will become your go-to turkey recipe for years to come. Happy holidays and happy cooking!