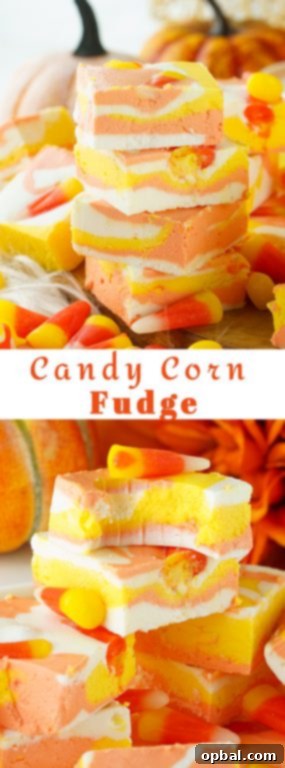
No-Bake Candy Corn Fudge: The Ultimate Easy Halloween Treat for Kids and Adults
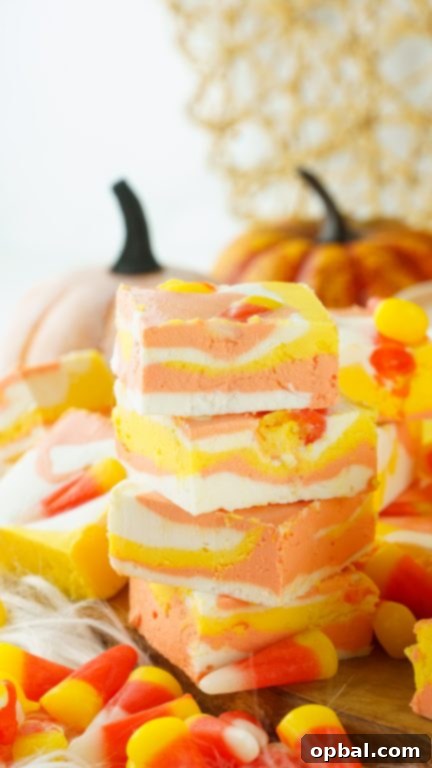
As the leaves begin to turn and a crisp autumn breeze fills the air, there’s an undeniable excitement that comes with the approach of Halloween. And what better way to celebrate this spooky season than with a delightful, no-fuss treat that captures the spirit of fall? Our No-Bake Candy Corn Fudge is precisely that – a wonderfully creamy, homemade delicacy that brings together the iconic colors of Halloween candy in a simple, effortless recipe. Forget about lengthy baking sessions; this fudge requires only four basic ingredients and a mere 15 minutes of active preparation, making it an ideal project for both seasoned home cooks and eager little helpers. It’s truly a super fun Halloween treat to make with your kids, transforming ordinary ingredients into an extraordinary festive delight.
The Allure of No-Bake Desserts and Festive Fudge
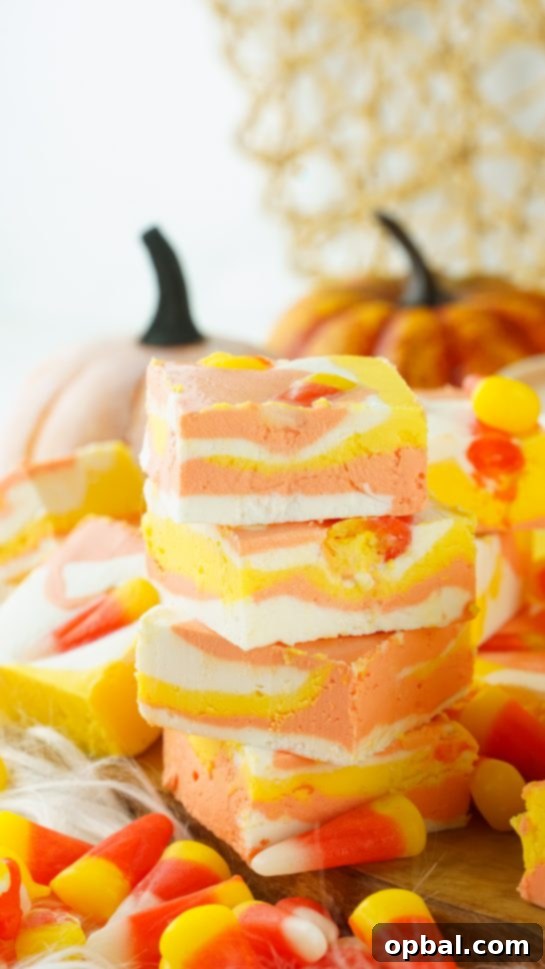
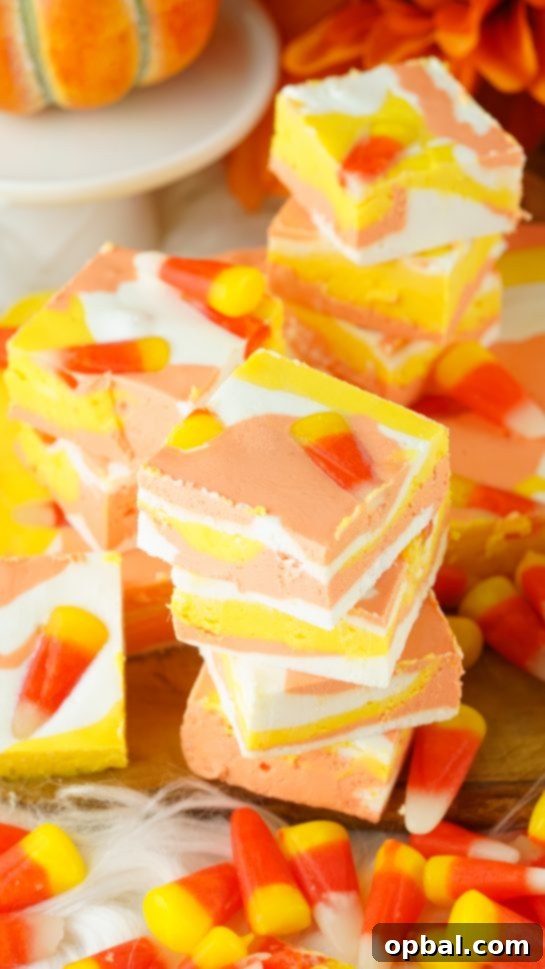
While many associate rich, decadent fudge with the Christmas holiday season, we’re here to prove that fudge deserves a place at every festive table, especially during Halloween. This Candy Corn Fudge is perfectly decked out for trick-or-treat time, with its vibrant layers of yellow, white, and orange that instantly evoke images of classic candy corn. The beauty of a no-bake recipe lies in its simplicity and accessibility. It eliminates the need for an oven, reducing preparation time and making it safer and easier to involve children in the cooking process. For busy parents, or anyone looking for a quick yet impressive dessert, no-bake fudge is a game-changer. Our recipe combines readily available ingredients like creamy vanilla frosting, smooth white chocolate, a touch of food coloring, and, of course, the quintessential candy corn, all coming together to create an irresistibly creamy and delicious confection.
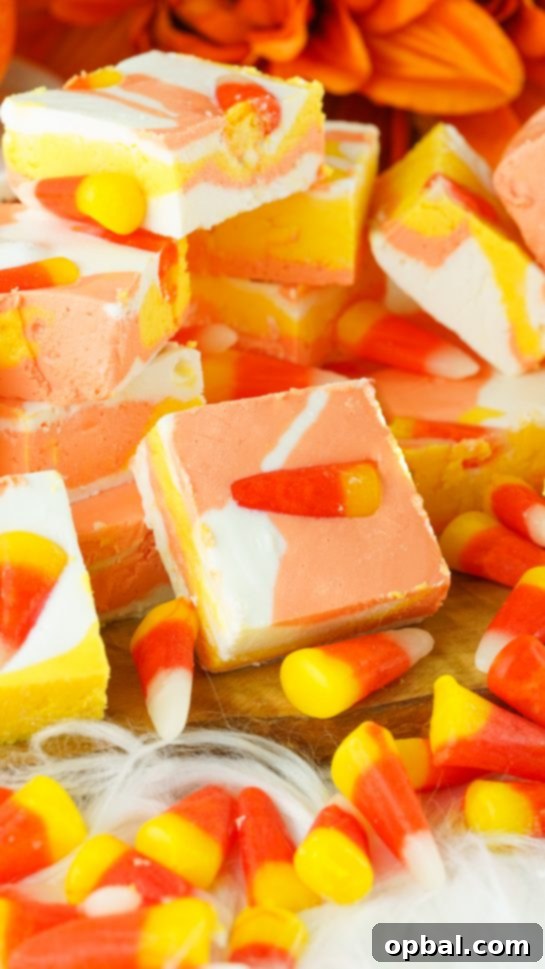
Indeed, the visual appeal of this fudge is undeniable. Those distinct layers of yellow, white, and orange create a stunning presentation, making it a beautiful addition to any Halloween party spread or a thoughtful homemade gift. This vibrant color combination is more than just eye-catching; it’s a direct nod to the beloved candy corn, instantly signaling that this is a truly special autumnal treat.
Embracing the Flavors of Fall and Halloween
As the seasons shift, many of us feel a mix of emotions. There’s a certain wistfulness for the carefree days of summer, with its warmth, long daylight hours, and the joy of wearing light dresses. Yet, there’s also an exciting anticipation for the unique comforts and flavors that autumn brings. While I might always lean towards wishing for summer to linger a little longer, it’s hard to resist the charm of fall-specific delights. This period marks the return of cozy sweaters, pumpkin spice everything, and an array of festive Halloween recipes, much like my favorite Candy Corn Pretzel Bites. Even if the warm weather could stick around, the allure of these seasonal treats is a welcome change.
The Iconic (and Sometimes Controversial) Candy Corn
It’s a widely acknowledged fact that candy corn often divides opinions; it’s certainly NOT the most universally loved Halloween sweet. However, its status as one of the most iconic Halloween candies is undisputed. As September rolls into October, you’d be hard-pressed to find a store shelf or a festive decoration that doesn’t feature this tri-colored confection. Perhaps it’s time to fully embrace it, because whether you love it or simply tolerate it, candy corn is undeniably a staple of the season. It’s incredibly easy to snack on by the handful, making it a casual and enjoyable treat. More importantly, this classic candy often finds its way into many of our favorite fall desserts, adding a distinct visual appeal and a unique sweetness that perfectly complements the autumnal theme. Its presence signifies the spirit of Halloween, making it an essential element in festive recipes like our delightful fudge.
My Personal Affection for Candy Corn
For me, the arrival of September and October immediately sparks thoughts of sweet treats and, inevitably, candy corn. It’s an almost involuntary association with the changing leaves and festive atmosphere. During these enchanting fall months, you’ll almost always find a bowl of candy corn prominently displayed in my home. It’s more than just a decoration; it’s one of my absolute favorite treats to snack on throughout the season. The distinctive flavor and texture bring a sense of nostalgia and comfort. I often go to great lengths to stockpile a few extra bags when they’re readily available, ensuring I have a secret stash to pull out later in the year. Because, without fail, those candy corn cravings are bound to hit, long after the Halloween decorations have been packed away.
Indulging in Halloween Delights: No Such Thing as Too Much Candy!
As we fully immerse ourselves in the Halloween season, let me declare it unequivocally: there is absolutely no such thing as too much candy and fudge! This is the time of year to revel in sweet indulgences, and our Candy Corn Fudge, alongside other festive creations like Candy Corn Cookie Cups, truly hit the spot. The beauty of this easy fudge recipe lies in its incredibly quick preparation time. It’s so fast, in fact, that it might be a little *too* easy to whip up a batch, making it dangerously simple to keep going back for more. The process itself is straightforward: setting the vibrant layers of fudge and then exercising the utmost self-control as it chills. Waiting for the fudge to properly set is arguably the hardest part, especially for someone whose strong suit isn’t patience when delicious treats are involved!
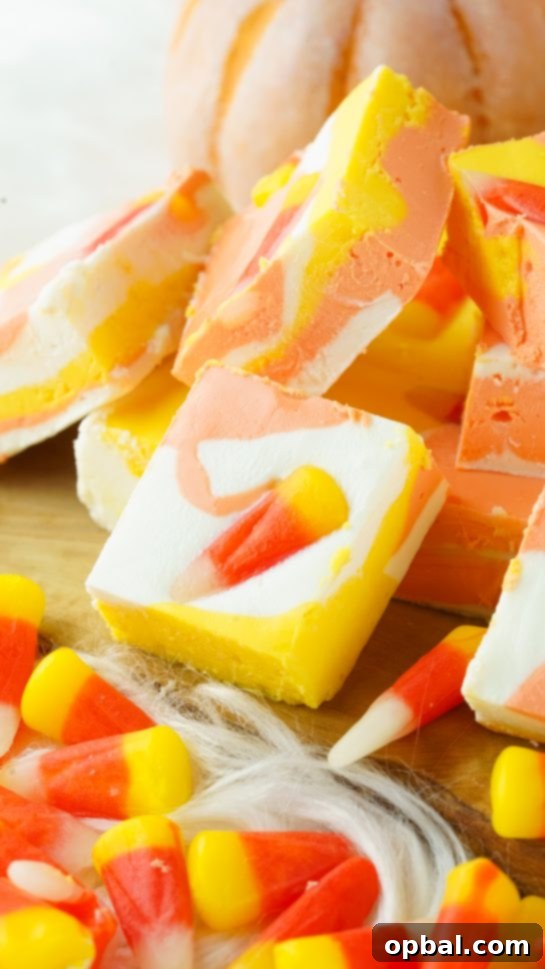
This no-bake marvel isn’t just a treat for your family; it’s also a fantastic way to spread some festive cheer. Imagine the delight on your neighbors’ faces when you share a plate of this colorful, creamy fudge – you’re guaranteed to instantly become the favorite neighbor on the block! And if you happen to find yourself with any leftover candy corn after crafting this fudge (a rare but possible scenario for true enthusiasts), don’t let it go to waste. Consider transforming it into my incredible 3-Ingredient Homemade Butterfingers, a surprisingly simple and delicious confection. Or, better yet, incorporate it into my absolute favorite fall creation: the perfectly balanced Sweet & Salty Halloween Chex Mix. No matter how you choose to enjoy these treats, I wish everyone a very Happy (early) Halloween!
Crafting Your Own Candy Corn Fudge: Key Ingredients
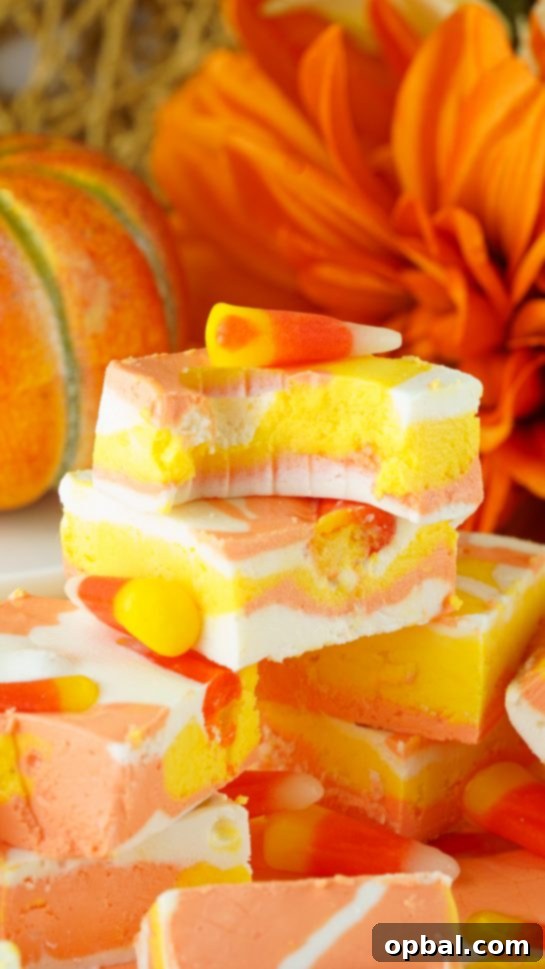
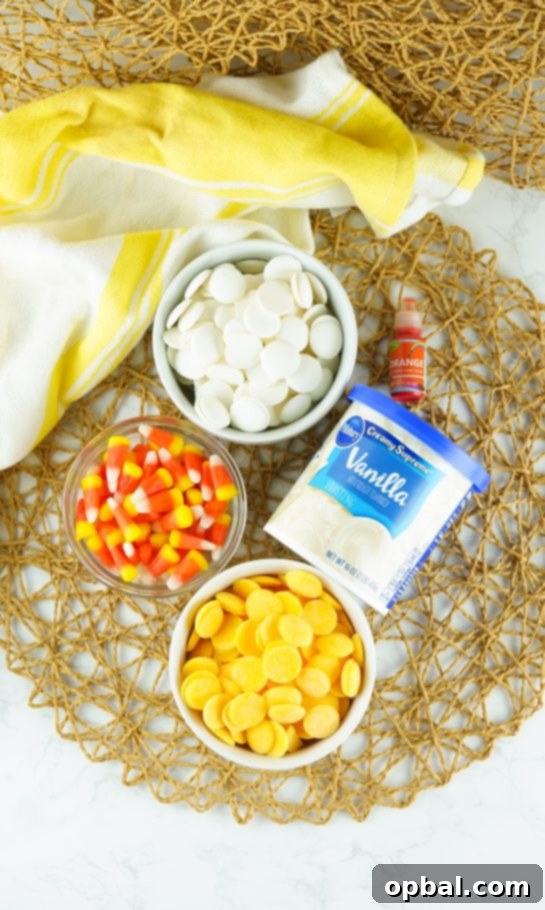
Creating this stunning No-Bake Candy Corn Fudge is surprisingly straightforward, thanks to its minimal ingredient list. Each component plays a crucial role in achieving the desired taste, texture, and visual appeal. Let’s delve into what makes this recipe so special:
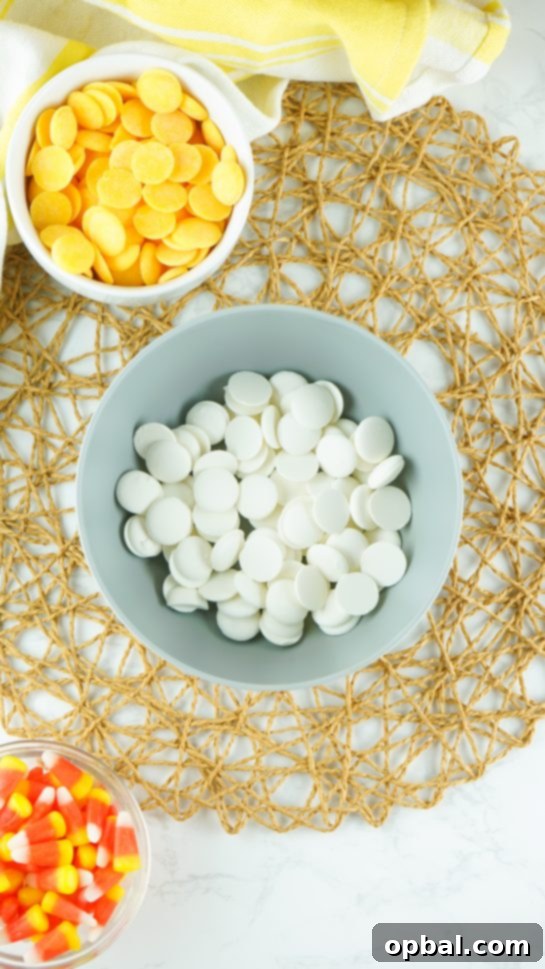
- White Candy Melts: These are the foundation of our creamy fudge. Candy melts are formulated to melt smoothly and set firmly, providing a perfect base. You’ll need two cups for this recipe – one cup to remain white, and the other to be dyed orange. If you don’t have candy melts, high-quality white chocolate chips or chopped white chocolate bars can work, but ensure they are tempered properly for the best texture.
- Yellow Candy Melts: Complementing the white, yellow candy melts provide that distinct second color of the candy corn trio. Like the white melts, they contribute to the smooth, rich texture of the fudge.
- Vanilla Frosting (16 ounces): This is our secret shortcut to no-bake fudge perfection. Pre-made vanilla frosting adds incredible creaminess and sweetness without any complex cooking. Microwaving it briefly ensures it’s pliable and easy to incorporate with the melted candy, resulting in a perfectly smooth, velvety fudge. Any good quality store-bought vanilla frosting will do, or you can even use homemade if you prefer!
- Orange Oil-Based Food Dye (½ Teaspoon): To achieve that vibrant orange layer, an oil-based food dye is essential. Unlike water-based dyes, oil-based colors won’t cause the candy melts to seize or become grainy. This ensures a beautifully smooth and evenly colored orange layer. Start with a small amount and add more gradually until you reach your desired shade.
- Candy Corn (⅓ Cup): The star of the show! Candy corn serves as both a decorative topping and a delightful flavor accent. Its unique texture and sweet, honey-like flavor are synonymous with Halloween. We recommend strategically placing the candy corn on top for the most appealing presentation.
Step-by-Step Perfection: Achieving the Swirled Effect
The beauty of this No-Bake Candy Corn Fudge isn’t just its taste, but also its striking appearance. Creating those distinct, vibrant layers with a beautiful swirl is a simple process, but a few key steps ensure perfection. Here’s a more detailed breakdown:
- Prepare Your Pan: Start by lining a 9-inch square pan with parchment paper or a silicone baking mat. This crucial step ensures that your fudge won’t stick and can be easily lifted out for cutting once set. Make sure the paper extends up the sides to create handles.
- Separate the Candy Melts: Divide your white candy melts into two separate small mixing bowls, one cup in each. Place the yellow candy melts into a third bowl. This separation is vital for creating your three distinct colors.
- Melt with Care: Microwave each bowl of candy melts individually. Begin with about 45 seconds, then stir thoroughly. If not fully melted, continue microwaving in 15-second intervals, stirring after each, until smooth. The key is to avoid overheating, which can cause the melts to seize and become clumpy. They should be just melted enough to be smooth and pourable.
- Soften the Frosting: Remove the lid from your container of vanilla frosting and microwave it for approximately 45 seconds. This brief warming makes the frosting much softer and easier to mix into the melted candy melts, ensuring a silky-smooth fudge base.
- Color the Orange Layer: Add the orange oil-based food dye directly into one of the bowls of melted white candy melts. Stir diligently until the color is evenly distributed and vibrantly orange. Using an oil-based dye prevents the chocolate from seizing.
- Combine Frosting and Melts: Pour approximately one-third of the softened vanilla frosting into each of the three bowls (white, yellow, and orange melted candy). Stir each bowl thoroughly until the frosting and candy melts are perfectly combined, creating three distinct colors of fudge batter.
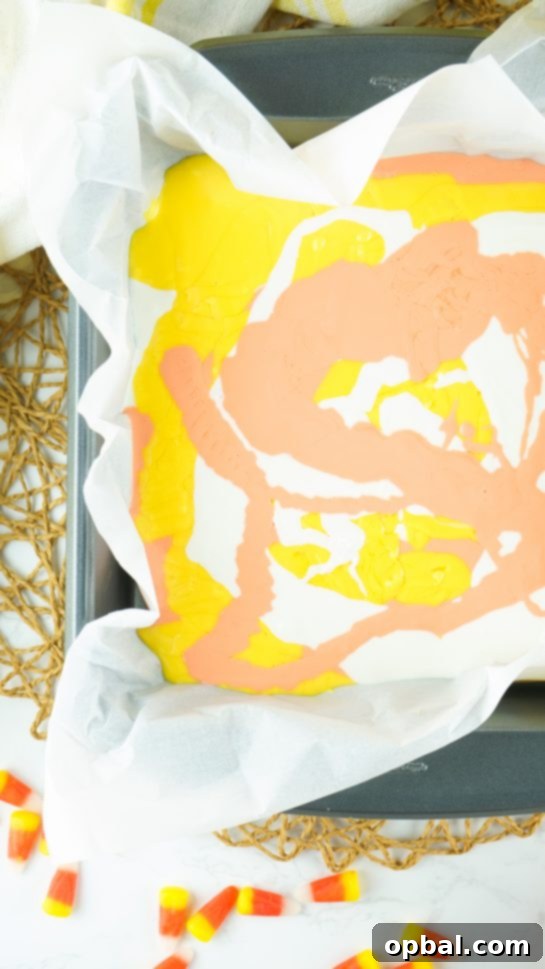
- Create the Swirl: This is where the artistry comes in! Alternate pouring spoonfuls or drizzles of each color into your prepared pan. There’s no single “right” way to do this; drizzling randomly creates a beautiful marble effect, while more deliberate layering can produce distinct stripes. I personally find that three separate pourings of each color, overlapping slightly, create a visually appealing and dynamic swirl. Don’t overthink it – part of the fun is seeing the unique pattern emerge!
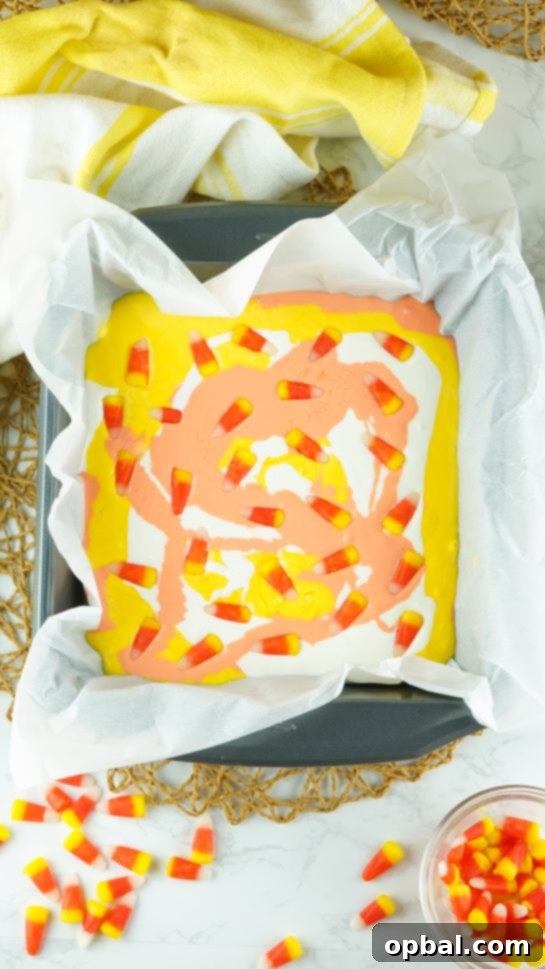
- Decorate and Chill: Immediately after pouring, top the fudge with your desired amount of candy corn. Strategically placing the candy corn can enhance the visual appeal, ensuring each piece of fudge has a nice decorative element. Once decorated, carefully transfer the pan to the refrigerator. Allow it to chill for at least 3 hours, or until the fudge is completely firm and set. This chilling time is essential for the fudge to hold its shape.
- Cut and Enjoy: Once firm, lift the fudge out of the pan using the parchment paper handles. Place it on a cutting board. For perfect-looking squares, I often trim the edges where they touched the parchment paper, creating clean, crisp lines. Then, cut the fudge into desired squares or rectangles. Serve and enjoy your homemade, festive No-Bake Candy Corn Fudge!
Tips for Fudge-Making Success
To ensure your No-Bake Candy Corn Fudge turns out perfectly every time, keep these helpful tips in mind:
- I strategically placed the candy corn on top for the best look. I would suggest doing this as well unless you don’t mind how the candy corn falls. For an even more professional finish, gently press the candy corn into the fudge while it’s still soft, just before chilling.
- It doesn’t take long for the candy melts to melt, so don’t overcook them. They will get hard and want to ball up if you do. Heat in short bursts (15-30 seconds) and stir vigorously between each interval until smooth. Patience here prevents a grainy texture.
- I didn’t have a set strategy when pouring the chocolate into the dish, I just drizzled it randomly, which is part of the fun. You can always layer it instead of making it a marble style. Totally up to you. Experiment with different pouring techniques to achieve your desired aesthetic – from subtle swirls to distinct block colors.
- You can add some flavored extract to your fudge, if preferred. No more than a half teaspoon is needed. Add it straight to the frosting and stir well before adding the frosting to the chocolate. Vanilla extract enhances the vanilla flavor, or you could try a hint of almond or even a touch of pumpkin spice for an extra autumnal twist.
- I like to trip the edges of the fudge where they were touching the parchment paper, in order to get those perfect looking squares. This step creates a cleaner, more uniform appearance for serving, making your homemade fudge look even more impressive.
- Storage: Store your finished Candy Corn Fudge in an airtight container in the refrigerator for up to two weeks, or at room temperature for a few days (if your home is cool). For longer storage, it can be frozen for up to 2-3 months. Thaw in the refrigerator before serving.
- Customization: Don’t limit yourself to just candy corn! While it’s perfect for Halloween, you can adapt this recipe for other holidays by changing the food coloring and toppings. Think red and green with crushed peppermints for Christmas, or pastel colors with sprinkles for Easter.
Candy Corn Fudge
Pin Recipe
Ingredients
- ● 2 Cups White Candy Melts
- ● 1 Cup Yellow Candy Melts
- ● 1 Container Vanilla Frosting 16 ounces
- ● ⅓ Cup Candy Corn
- ● ½ Teaspoon Orange Oil Based Food Dye
Instructions
-
Line a 9-inch square pan with parchment paper or silicone baking mat.
-
Place 1 cup of the white candy melts in a small mixing bowl, and the other cup in a separate bowl. Place the yellow candy melts in a third bowl.
-
Microwave each bowl for about 45 seconds to 1 minute or until smooth when stirred.
-
Remove the top of the frosting and microwave it for about 45 seconds.
-
Place the orange dye in one of the white bowls and stir until mixed.
-
Pour a third of the frosting into each bowl and stir until well combined.
-
Alternate pouring each color into the prepared pan until the colors are gone. I did three separate pourings of each color.
-
Top with the candy corn then place in the fridge for 3 hours or until set.
-
Cut into squares and enjoy!
Notes
Tips:
- I strategically placed the candy corn on top for the best look. I would suggest doing this as well unless you don’t mind how the candy corn falls. For an even more professional finish, gently press the candy corn into the fudge while it’s still soft, just before chilling.
- It doesn’t take long for the candy melts to melt, so don’t overcook them. They will get hard and want to ball up if you do. Heat in short bursts (15-30 seconds) and stir vigorously between each interval until smooth. Patience here prevents a grainy texture.
- I didn’t have a set strategy when pouring the chocolate into the dish, I just drizzled it randomly, which is part of the fun. You can always layer it instead of making it a marble style. Totally up to you. Experiment with different pouring techniques to achieve your desired aesthetic – from subtle swirls to distinct block colors.
- You can add some flavored extract to your fudge, if preferred. No more than a half teaspoon is needed. Add it straight to the frosting and stir well before adding the frosting to the chocolate. Vanilla extract enhances the vanilla flavor, or you could try a hint of almond or even a touch of pumpkin spice for an extra autumnal twist.
- I like to trip the edges of the fudge where they were touching the parchment paper, in order to get those perfect looking squares. This step creates a cleaner, more uniform appearance for serving, making your homemade fudge look even more impressive.
- Storage: Store your finished Candy Corn Fudge in an airtight container in the refrigerator for up to two weeks, or at room temperature for a few days (if your home is cool). For longer storage, it can be frozen for up to 2-3 months. Thaw in the refrigerator before serving.
- Customization: Don’t limit yourself to just candy corn! While it’s perfect for Halloween, you can adapt this recipe for other holidays by changing the food coloring and toppings. Think red and green with crushed peppermints for Christmas, or pastel colors with sprinkles for Easter.