
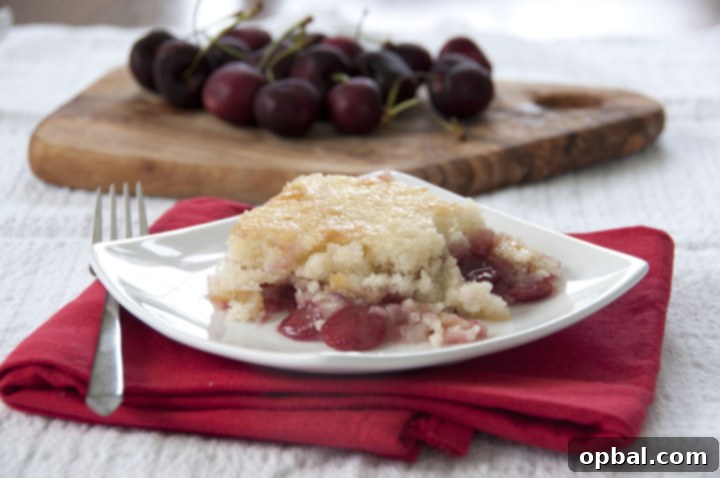
Nothing says summertime quite like cherry cobbler.
The Quintessential Summer Delight: Homemade Cherry Cobbler
As the sun ascends higher and days stretch longer, there’s a certain magic in the air that announces the arrival of summer. For many, myself included, nothing encapsulates this joyous season quite as perfectly as a warm, bubbling homemade cherry cobbler. It’s more than just a dessert; it’s a comforting embrace, a celebration of vibrant fruit, and a testament to simple, wholesome pleasures. This year, my appreciation for this classic treat has reached an entirely new level, thanks to a delightful discovery right in my own backyard.
From Our Backyard Orchard to Your Table: A Sweet Summer Surprise
Our journey with this particular cherry cobbler recipe begins with a story of unexpected joy. This summer marks our very first in our new home, and like any new homeowners, my husband, Mr. Wishes, and I have dedicated many of our weekends to taming and transforming our outdoor space. It’s been a labor of love, clearing overgrown areas, planting new blooms, and generally getting acquainted with the landscape that now belongs to us. Roughly a month ago, amidst one of these industrious weekend sessions, we stumbled upon a truly wonderful secret that our new property had been keeping.
To our utter amazement, tucked away among the established greenery, we discovered a small orchard of fruit-bearing trees flourishing right in our backyard! When we purchased the house in the autumn, the trees were dormant and bare, offering no hint of their delicious potential. We were focused on interior renovations and didn’t pay close attention to the specific varieties of trees adorning the property line. Little did we know, we were sitting on a goldmine of fresh produce just waiting for the warmer months to reveal itself. This spring, as the temperatures rose and the trees burst into bloom, their identities became gloriously clear, turning our humble backyard into a veritable edible paradise.
We are now the proud custodians of three magnificent fruit trees: a robust cherry tree, a promising plum tree (at least that’s what it’s shaping up to be), and a future-fruit-bearing peach tree. The moment Mr. Wishes laid eyes on the burgeoning clusters of ruby-red cherries on our cherry tree, his exact words were, “I’m in heaven.” And it’s true; that guy absolutely adores his cherries. His enthusiasm was infectious, and it immediately sparked an idea: to create the ultimate homemade cherry cobbler using our very own, freshly picked cherries. This was the perfect opportunity to embrace the ‘farm-to-table’ concept right from our back door.
Crafting the Perfect Cherry Cobbler from Scratch
With a basket brimming with ripe, juicy cherries harvested from our tree, I set out to bake a cobbler. I didn’t follow a strict recipe, choosing instead to improvise as I went along, guided by intuition and years of baking experience. This free-form approach always carries a hint of nervousness – will it turn out? – but the results were nothing short of spectacular. The cobbler emerged from the oven beautifully golden on top, with a crust that was perfectly soft without being soggy, holding its integrity against the luscious fruit filling. It was a triumph, and a testament to the unparalleled flavor of fresh, homegrown ingredients.
This easy cherry cobbler recipe truly is an excellent way to utilize an abundance of fresh cherries, whether they come from your backyard tree, a local orchard, or the farmer’s market. While it does require a little bit of effort to pit the cherries, don’t let that deter you. It’s a minor task that yields immense rewards in flavor and texture, ensuring a smooth, delightful bite every time. The best part? The ingredients for this classic summer dessert are likely staples you already have stocked in your pantry and refrigerator, making it incredibly accessible and convenient to whip up on a whim.
The Magic of Fresh Ingredients and the Pitting Process
Using fresh cherries is undoubtedly the secret to this cobbler’s vibrant taste and aroma. The natural sweetness and slight tartness of fresh fruit simply cannot be replicated. While frozen cherries can be a convenient substitute in a pinch (and I’ve provided guidance for their use), the joy of baking with fruit picked moments ago is an experience unto itself. Our cherries were naturally sweet, requiring minimal added sugar to enhance their flavor.
Now, about pitting the cherries: yes, it takes a moment, but it’s far from a major chore and is absolutely worth the effort for a seamless, stone-free cobbler. You can use a dedicated cherry pitter, which makes the job remarkably quick and clean, or you can improvise with a sturdy straw, a chopstick, or even a small paring knife. Simply push the pit out from the stem end. A little trick is to wear gloves to avoid stained fingers, or pit them over a bowl of water to catch errant juices. Consider it a mindful activity, connecting you directly to the ingredients and the process of creating something truly delicious from scratch.
Our cherry tree in our backyard, providing the star ingredient for this amazing cobbler!
Your Homemade Cherry Cobbler Recipe: Simple Steps, Incredible Flavor
This recipe for homemade cherry cobbler is designed to be straightforward, allowing the natural goodness of the cherries to shine. The rich, bubbly fruit filling crowned with a tender, golden crust makes for an unforgettable summer dessert that will surely become a family favorite. Get ready to impress with minimal fuss!
INGREDIENTS:
3 tablespoons unsalted butter, melted
1 cup all-purpose flour
1/4 teaspoon salt
1 teaspoon baking powder
1/2 cup whole milk (or preferred milk)
3/4 cup granulated white sugar (for the dough)
1 and 1/2 tablespoons cornstarch (for thickening the filling)
3/4 cup boiling water
3 1/2 cups fresh cherries, pitted (sweet cherries are ideal, but tart can be used with slight sugar adjustment; frozen cherries can also be used, do not thaw)
3/4 cup additional granulated white sugar (for the filling)
DIRECTIONS:
1. Prepare the Dough: In a medium-sized mixing bowl, combine the first 3/4 cup of sugar, the melted butter, all-purpose flour, salt, baking powder, and milk. Mix these ingredients thoroughly until a soft, uniform dough forms. The dough should be slightly thick but spreadable, a consistency similar to a thick cake batter. Avoid overmixing to keep the crust tender.
2. Arrange the Cherries: Take your freshly pitted cherries (or frozen, unthawed cherries if using) and evenly spread them across the bottom of a 9-inch square baking pan. Ensure the cherries form a relatively even layer, as this will help the cobbler bake uniformly and allow the filling to distribute well.
3. Layer the Dough: Carefully spoon or spread the prepared dough mixture over the layer of cherries in the baking pan. You might find it easier to drop dollops of dough evenly over the fruit and then gently spread them out with the back of a spoon or an offset spatula until the cherries are mostly covered. Don’t worry if it’s not perfectly smooth; the rustic charm is part of the cobbler’s appeal.
4. Create the Boiling Water Mixture: In a separate small bowl, combine the remaining 3/4 cup of granulated sugar with the cornstarch. Whisk them together thoroughly to ensure there are no lumps of cornstarch. This step is crucial for achieving a smooth, thickened sauce. Once combined, carefully stir in the 3/4 cup of freshly boiling water. Mix until the sugar is dissolved and the mixture is clear. The hot water activates the cornstarch, preparing it to thicken the fruit juices during baking.
5. Pour and Bake: Gently and evenly pour the hot sugar-cornstarch mixture over the dough layer in the baking pan. It might seem unconventional to pour liquid over the dough, but this is what creates that wonderful, bubbly, sweet sauce that infuses the entire cobbler. Place the pan into a preheated oven set to 350 degrees F (175 degrees C). Bake for approximately 45 minutes, or until the topping is beautifully golden brown, and the filling is visibly bubbling around the edges. A toothpick inserted into the crust should come out clean, indicating the dough is cooked through. The exact baking time may vary slightly depending on your oven.
6. Serve Warm: Once baked to perfection, remove the cherry cobbler from the oven. Allow it to cool for at least 15-20 minutes before serving. This resting period allows the filling to set slightly and intensifies the flavors. Serve warm and enjoy the fruits of your labor!
Serving Suggestions and Storage Tips for Your Perfect Cherry Cobbler
This homemade cherry cobbler is incredibly versatile and delicious, whether served warm, at room temperature, or even chilled. My personal preference is to enjoy it when it has been out of the oven for about 20-30 minutes. At this point, it’s still slightly warm, allowing the aromatic cherry juices to mingle perfectly with the soft crust, creating a comforting experience that is hard to beat. It’s delightful served simply on its own, allowing the pure flavors to shine. However, for an extra touch of indulgence, a generous scoop of creamy vanilla ice cream melting slowly over the warm cobbler is absolutely heavenly. Other delicious accompaniments include a dollop of freshly whipped cream or a light dusting of powdered sugar.
Should you find yourself with any leftovers – a rare occurrence with a dessert this delicious – they can be easily stored. Simply cover the baking dish tightly with plastic wrap or aluminum foil and refrigerate for 1-2 days after baking. Reheat individual portions gently in the microwave or oven for a quick revival of that warm, comforting goodness. This easy cherry cobbler recipe is perfect for gatherings, a delightful weekend treat, or simply to celebrate the abundance of summer fruit.
Variations and Tips for Success with Your Easy Cherry Cobbler
* Cherry Varieties: While sweet cherries were used here, tart cherries (like Montmorency) work wonderfully too. If using tart cherries, you might want to increase the additional sugar in the filling by an extra 1/4 cup, depending on your preference for sweetness.
* Frozen Cherries: If fresh cherries are out of season or unavailable, you can absolutely use frozen pitted cherries. Do not thaw them before adding to the pan; simply add them frozen and proceed with the recipe. The baking time might need to be extended by 5-10 minutes to ensure the fruit is thoroughly cooked and the filling is bubbling.
* Spice It Up: For an added layer of flavor, consider adding a pinch of cinnamon or almond extract to the cherry filling. These spices complement cherries beautifully.
* Gluten-Free Option: For a gluten-free version, substitute the all-purpose flour with a high-quality 1:1 gluten-free baking flour blend.
* Presentation: For a picture-perfect finish, consider a sprinkle of turbinado sugar over the dough before baking for an extra crunch and sparkle.
Why This Homemade Cherry Cobbler Stands Out
This homemade cherry cobbler is more than just a recipe; it’s an experience. It connects you to the simple pleasures of baking from scratch, especially when using fresh, seasonal fruit. The ease of preparation, combined with the profound flavor, makes it a standout dessert that will quickly become a cherished part of your summer traditions. Whether you’re using backyard bounty or farmer’s market finds, this easy cherry cobbler is a delicious way to celebrate the vibrant flavors of the season. We hope you enjoy making and sharing this delightful summer treat as much as we do!