
Mastering Royal Icing: Your Ultimate Guide to Beautifully Decorated Sugar Cookies

The art of decorating sugar cookies with royal icing might seem intimidating at first glance, but I promise you, it’s a skill completely within your reach! Imagine creating stunning, custom cookies for every celebration, holiday, or just a special treat. With this straightforward royal icing recipe and a comprehensive guide to techniques, tips, and tricks, you’ll gain all the confidence you need to transform simple cut-out sugar cookies into edible masterpieces right in your own kitchen. Forget those store-bought treats; homemade decorated cookies are not only more delicious but also infused with love and personal touch.
Over the years, I’ve shared some of my most cherished sugar cookie recipes, from delightful Christmas Sugar Cookie Bites to classic Cut-Out Sugar Cookies, and even scrumptious Frosted Swig Sugar Cookies. However, a sugar cookie isn’t truly complete without the perfect topping! That’s why I’m thrilled to finally bring you this easy royal icing recipe, designed specifically to complement your favorite cookies and elevate your baking game. Be sure to explore all my cookie recipes – they’re my absolute favorite to bake because they’re incredibly easy and always a hit!
The Magic of Royal Icing: Why It’s Perfect for Decorating
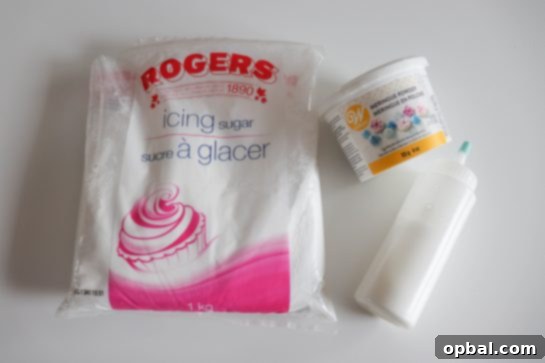
For many, sugar cookies evoke nostalgic memories of childhood holidays, spent rolling dough and choosing cookie cutters with family. What was your favorite part of that tradition? Beyond the joy of devouring the freshly baked goods, for me, it was always the decorating. There’s something uniquely satisfying about transforming a plain cookie into a festive or personalized treat. This royal icing recipe makes that decorating process not only enjoyable but surprisingly simple.
Don’t let the name “royal icing” intimidate you. Despite its elegant reputation, it’s far more achievable than you might imagine. The idea that you need to possess artistic talent to create beautifully decorated sugar cookies is a common misconception. Trust me, I don’t consider myself to have a single artistic bone, yet I consistently create stunning results with this recipe. If I can do it, so can you! It’s all about understanding the few basic principles and having the right recipe.
I’ve used this very royal icing recipe for various projects, including my adorable Minnie Mouse Sugar Cookies, which turned out absolutely beautifully. It’s also an excellent choice for festive projects like decorating gingerbread houses during the Christmas season, offering that perfect hard finish and vibrant color.
Royal Icing vs. Buttercream: Understanding the Difference
Perhaps you’re wondering what truly sets royal icing apart from a more common frosting, like buttercream. The biggest distinction lies in their texture and finish. Buttercream frosting is renowned for its creamy, soft, and easily spreadable consistency, making it wonderful for cupcakes and cakes where a plush topping is desired. Royal icing, on the other hand, dries completely to form a hard, candy-like shell. This unique characteristic allows for intricate designs, sharp lines, and a smooth, elegant finish that makes decorated sugar cookies look impeccably perfect – almost too good to be real!
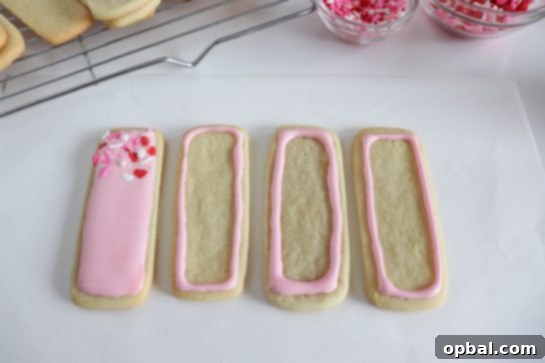
This hard finish is not only aesthetically pleasing but also incredibly practical. It means your beautifully decorated cookies can be stacked, packaged, and transported without smudging or damage, making them ideal for gifting or selling. The firm texture also contributes to a longer shelf life for your cookies, as the icing acts as a protective layer.
Achieving the Perfect Consistency: Your Key to Success

The most crucial element in working with royal icing is achieving the right consistency. This isn’t a one-size-fits-all situation; you’ll typically need two main consistencies: one for outlining and detailing, and another for flooding.
- Outlining/Detailing Consistency: Think of this as similar to toothpaste or very soft cream cheese. It should hold its shape when piped, allowing you to create clean borders and fine details. When you lift your spoon or whisk from the icing, a peak should form and slowly melt back into itself after about 15-20 seconds. If it melts faster, it’s too thin; if it doesn’t melt at all, it’s too thick.
- Flooding Consistency: This is a thinner consistency, like honey or thick syrup, designed to fill in your outlined areas smoothly. When you drizzle a spoonful of this icing back into the bowl, it should disappear and become smooth again within 10-15 seconds. This “10-15 second rule” is a widely used benchmark. Too much water will make your icing run everywhere, while too little will make it hard to spread evenly, leading to bumps and an uneven finish.
The beauty of royal icing is that you can easily adjust its consistency. If it’s too thick, add water a tiny bit at a time (half a teaspoon is a good starting point), mixing well after each addition. If it becomes too thin, simply add more powdered sugar, again, in small increments until you reach the desired texture. Patience and gradual adjustments are your best friends here.
Creative Decorating Techniques with Royal Icing
Once you’ve mastered the consistency, the fun truly begins! Royal icing opens up a world of creative possibilities. Here are some fundamental decorating instructions and techniques you can easily try:
-
Outlining and Flooding:
- Using outlining consistency, pipe a border around the edge of your cookie. This creates a dam to hold in the thinner flood icing.
- Immediately (or shortly after) switch to flooding consistency icing and fill in the middle area within your piped border.
- Use a clean toothpick or a scribe tool to gently spread the flood icing to the edges and pop any air bubbles that may appear. This ensures a smooth, even surface.
- Allow this flooded area to dry completely at room temperature for at least four hours, or ideally overnight, before adding any additional piping details on top. This prevents colors from bleeding and designs from smudging.
-
Wet-on-Wet Techniques (applied before the flooded area dries):
- Polka Dots: While the base flood layer is still wet, add small dots of a different colored icing onto the wet surface. The dots will sink slightly, creating a smooth, integrated design.
- Hearts: Similar to polka dots, add dots of colored icing onto the wet flood. Then, immediately drag a toothpick through the center of each dot, pulling the icing into a heart shape.
- Zigzag Design/Marbling: After flooding your cookie, pipe stripes or dots of different colored icing across the wet surface. While still wet, drag a toothpick perpendicular to your stripes (or swirl for marbling) to create intricate patterns.
-
Adding Sprinkles or Edible Decorations:
- If you want sprinkles to adhere permanently, add them immediately after flooding, while the icing is still wet. This ensures they sink slightly and stick securely as the icing dries.
- For larger candies or edible embellishments, use a tiny dot of royal icing as “glue” to attach them to a fully dry cookie.
-
Piping Details (applied after the base flood layer is completely dry):
- Once your base layer is hard to the touch (at least 4 hours, preferably overnight), you can pipe intricate designs, lines, or lettering on top using outlining consistency icing. The dry base allows these details to sit on top of the cookie, creating a beautiful dimensional effect.
-
Using Edible Markers:
- If you plan to draw or add fine details with edible markers, ensure the royal icing has hardened completely for at least four hours (or overnight) to prevent the marker from smudging or tearing the icing surface.

My family has cherished cookies decorated with this royal icing recipe for years, and I am absolutely delighted to finally share this treasured secret with all of you! Decorating cookies with royal icing is an incredibly fun and creative activity for everyone – from little kids exploring colors to older kids honing their skills, and adults embracing their inner artist. It’s a wonderful way to express creativity and bring joy to any occasion.


Easy Sugar Cookie Royal Icing Recipe
By Ashley
Unlock the secret to stunning, professional-looking decorated sugar cookies right in your home kitchen. This easy-to-follow royal icing recipe, coupled with essential instructions, expert tips, and helpful tricks, will empower you to create beautifully decorated cut-out cookies for any celebration or holiday with confidence and flair!
Pin Recipe
30 minutes
15 minutes
45 minutes
10
Ingredients
For the Sugar Cookies:
-
1/4 cup all-purpose flour
(for dusting and rolling) -
1 package refrigerated sugar cookie dough
(such as Pillsbury, or use your favorite homemade cut-out sugar cookie recipe)
For the Royal Icing:
-
4 cups powdered sugar
(confectioners’ sugar, sifted to remove lumps) -
3 TBSP meringue powder
(essential for structure and quick drying) -
8-12 TBSP room temperature water
(start with less and add gradually for desired consistency) -
Gel food coloring
(for vibrant, rich colors without thinning the icing too much)
Instructions
Preparing the Sugar Cookies:
-
Lightly flour your work surface and rolling pin with the 1/4 cup all-purpose flour. Combine the refrigerated cookie dough with the flour on your work surface, kneading briefly to fully incorporate the flour. This helps prevent the cookies from spreading too much during baking, ensuring your cut-out shapes hold their form perfectly. Roll the dough evenly to approximately ¼” thickness.
-
Using your favorite cookie cutters, cut out desired shapes. Carefully transfer the cut-out cookies to a baking sheet lined with parchment paper or a silicone mat. Bake in a preheated oven at 350°F (175°C) for 8-12 minutes, or until the edges begin to turn a light golden brown. Baking time may vary depending on your oven and cookie thickness. Allow cookies to cool completely on the baking sheet for a few minutes before transferring them to a wire rack to finish cooling. Ensure cookies are completely cool before icing.
Making the Royal Icing:
-
In the bowl of a stand mixer fitted with the whisk attachment (a hand mixer works just as well), combine the sifted powdered sugar and meringue powder. Begin adding the room temperature water, starting with 8 tablespoons. With the mixer on low speed, beat for 1 minute until the ingredients are just combined and appear slightly pasty.
-
Gradually continue to add water, one tablespoon at a time, beating after each addition, until the icing reaches a good consistency for outlining. For outlining, you want a consistency similar to thick toothpaste or honey that holds its shape. When you lift the whisk, a peak should form and slowly melt back into itself after about 15-20 seconds. This is often referred to as a “medium-stiff” consistency.
-
Once your basic outlining consistency is achieved, you can adjust it further. If the icing is too hard or stiff, add a tiny amount of water (1/2 teaspoon at a time) and mix well. If it becomes too runny for outlining, add more powdered sugar (1-2 tablespoons at a time) until it thickens back up. For flooding consistency, you will simply add a bit more water to a portion of your outlining icing until it reaches the desired flow (10-15 second rule).
-
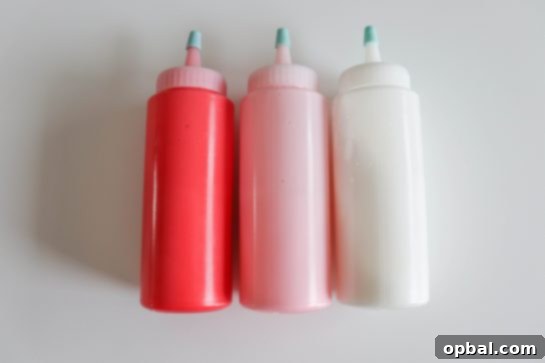
Separate the prepared icing into small mixing bowls, one for each color you wish to use. Add gel food coloring, a tiny drop at a time, mixing thoroughly after each addition until you reach your desired vibrant color. Avoid using liquid food coloring as it can thin the icing too much. Scoop the colored icing into piping bags fitted with small round tips or into plastic icing bottles for easy application. Keep any unused icing covered tightly with plastic wrap directly touching the surface to prevent it from drying out.
Notes & Expert Tips
1. Outlining and Flooding: Use outlining consistency to draw a border on the cookie, then immediately fill the center with thinner flood consistency icing. Use a toothpick or scribe to spread the icing to the edges and pop any air bubbles for a smooth finish.
2. Drying Time is Crucial: Allow each flooded area to dry completely at room temperature for AT LEAST four hours, or preferably overnight, before adding additional layers or piping details. This prevents colors from bleeding and ensures a durable, stackable cookie.
3. Wet-on-Wet Designs: For designs like Polka Dots, Hearts, or Zigzags, add dots or stripes of different colored icing onto a freshly flooded (still wet) base. Then, use a toothpick to swirl or drag through the wet icing to create your desired pattern. These designs will dry flush with the base layer.
4. Sprinkles & Candies: Apply sprinkles onto wet flood icing immediately after flooding for best adhesion. For larger candies or edible embellishments, “glue” them to a completely dry cookie with a tiny drop of fresh royal icing.
5. Edible Markers: If you plan to draw fine details with edible markers, always wait until the royal icing is completely hardened (minimum four hours) to prevent tearing or smudging.
6. Troubleshooting Consistency:
- Too thick: Add 1/2 teaspoon of water at a time, mixing well.
- Too thin: Add 1-2 tablespoons of sifted powdered sugar at a time, mixing well.
7. Storing Icing: Always keep royal icing covered tightly with plastic wrap directly touching its surface when not in use to prevent it from drying out and forming a crust. Store unused colored icing in airtight containers in the refrigerator for up to 2 weeks. Re-whip briefly before use.
Tried this recipe?Let us know how it was!