
Unlock Perfect Baking: The Ultimate Guide to Accurately Measuring Flour
Have you ever followed a baking recipe to the letter, only for your cookies to turn out tough, your cakes dry, or your pie crusts disappointingly crumbly? If so, you’re not alone. Many home bakers, even experienced ones, often overlook one of the most critical steps in achieving consistently flawless results: accurately measuring flour. This seemingly simple task can be the silent saboteur of countless delicious creations. But fear not, because today we’re unraveling the mystery of precise flour measurement, sharing a game-changing kitchen tip that will elevate your baking life forever!
Why Accurate Flour Measurement is the Secret to Baking Success
Baking is often described as a science, and for good reason. Unlike cooking, where a pinch of this or a dash of that often works out, baking relies on precise ratios and chemical reactions. Flour, being a primary structural component in most baked goods, plays a pivotal role in determining texture, moisture, and overall success. An incorrect amount of flour can throw off the entire delicate balance of a recipe.
The Detrimental Effects of Too Much Flour
- Dry and Dense Baked Goods: Excess flour absorbs too much moisture, leading to a dry, crumbly texture that lacks tenderness. Think of a hockey puck instead of a fluffy muffin.
- Tough and Chewy Products: Flour contains gluten, and too much flour can lead to over-development of gluten, resulting in a tough, unappetizing chewiness, especially in delicate items like cakes and pastries.
- Reduced Spread: In cookies, too much flour can prevent them from spreading properly, leaving you with thick, cake-like discs rather than perfectly flat, chewy treats.
- Altered Flavor: An imbalance in ingredients can mask other flavors, making your baked goods taste predominantly of flour.
The Pitfalls of Too Little Flour
While the focus is often on too much flour, using too little can also lead to issues:
- Weak Structure: Insufficient flour can result in baked goods that collapse, spread excessively, or have a weak, unstable structure.
- Greasy or Oily Texture: Without enough flour to absorb fats, your final product might feel greasy or heavy.
- Overly Soft or Cakey: Recipes like cookies might become overly soft or even cakey instead of having their intended chewiness.
Understanding these consequences underscores why mastering flour measurement is not just a suggestion, but a fundamental skill for any aspiring baker.
The Common Mistake: Dipping and Packing
For years, like many others, I struggled with recipes that yielded fantastic results for friends but fell flat for me. The culprit? More often than not, it was my flour measurement technique. The most common and damaging mistake many home bakers make is scooping flour directly from the bag or container with their measuring cup. While this seems convenient, it invariably packs the flour tightly into the cup, leading to a significantly higher quantity than the recipe intends.
Let’s illustrate with a common scenario: if a recipe calls for 3 cups of all-purpose flour, and you measure it by dipping your measuring cup directly into the flour container, you could easily end up with approximately 18 ounces (or even more) of flour. However, 3 cups of accurately measured all-purpose flour should weigh closer to 12.75 ounces. That’s a staggering difference of over 5 ounces – nearly an extra 3/4 cup of flour in your recipe! This drastic surplus is more than enough to transform a potentially perfect batch of cookies into dry, dense disappointments, or a moist cake into a crumbly brick.
The Gold Standard: Weighing Flour with a Kitchen Scale
For ultimate precision and consistent results, especially when tackling more complex recipes or international bakes, a kitchen scale is your best friend. Weighing ingredients, particularly dry ones like flour, is the most accurate and reliable method available. A gram is always a gram, regardless of how tightly packed it is, eliminating any guesswork or compaction issues.
Kitchen scales offer numerous benefits:
- Unmatched Accuracy: Provides the exact amount needed every time, removing human error from packing or leveling.
- Consistency: Guarantees that your recipe will turn out the same way, batch after batch.
- Ease of Use: Simply place your bowl on the scale, tare it to zero, and spoon in your flour until you reach the desired weight. It’s often quicker and less messy than volumetric measuring.
- International Recipe Compatibility: Many global recipes use weight measurements, making a scale invaluable for exploring diverse cuisines.
If you’re ready to embrace the precision of a kitchen scale, here are some approximate weight measurements for common types of flour, which can vary slightly by brand and humidity:
- All-purpose flour: 1 cup weighs approximately 4 and 1/4 ounces (or about 120 grams)
- Cake flour: 1 cup weighs approximately 4 ounces (or about 113 grams)
- Bread flour: 1 cup weighs approximately 4 and 1/4 ounces (or about 120 grams)
- Whole wheat flour: 1 cup weighs approximately 4 and 1/4 ounces (or about 120 grams)
- Pastry flour: 1 cup weighs approximately 3 and 3/4 ounces (or about 106 grams)
Investing in a good digital kitchen scale is a relatively small expense that yields immense dividends in your baking journey.
The Practical Solution: The “Spoon and Level” Method
While a kitchen scale offers unparalleled accuracy, you don’t always need one to achieve excellent results. The “spoon and level” method is a time-tested technique that provides near-scale accuracy using standard measuring cups. This is my go-to method for everyday baking, and it’s a fundamental skill every baker should master.
Follow these simple yet crucial steps for perfectly measured flour every time:
Step 1: Fluff and Aerate Your Flour
Flour, especially when stored for a while, settles and compacts in its container or bag. This compaction can lead to more flour being packed into your measuring cup. Before you even think about measuring, take a whisk or a spoon and gently fluff up the flour within its container. Stir it around to aerate it and break up any clumps. This loosens the flour, ensuring a consistent density before you begin to scoop.
Step 2: Spoon Flour into the Measuring Cup
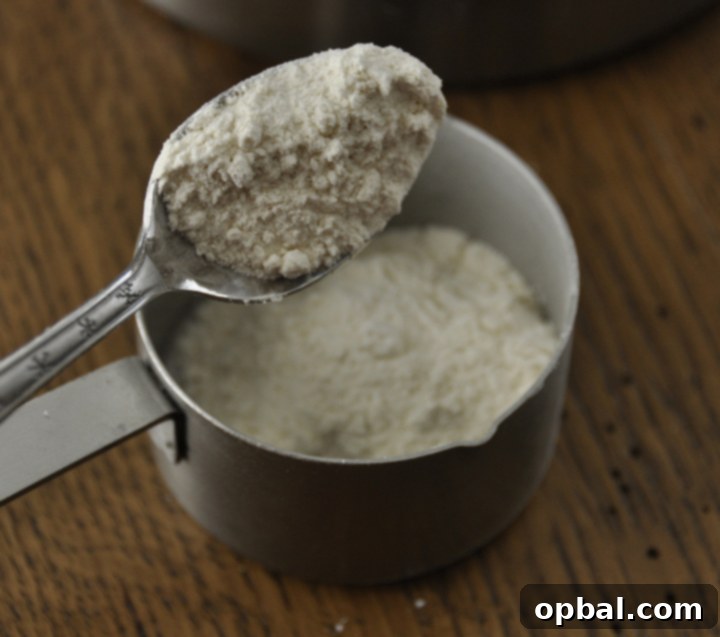
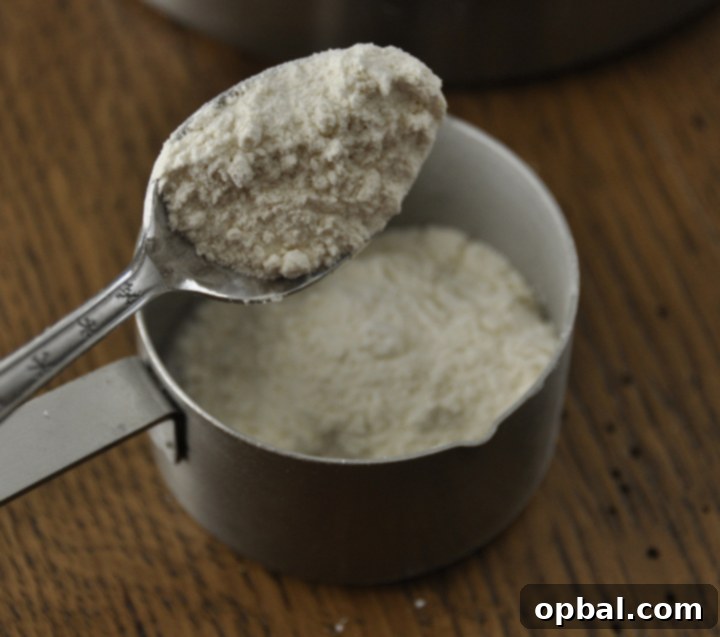
Instead of using the measuring cup itself as a scoop, grab a separate spoon (a tablespoon works well) and gently spoon the fluffed flour into your measuring cup. Pile the flour lightly into the cup until it slightly overflows. The key here is gentle handling. Do NOT shake the measuring cup, tap it against the counter, or press the flour down in any way. Any form of compaction will defeat the purpose of fluffing and lead to an excess of flour.
Step 3: Level Off the Excess
Once your measuring cup is gently overfilled, take the straight edge of a knife, a bench scraper, or even the straight side of a ruler. Hold the utensil horizontally across the top of the measuring cup and, with a single sweep, level off the excess flour. Allow the excess to fall back into your flour container. This ensures that you have a perfectly level and accurate measure of flour, consistent with how recipes are typically developed.
Repeat these three steps for each cup of flour required in your recipe. This method takes a few extra moments compared to simply dipping and scooping, but the difference it makes in the quality of your baked goods is immeasurable. Your cakes will be lighter, your cookies chewier, and your breads more tender.
Beyond Flour: General Measurement Tips for Baking Success
While flour is often the trickiest ingredient to measure, applying similar principles of accuracy to other ingredients will further enhance your baking:
- Liquids: Always measure liquids at eye level in clear measuring cups to ensure accuracy. Don’t lift the cup to eye level; bend down to meet the liquid line.
- Granulated Sugars: Spoon granulated sugar into the measuring cup and level it off with a straight edge, similar to flour.
- Brown Sugar: Brown sugar needs to be firmly packed into the measuring cup until it retains its shape when inverted.
- Fats (Butter, Shortening): When a recipe calls for cold butter, it’s often measured by volume on the wrapper or by cutting precisely from a stick. For softened butter or shortening by volume, press it firmly into the cup to remove air pockets and level. Weighing is always preferred for fats when a scale is available.
- Leavening Agents (Baking Soda, Baking Powder): These are potent, so measure precisely. Spoon into the measuring spoon and level with a straight edge. Too much or too little can dramatically alter rise and flavor.
Troubleshooting Common Baking Woes with Accurate Measurement
Many common baking frustrations can be traced back to inaccurate ingredient measurements. If you’ve ever experienced:
- Cakes that sink in the middle.
- Cookies that are rock hard or too crumbly.
- Breads that are dense and do not rise.
- Pastries that lack flakiness.
The first step in troubleshooting should always be to re-evaluate your measuring techniques. Even small inconsistencies can snowball into significant problems in the oven.
Conclusion: Elevate Your Baking, One Perfect Measure at a Time
Mastering the art of accurately measuring flour, whether through the precision of a kitchen scale or the reliable “spoon and level” method, is a fundamental skill that will transform your baking. It’s a small change in technique that yields monumental improvements in taste, texture, and consistency. This simple tip, once learned, becomes an indispensable part of your baking repertoire. Perhaps you knew this already, but it’s a piece of wisdom I wish I had discovered much earlier in my culinary journey. Share this knowledge, embrace precision, and get ready to enjoy truly happy baking and perfectly measured flour!