
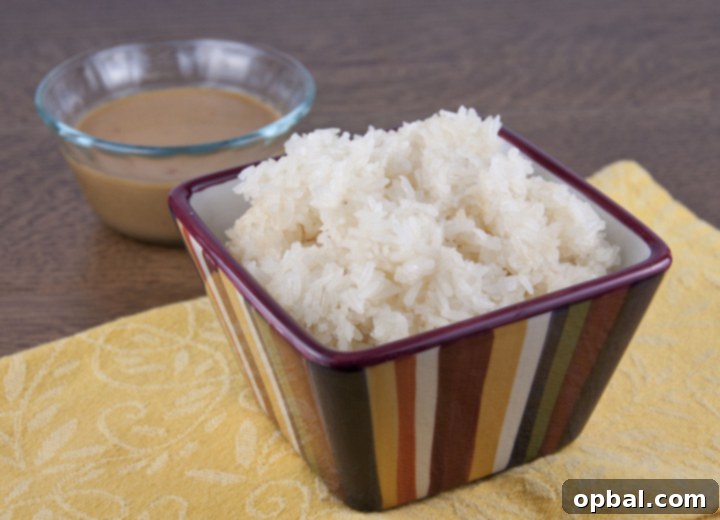
Authentic Thai Sticky Rice: Your Ultimate Guide to Perfect Khao Niao
Welcome to the delicious world of Thai sticky rice, a staple that truly elevates any Thai meal. Known as “Khao Niao” in Thailand, this unique grain offers a delightful chewy texture and a subtle sweetness that makes it an absolute favorite for many. If you’ve ever savored it at an authentic Thai restaurant and wondered how to replicate that perfect stickiness at home, you’re in the right place. This comprehensive guide will walk you through the traditional method of preparing sticky rice using a steaming basket, ensuring consistently perfect results every single time.
For years, I dreamt of mastering authentic Thai sticky rice in my own kitchen. The journey began a few Christmases ago when Mr. Wishes surprised me with the most incredible gift: a traditional Thai sticky rice steaming basket kit. Truth be told, it took me an embarrassingly long year to finally unbox and use it. It wasn’t for lack of enthusiasm—I absolutely adored the gift—but rather a classic case of “out of sight, out of mind” in our cramped apartment. The steamer was tucked away, waiting for its moment to shine.
Unveiling the Secret: The Traditional Steamer Kit
My long-awaited Christmas present was more than just a steamer; it was a complete Thai sticky rice kit. This treasure included a high-quality aluminum steaming pot imported directly from Thailand, a specialized bamboo steaming basket (often called a ‘huad’), genuine food-grade cheesecloth, and a generous five-pound bag of the correct sticky rice. For anyone serious about making authentic sticky rice, this type of kit is truly indispensable. It’s the traditional setup used throughout Thailand, especially in the northern and northeastern regions where sticky rice is a daily bread.
It’s crucial to understand that Thai sticky rice, also affectionately known as “sweet rice” or “glutinous rice,” is distinctly different from regular long-grain or jasmine rice. Despite the name, it contains no dietary gluten; “glutinous” refers to its sticky, glue-like consistency when cooked due to its high amylopectin starch content. This unique characteristic is what allows the cooked rice to be easily pinched off in clumps that hold together firmly, a signature of truly authentic sticky rice. It’s this specific type of rice that unlocks the desired texture and flavor, making substitutions simply out of the question for genuine results.
The term “sticky” perfectly describes the cooked rice, which can be effortlessly picked up in small, coherent clusters. And technically, this is precisely how it’s meant to be eaten—with your fingers! While I sometimes feel a bit self-conscious enjoying it this way in a restaurant, I simply don’t care enough to stop. There’s something wonderfully satisfying and authentic about eating sticky rice with your hands, allowing you to fully appreciate its unique texture and connection to traditional Thai dining.
A Love Affair with Thai Cuisine: From Restaurant Discoveries to Home Mastery
My passion for Thai food runs deep. Back when we lived in our apartment, we had the absolute best Thai restaurant, Phuket Thai, conveniently located right across the street. We were practically regulars—I won’t even disclose how often we visited, it’s honestly a bit embarrassing! It was at Phuket Thai that I first fell head over heels for sticky rice. The moment I tasted it, I knew I had to learn how to make it at home.
Before receiving my kit, I tried countless times to make sticky rice using conventional methods—rice cookers, pots on the stove—but nothing ever quite matched the restaurant quality. The texture was consistently off; it was either too mushy, too dry, or simply not sticky enough. There’s a certain alchemy to perfectly steamed sticky rice that seemed to elude me, leaving me frustrated but determined.
That special kit changed everything. It provided the proper tools, enabling me to replicate the perfect Thai sticky rice anytime I desired, right here in my own kitchen. This newfound capability is especially valuable now that we’ve moved to a new house, which is over a half-hour drive from our beloved go-to Thai restaurant. The ability to create restaurant-quality sticky rice at home has truly transformed my Thai cooking experience, making it more convenient and infinitely more satisfying.
Mastering the Soaking Process: The Foundation of Flawless Sticky Rice
The secret to truly tender and perfectly sticky rice lies primarily in the soaking process. While it requires patience, the effort is undeniably worth it. I typically plan to make sticky rice on a day when I know I’ll be home, as the rice needs to soak for a significant period—a minimum of 4-6 hours, and ideally 6-8 hours. This prolonged soak allows the glutinous rice grains to fully hydrate, ensuring they cook evenly and achieve that signature chewy, yet tender, texture without becoming mushy. It’s a vital step that cannot be rushed or skipped. If you’re pressed for time during the day, soaking the rice overnight in a bowl on the counter is an excellent alternative, offering flexibility and convenience.
Steaming to Perfection: A Step-by-Step Guide for Authentic Khao Niao
After the crucial soaking period, the actual cooking process is surprisingly simple. You just transfer the soaked and drained rice into the bamboo basket, lined with cheesecloth, and let the steam do its magic. This traditional steaming method is paramount for sticky rice. Unlike boiling, which can wash away starch and lead to clumpy, mushy rice, steaming gently cooks the grains, preserving their integrity and activating their sticky properties. The bamboo basket also allows for ideal steam circulation, cooking each grain evenly and preventing condensation from making the rice soggy. This gentle, indirect heat is what yields the characteristic fluffy yet cohesive texture of authentic Khao Niao.
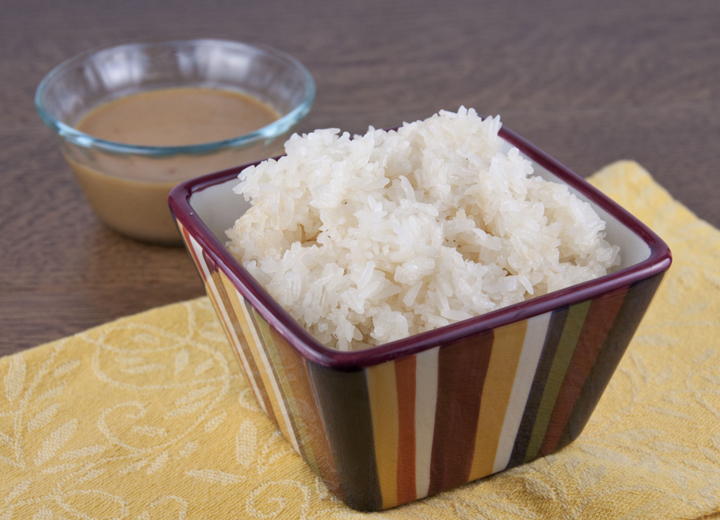
Once steamed, the rice should be removed from the cheesecloth promptly and transferred to a serving dish. This prevents it from compacting too much or continuing to cook from residual heat. Fluff it gently with a spoon or your hands (once cool enough to handle) to ensure even cooling and to prevent the grains from sticking excessively to each other. The result is a glistening, aromatic batch of sticky rice, ready to complement any Thai dish.
Serving Suggestions and Perfect Pairings
This authentic Thai sticky rice is incredibly versatile and makes a fantastic side dish for virtually any Thai meal. It pairs exceptionally well with robust and flavorful dishes like my favorite Pad Thai, spicy curries, or even these delicious Peanut Chicken Tacos. For an added burst of flavor, I highly recommend dipping your sticky rice in some rich peanut sauce—it’s an irresistible combination! Beyond savory dishes, sticky rice is also the star of many Thai desserts, most famously Mango Sticky Rice (Khao Niao Mamuang), where it’s served with fresh mango slices and a sweet coconut milk sauce. For a lighter meal, this Thai sticky rice would also be an excellent companion to this vibrant Thai Cashew Chicken Salad from my friend Tanya. Enjoy exploring the many delightful ways to savor this incredible grain!
Authentic Thai Sticky Rice (Khao Niao) Recipe
Recipe Type: Side Dish
Cuisine: Thai
Author: Ashley
Prep time: 6-8 hours (soaking)
Cook time: 45 minutes
Total time: ~7-9 hours (including soaking)
Serves: 6
Discover the authentic method for cooking traditional Thai Sticky Rice, known as Khao Niao, just like it’s prepared in Thailand. This recipe guarantees a perfect texture every time, ideal for pairing with your favorite Thai dishes or enjoying on its own.
Ingredients
- 1.5 cups Thai Sweet Glutinous Rice (also known as “sticky rice” or “glutinous rice”; using this specific type is absolutely essential for the recipe’s success)
- Cool water (for rinsing and soaking)
- 6-8 cups water (for steaming)
- Large piece of cheesecloth (food-grade, unbleached is recommended, approximately 18×18 inches)
- Traditional Thai sticky rice steamer (comprising an aluminum pot and a bamboo steaming basket), or a large pot with a standard steamer insert.
Instructions
- Rinse the Rice: Place the Thai glutinous rice in a large bowl. Rinse it thoroughly under cool running water about 2-3 times. Gently agitate the rice with your hands during rinsing until the water runs mostly clear. This step is vital as it removes excess surface starch, which helps achieve the perfect sticky but non-gummy texture.
- Soak the Rice: After rinsing, completely cover the rice with cool water. Ensure the water level is approximately 2-3 inches above the rice. Let the rice stand and soak for a minimum of 6 hours, or ideally 8 hours. For maximum convenience, you can easily soak it overnight. Adequate soaking is crucial for the rice to properly absorb moisture, which ensures even cooking and the characteristic stickiness.
- Prepare the Steamer: Just before you’re ready to cook, set up your traditional Thai sticky rice steamer. Fill the aluminum steaming pot (the bottom part) with 6-8 cups of water. If using a large pot with a steamer basket, ensure the water level is well below the bottom of your steamer basket, preventing the rice from touching the boiling water.
- Drain and Load the Rice: Once the soaking period is complete, carefully drain the rice completely. There should be no standing water. Line your bamboo steaming basket with the large piece of cheesecloth, allowing the edges to hang over the sides. Transfer the drained rice onto the center of the cheesecloth. Gather the corners of the cheesecloth over the rice, creating a loose bundle. This allows steam to circulate freely around the rice.
- Steam the Rice: Place the bamboo steamer, containing the rice bundle, securely inside the steaming pot. Double-check that the bottom of the bamboo steamer does not make contact with the water below. Place a standard 8-inch lid loosely over the top of the bamboo steamer. Turn the heat to medium-high and bring the water in the pot to a rolling boil. Steam the rice for a full 45 minutes.
- Check for Doneness: After 45 minutes, carefully lift the lid and check the rice for tenderness. It should be soft and chewy but not mushy, with that quintessential sticky texture. If it still feels a bit firm in the center, replace the lid and steam for an additional 5-10 minutes.
- Serve Immediately: As soon as the rice is cooked to perfection, immediately remove the bamboo steamer from the heat. Carefully unwrap the rice from the cheesecloth and transfer it to a clean serving bowl or dish. Prompt removal prevents it from becoming overly dense or drying out. Serve hot alongside your favorite Thai main courses.
Hint: For the best texture and to prevent the rice from sticking to the cheesecloth, always remove the cooked sticky rice promptly after steaming and transfer it to a serving dish.