
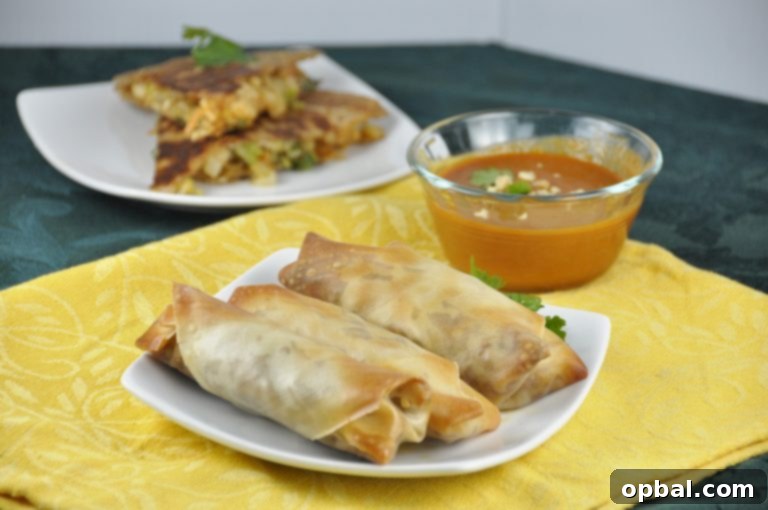
Crispy Baked Pork Spring Rolls with a Zesty Thai Twist: Your Go-To Healthy Appetizer
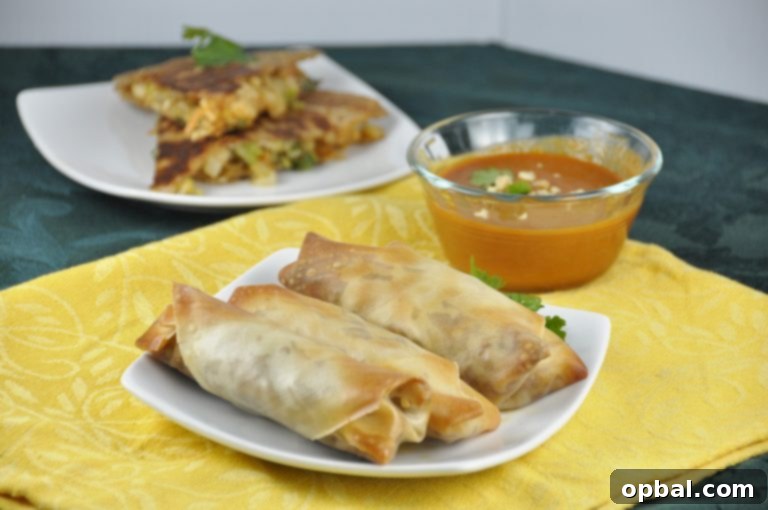
Tired of the mess and guilt that often come with deep-fried appetizers? We completely understand! The allure of crispy spring rolls is undeniable, but the splattering oil, the heavy cleanup, and the added calories can be a real deterrent for home cooks. That’s precisely why we’re thrilled to share a game-changing recipe for Crispy Baked Pork Spring Rolls. These aren’t just any spring rolls; they boast a vibrant Thai twist and are baked to golden perfection right in your oven, eliminating all the frying fuss. Prepare to be amazed by their incredible flavor and satisfying crunch, making them an ideal choice for a healthier dinner option or an unforgettable party appetizer. You absolutely won’t miss the fried version!
Why Choose Baked Over Fried? The Healthier, Easier Way to Crispy Perfection
For many, the thought of homemade spring rolls is synonymous with deep frying. While traditional frying certainly delivers crispiness, it often comes at the cost of added fat, extra calories, and a considerable amount of kitchen cleanup. Our baked spring roll recipe offers a brilliant alternative, ensuring you achieve that coveted golden-brown, irresistibly crispy exterior without a drop of excess oil or the dreaded oil splatter. By opting for the oven, you significantly cut down on unhealthy fats, transforming a typically indulgent snack into a lighter, more wholesome option that you can enjoy guilt-free.
Beyond the health benefits, the convenience of baking cannot be overstated. Imagine preparing a batch of delicious spring rolls without worrying about hot oil, messy splatters, or the need for constant monitoring. Simply assemble, brush with a touch of olive oil, and let your oven do the work. This method not only simplifies the cooking process but also makes cleanup a breeze, giving you more time to savor your culinary creations and less time scrubbing pots and pans. It’s a win-win for busy weeknights and entertaining alike!
The Irresistible Thai Twist: A Symphony of Flavors
What truly elevates these Crispy Baked Pork Spring Rolls is their exquisite Thai-inspired filling. We’ve meticulously crafted a blend of aromatic ingredients that dance on your palate, providing a refreshing departure from standard spring roll recipes. Freshly minced garlic and ginger lay the foundational notes, infusing the pork with a warm, pungent depth. Finely shredded green cabbage and carrots add a delightful crunch and subtle sweetness, while thinly sliced green onions contribute a mild, zesty bite. The secret weapon here is store-bought Hoisin sauce, which brings a rich, umami-laden sweetness and a touch of savory complexity that perfectly complements the other ingredients.
But the Thai journey doesn’t end with the filling. We’ve included a recipe for a sensational Chili Dipping Sauce that transforms these spring rolls into an unforgettable experience. This homemade sauce is a masterful balance of sweet chili sauce, tangy rice vinegar, creamy coconut milk, and a hint of brown sugar for sweetness. Freshly pressed garlic, grated ginger, a squeeze of lime juice, and a touch of soy sauce round out the profile, with creamy peanut butter adding a luxurious texture and nutty depth. It’s moderately spicy, offering just enough kick to awaken your taste buds without overpowering the delicate flavors of the spring rolls. If you prefer a milder dip, a classic sweet and sour sauce or simple soy sauce would also be fantastic.
Perfect for Any Gathering: From Game Day to Elegant Appetizers
These Crispy Baked Pork Spring Rolls are incredibly versatile, making them a fantastic choice for virtually any occasion. Whether you’re hosting a lively game day party – even if you, like me, are more interested in the snacks than the game itself – or looking for an elegant appetizer to kick off a dinner party, they fit the bill perfectly. Their finger-food format makes them easy to serve and enjoy while mingling, and their vibrant flavors are sure to impress even the most discerning guests. You might find yourself making entire meals out of them, as they are truly that satisfying!
One of the best features of this recipe is its make-ahead potential. You can prepare the filling and even roll the spring rolls in advance, storing them in the refrigerator until you’re ready to bake. This flexibility is a huge advantage when planning for events, allowing you to focus on other preparations without the last-minute stress. Simply pop them in the oven when your guests arrive, and serve them hot and fresh with your chosen dipping sauce. They retain their moist interior and crispy exterior beautifully, proving that convenience doesn’t have to compromise quality or taste.
Tips for Achieving the Ultimate Crispy Baked Spring Rolls
While baking is inherently simpler than frying, a few key tips can help you achieve maximum crispiness and ensure your spring rolls are a resounding success:
- **Don’t Overfill:** Resist the urge to pack too much filling into each wrapper. Overfilled rolls are harder to seal and more prone to bursting during baking. Aim for 3-4 tablespoons per wrapper.
- **Roll Tightly:** A tight roll is crucial for both structure and crispiness. Ensure there are no air pockets and the edges are securely sealed with a dab of water. This prevents them from unwrapping and helps create an even, golden crust.
- **Brush with Oil:** A light brush of olive oil on the exterior of each spring roll before baking is essential. This helps promote that beautiful golden-brown color and contributes significantly to the desired crispy texture.
- **Parchment Paper or Silpat:** Always bake your spring rolls on a baking sheet lined with parchment paper or a silicone baking mat (Silpat). This prevents sticking and ensures even heat distribution for consistent crispiness.
- **Watch Your Oven:** Ovens can vary widely in temperature. Keep an eye on your spring rolls, especially during the last few minutes of baking. If they’re browning too quickly, you might need to adjust the temperature slightly. For extra crispiness, flip them halfway through baking.
- **Serve Immediately:** For the best texture, serve these crispy delights straight from the oven. While they are still delicious cooled, that initial warmth and crunch are truly unparalleled.
Explore More Flavorful Creations: Pairings and Related Recipes
These Crispy Baked Pork Spring Rolls are fantastic on their own, but they also pair wonderfully with other Thai-inspired dishes to create a memorable meal. We highly recommend trying them alongside our Thai Chicken Quesadillas – a fusion dish that brings together vibrant Thai flavors with the comforting appeal of a quesadilla. The combination of these two dishes offers a delightful textural and flavor contrast that you and your guests will absolutely love.
And if you’re a fan of our baked spring roll concept, you absolutely must try another one of our most popular recipes: Philly Cheesesteak Baked Egg Rolls. This creative twist on a classic comfort food takes the familiar flavors of a cheesesteak and encases them in a crispy, oven-baked egg roll wrapper. It’s another testament to how baking can elevate your favorite appetizers without compromising on taste or satisfaction. Be sure to check them out!
- 1 Tablespoon minced garlic
- 2 teaspoons minced fresh ginger or 1 teaspoon dry ground ginger
- 1 teaspoon sesame oil
- 1 Tablespoon olive oil, plus more for brushing on rolls
- 1 pound ground pork
- 1 cup finely shredded green cabbage
- 1/4 cup finely shredded carrot
- 2 green onions, thinly sliced
- 2 Tablespoons store-bought Hoisin sauce
- 12 square (7-inch) spring roll wrappers
- Sweet and sour sauce, for dipping (or make sauce recipe below)
- Chili Dipping Sauce:
- 1/2 cup sweet chili sauce
- 1/4 cup rice vinegar
- 1/4 cup canned coconut milk
- 3 tablespoons brown sugar
- 3 garlic cloves, pressed or finely minced
- 1 tablespoon creamy peanut butter
- 1 teaspoon-sized knob of ginger, grated
- 1 lime, juiced
- 1/2 tablespoon soy sauce
- Preheat the oven to 425ºF (220°C).
- In a large sauté pan, heat the sesame oil and 1 tablespoon of olive oil over medium-low heat. Add the minced garlic and ginger, and sauté for 1-2 minutes until fragrant, being careful not to burn the garlic.
- Add the ground pork to the pan. Break it apart with a spoon and cook until it is fully browned and no pink remains.
- Remove the pan from the heat and carefully drain any excess liquid or fat. Stir in the finely shredded green cabbage, thinly sliced green onions, shredded carrots, and Hoisin sauce until all ingredients are thoroughly combined. Transfer the mixture to a large bowl and let it cool for at least 10 minutes. This cooling step prevents the wrappers from becoming soggy.
- Prepare your work surface. Lay out a spring roll wrapper with one corner pointing towards you, forming a diamond shape. Place 3 to 4 tablespoons of the cooled pork mixture just below the center of the wrapper. Fold the bottom corner up over the filling. Then, fold in the left and right corners towards the center. Finally, roll the wrapper tightly away from you until you reach the top corner. Before the final fold, moisten the top edge of the wrapper with water (using your finger) to seal the spring roll securely shut. Roll them as tightly as possible to prevent them from bursting open during baking. Repeat with the remaining wrappers and filling.
- Arrange the prepared spring rolls in a single layer on a baking sheet that has been lined with parchment paper or a Silpat nonstick baking mat. Ensure there is some space between each roll for even cooking. Lightly brush the tops and sides of each spring roll with additional olive oil.
- Bake in the preheated oven for 20 minutes, or until they are golden brown and wonderfully crispy. For optimal crispiness and even browning, consider carefully turning the spring rolls halfway through the baking time (after about 10 minutes). Keep a close eye on them, as oven temperatures can vary. If they don’t seem crispy enough after 20 minutes, you can leave them in for a few extra minutes, watching carefully to prevent burning.
- Remove the Crispy Baked Pork Spring Rolls from the oven and serve them immediately. Pair them with your dipping sauce of choice: classic sweet and sour sauce, traditional soy sauce, or the homemade Chili Dipping Sauce recipe provided below.
- In a small saucepan, combine the sweet chili sauce, rice vinegar, canned coconut milk, brown sugar, pressed or minced garlic, grated ginger, creamy peanut butter, soy sauce, and fresh lime juice. Whisk thoroughly with a fork until all ingredients are well combined and the peanut butter is fully incorporated.
- Place the saucepan over medium heat and bring the mixture to a gentle bubble, whisking occasionally. Let it boil for 1 minute, then reduce the heat to low and allow it to simmer for an additional 2-3 minutes. The sauce will thicken slightly as it simmers.
- Remove the sauce from the heat and set it aside to cool. The flavors will meld beautifully as it cools. Serve at room temperature alongside your baked spring rolls.
We hope you enjoy this healthier and incredibly delicious way to enjoy your favorite spring rolls. Happy cooking!