Festive Turkey Cake Pops: An Easy Thanksgiving Dessert Your Family Will Love
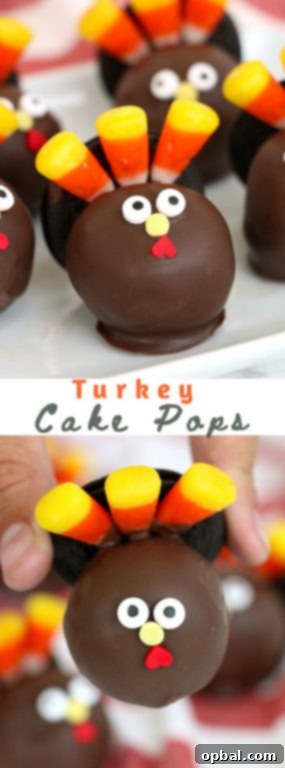
Prepare to delight your taste buds and charm your guests with these irresistibly adorable Turkey Cake Pops! Perfect for autumn gatherings and especially as a centerpiece for your Thanksgiving dessert spread, these treats are not only incredibly fun to create but also a joy to eat. Imagine the smiles when your family gathers to enjoy these whimsical turkey-themed confections. This recipe transforms simple chocolate cake into a bite-sized masterpiece, making holiday baking easy, engaging, and utterly delicious for everyone involved.
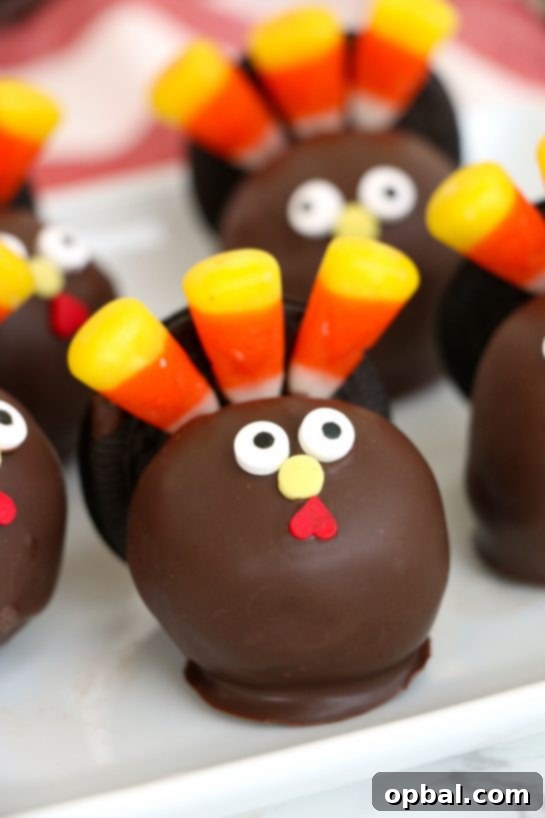
Thanksgiving is a time for sharing gratitude, creating cherished memories, and indulging in comforting flavors. While traditional pies hold a special place on our holiday tables, these Turkey Cake Pops offer a playful and modern twist, guaranteed to be a hit with both children and adults. Their individual portions make them a convenient and mess-free dessert, and the collaborative decorating process can become a treasured family tradition. Get ready to add a touch of charming festivity to your fall celebrations with these impossibly cute and incredibly tasty treats.
Unveiling the Magic of Cake Pops: A Delightful Dessert Explained
Perhaps you’re wondering, “What exactly is a cake pop?” It’s a fantastic question, and once you understand the concept, you’ll see why they’re such a brilliant dessert innovation. A cake pop begins its life as a regular baked cake – in this case, a rich chocolate cake. After cooling, the cake is crumbled into fine pieces, then meticulously mixed with a small amount of frosting. This combination creates a moist, dense, and pliable “cake dough” that can be easily rolled into small, uniform spheres.
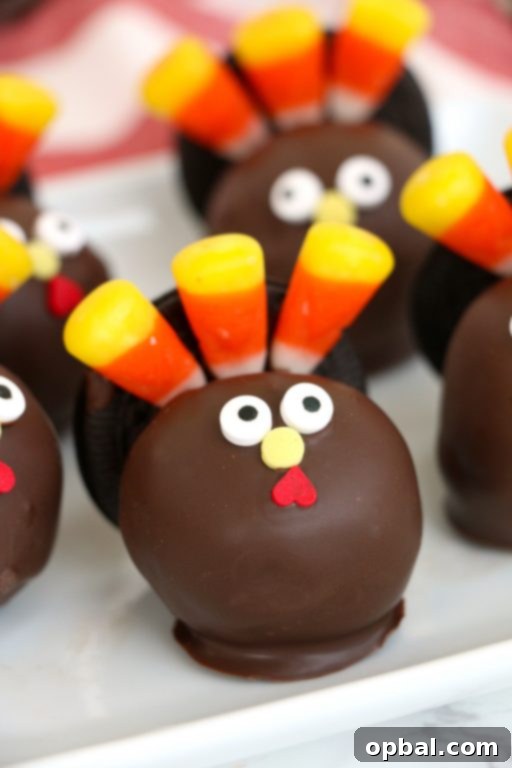
Once rolled, these cake balls are typically chilled to firm them up. Then, they are often placed on a stick (transforming them into the “pop” format) and dipped into a vibrant melted candy coating, usually chocolate or colored candy melts. The final and most exciting step involves decorating these coated balls with various candies, sprinkles, and edible embellishments, bringing them to life with creative themes. For our Turkey Cake Pops, this means adding iconic candy corn “feathers” and expressive candy “faces,” turning a simple chocolate treat into an adorable holiday character. Cake pops are beloved for their portion control, portability, and the sheer fun of customizing each one.
Essential Ingredients for Crafting Your Turkey Cake Pops
One of the best aspects of this Turkey Cake Pop recipe is the accessibility of its ingredients. You won’t need to search far and wide for obscure items; most can be found at your local supermarket or a crafting store. The beauty of these festive treats lies in their transformation from everyday staples into something truly special and seasonal. Here’s a comprehensive breakdown of everything you’ll need to create your own flock of delightful dessert turkeys:
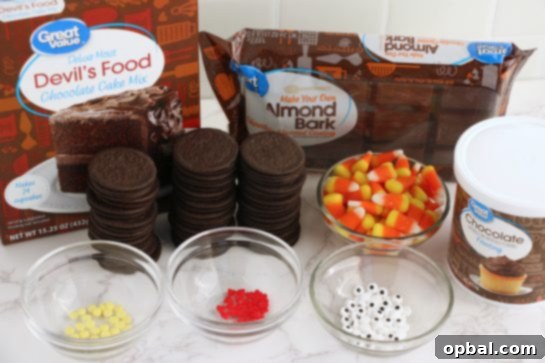
- Chocolate Cake Mix (and ingredients to prepare it): Starting with a boxed cake mix is a fantastic shortcut that guarantees a consistently moist base and saves valuable time, especially during busy holiday preparations. Feel free to opt for your favorite brand and follow the package instructions to bake it. If you’re feeling adventurous, a spiced pumpkin cake mix could also add a wonderfully seasonal flavor dimension to your cake pops.
- White Frosting: A mere three tablespoons of white frosting are all that’s required to bind your crumbled cake into a cohesive, rollable dough. Whether you choose a classic vanilla buttercream, cream cheese frosting, or even a simple store-bought variety, its primary role is to provide moisture and structure, not necessarily overt flavor.
- 16 oz Chocolate Bark or Melting Chocolate: This crucial component will form the smooth, shiny, and delicious outer shell of your cake pops. Chocolate bark, often referred to as candy melts, is engineered to melt evenly and set quickly, providing that characteristic crisp coating. You have the flexibility to choose between milk, dark, or even white chocolate, which can be easily tinted with food-safe coloring if you desire a different aesthetic for your turkeys.
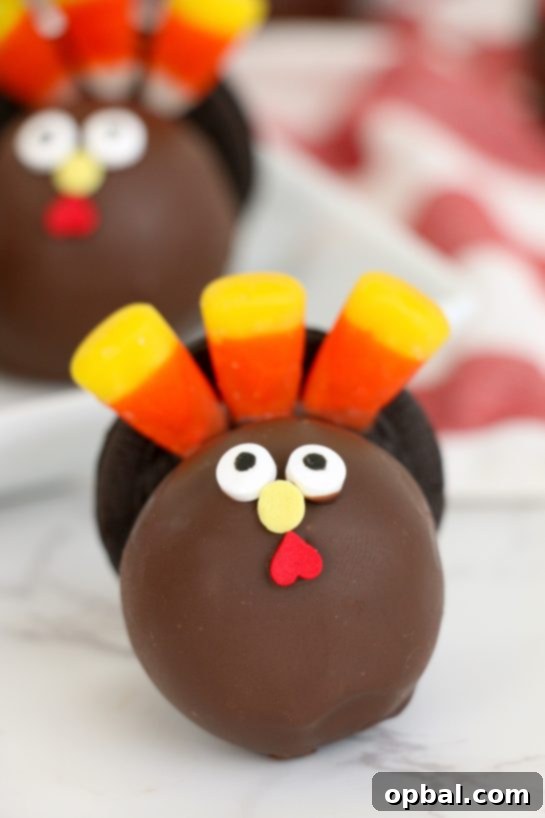
- 28 Thin Dark Chocolate Oreos: These delightful sandwich cookies serve a dual purpose: they add an extra layer of chocolatey flavor and texture, and their thin profile makes them the perfect “body” or “tail fan” base for your adorable turkey creations.
- 84 Candy Corn Candies: A quintessential symbol of autumn, candy corn will be transformed into the vibrant, fanned-out tail feathers of your turkeys. You’ll need three pieces per cake pop to achieve that classic feathered look.
- 56 Candy Eyeballs: These whimsical edibles are absolutely essential for giving your turkeys their expressive and endearing personalities. Available in various sizes, choose ones that are proportionate to your cake balls for the most charming effect.
- 28 Yellow Candy Balls (for noses): Small, round yellow candies – like mini M&M’s, yellow gumballs, or even small lemon drops – will serve as the perfectly proportioned beak (nose) for each turkey, adding a pop of color to their faces.
- 28 Heart Sprinkles (for mouths): Tiny red or orange heart-shaped sprinkles are ingeniously used to create the turkey’s distinct wattle (the fleshy appendage hanging from their chin). This small detail adds an extra layer of cuteness and authenticity to your cake pop turkeys.
- 28 Cake Pop Sticks (Optional but Recommended): While the recipe can be made as cake balls, using sticks truly makes them “cake pops.” These provide a convenient handle for both dipping and eating, and they elevate the presentation, making them ideal for a cake pop stand.
Your Guide to Crafting Perfect Turkey Cake Pops: Step-by-Step Instructions
Creating these festive Turkey Cake Pops is a fun and straightforward process, broken down into manageable steps that even aspiring young chefs can assist with. Gathering your ingredients and setting up a clear workspace will ensure a smooth and enjoyable baking and decorating experience.
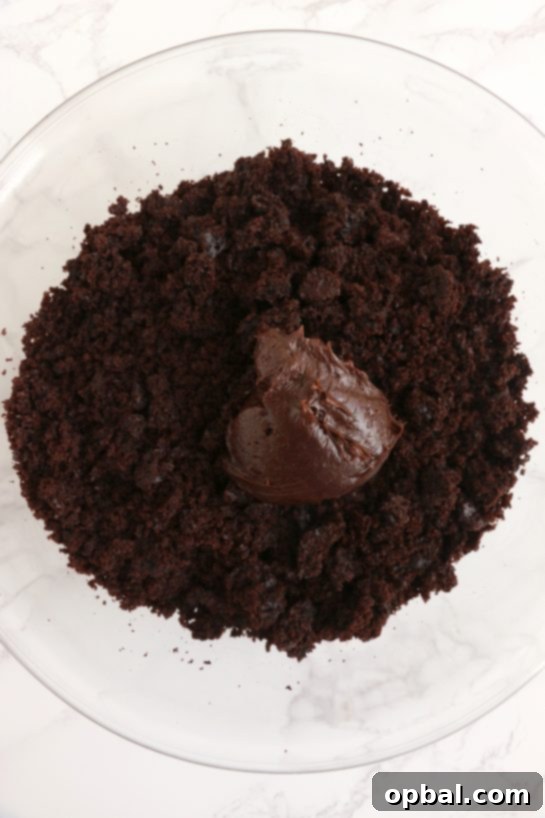
Part 1: Preparing the Cake Base
- Bake and Cool the Cake: Begin by preparing your chocolate cake mix according to the instructions provided on its packaging. Once baked, allow the cake to cool completely in its pan before attempting to handle it. A thoroughly cooled cake is essential for the next steps.
- Crumble the Cake: Transfer the cooled cake into a spacious mixing bowl. Using a sturdy fork or your clean hands, thoroughly crumble the entire cake until it resembles fine, moist crumbs. Ensure there are no large lumps remaining for a consistent texture.
- Mix with Frosting: Add the three tablespoons of white frosting to the crumbled cake. Using your hands, gently work the frosting into the cake crumbs. Continue mixing and kneading until the mixture comes together to form a cohesive, dough-like consistency that can be easily rolled into a ball without falling apart. Be mindful not to overmix or add too much frosting, as this can make the cake balls greasy.
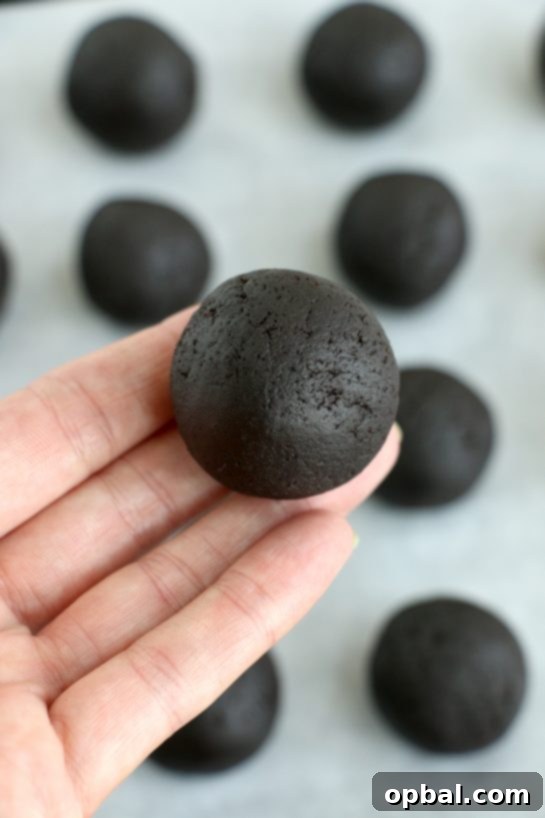
- Roll into Balls: Take small portions of the cake mixture and roll them into uniform 1-inch balls using your hands. Precision in size helps ensure even dipping and a polished final appearance. Place these neatly rolled cake balls onto a baking sheet that has been lined with parchment paper.
- Freeze for Firmness: Transfer the baking sheet containing the cake balls into the freezer. Allow them to freeze for a minimum of 1 hour. This crucial step firms up the cake balls, making them robust enough to withstand dipping in warm chocolate without crumbling. If you plan to use cake pop sticks, dip the tip of each stick into melted chocolate and insert it halfway into a frozen cake ball, then return to the freezer for a few extra minutes to allow the chocolate “glue” to set.
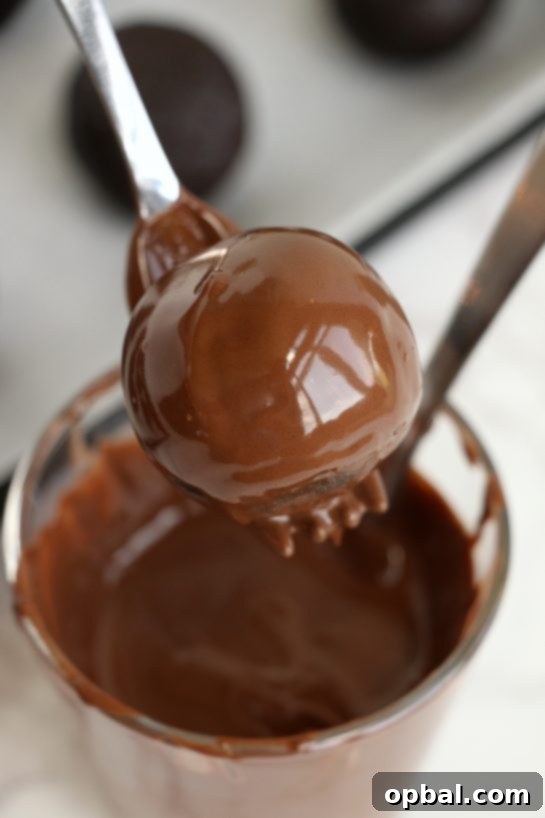
Part 2: Dipping and Decorating Your Turkeys
- Melt the Chocolate: While your cake balls are firming up in the freezer, prepare your chocolate bark or melting chocolate. Melt it in a microwave-safe bowl or a deep cup that allows for easy dipping of the cake balls. Heat in short bursts (e.g., 30-second intervals), stirring thoroughly after each interval, until the chocolate is smooth and completely melted. Alternatively, you can use a double boiler for a gentler melting process.
- Dip the Cake Pops: If using sticks, hold each cake pop by its stick. If not, use two forks to gently cradle each frozen cake ball. Dip the entire cake pop into the melted chocolate, ensuring it’s fully coated. Gently tap the fork or stick against the rim of the bowl to remove any excess chocolate, allowing it to drip back into the bowl for a clean finish. Immediately place the dipped cake pop back onto a clean, parchment-lined baking sheet to begin drying.
- Attach the Oreo Body: Crucially, BEFORE the chocolate coating has a chance to harden, carefully place one thin dark chocolate Oreo cookie onto the backside of each newly dipped cake pop. This will form the turkey’s distinctive body and tail fan. Gently press the Oreo to ensure it adheres well to the still-wet chocolate coating.
- Add Facial Features: While the chocolate coating is still pliable, meticulously place the candy eyeballs, the yellow candy ball (for the nose/beak), and the heart sprinkle (for the mouth/wattle) in their correct positions on the front of the cake pop. For enhanced precision, consider using a pair of clean food-grade tweezers. If, by chance, the chocolate sets too quickly, you can use a tiny dot of fresh melted chocolate as an edible adhesive to secure any decorations.
- Create the Feathers: For the final touch of turkey charm, dip the wide base of three candy corn pieces into the melted chocolate. Carefully press these three candy corn pieces onto the Oreo cookie (the turkey’s tail) to create a fanned-out feather effect. You might find it necessary to hold each candy corn in place for a few seconds until the chocolate begins to set and secures them upright.
- Chill Again Before Serving: Once all your adorable Turkey Cake Pops are decorated, return them to the refrigerator or freezer for at least 30 minutes. This final chill allows the chocolate coating to fully harden and ensures all the decorations are securely set. Once firm, they are ready to serve and enjoy!
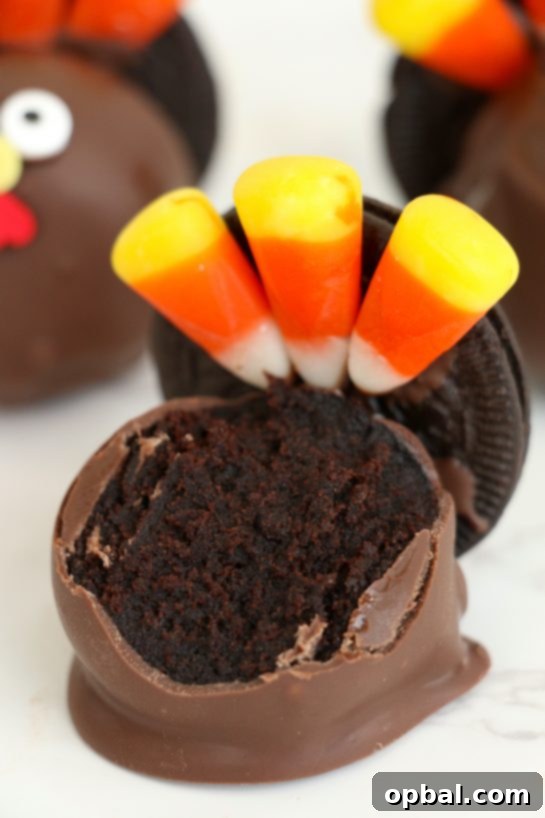
Tips for Turkey Cake Pop Perfection and Creative Variations
While the process of making Turkey Cake Pops is relatively simple, a few expert tips can elevate your results from good to absolutely spectacular. These insights will help you achieve that smooth coating and ensure your decorations stay perfectly in place, making your cake pops truly shine on any dessert table.
- Achieving the Right Cake Dough Consistency: The key to flawless cake pops lies in the initial cake and frosting mixture. It should be firm enough to roll without sticking excessively to your hands, yet moist enough not to crumble. If it’s too dry, add a tiny bit more frosting; if too sticky, a dash of powdered sugar can help.
- Uniformity in Rolling: Strive for consistently sized cake balls. This not only makes for a more professional presentation but also ensures even dipping and drying times. A small cookie scoop can be a helpful tool for this.
- Crucial Chilling Times: Never skip the freezing step for the cake balls. Cold, firm cake balls are less prone to breaking apart in the warm chocolate and allow the coating to set faster and more smoothly.
- Mastering Chocolate Temperature: The temperature of your melted chocolate is paramount. If it’s too hot, it risks melting your cake balls and creating a messy dip. If it’s too cool, the chocolate will be too thick, leading to a clumpy coating. Aim for a smooth, pourable consistency, reheating briefly if it thickens.
- Act Swiftly During Decoration: Have all your candy decorations laid out and ready before you start dipping. The chocolate sets quickly, so you’ll need to work fast to place the Oreos, eyes, noses, and feathers while the coating is still wet and acts as a natural adhesive.
- Leverage Tweezers for Precision: For small and delicate decorations like candy eyeballs and heart sprinkles, a pair of clean, food-grade tweezers can be an invaluable tool. They allow for much greater precision and prevent fingerprints or smudges on your perfectly dipped pops.
Creative Variations to Personalize Your Turkey Cake Pops
While our chocolate turkey cake pops are a delightful classic, don’t hesitate to unleash your creativity and personalize them to your liking:
- Alternative Cake Flavors: Swap the chocolate cake mix for a vanilla, spice, or even a classic pumpkin spice cake mix to introduce different flavor profiles that align with the season.
- Colorful Coatings: Use white candy melts and tint them with various food colorings to create a flock of turkeys in vibrant orange, yellow, red, or green, adding an extra pop of color to your dessert spread.
- Unique Feather Options: Instead of traditional candy corn, consider using fall-themed leaf sprinkles, small chocolate-covered pretzel pieces for a rustic feather look, or even thinly sliced almonds for a more sophisticated tail.
- Expressive Eyes: Experiment with different sizes or colors of candy eyes to give your turkeys varied expressions and personalities.
- Charming Pretzel Legs: For an extra touch of cuteness, break pretzel sticks in half and insert two pieces into the bottom of the plain cake ball (before dipping in chocolate) to create adorable little turkey legs.
Serving & Storing Your Festive Turkey Cake Pops with Ease
These delightful Turkey Cake Pops are designed to be a standout feature at any holiday gathering. Their individual size makes them perfect for parties, ensuring everyone gets a charming, personalized treat. Whether you’re hosting a grand Thanksgiving dinner or a casual fall get-together, these cake pops are sure to be a conversation starter and a crowd-pleaser.
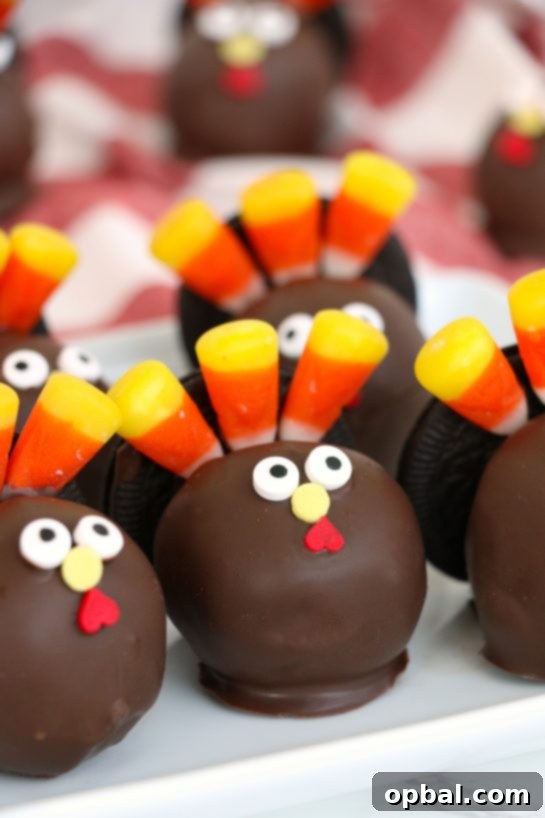
Eye-Catching Display Ideas
Beyond their delicious taste, the presentation of your Turkey Cake Pops can truly elevate their appeal. Consider these creative display options:
- Dedicated Cake Pop Stand: For an elegant and organized presentation, a tiered cake pop stand allows each turkey to stand upright, showcasing their intricate details.
- Tiered Dessert Platter: Arrange them artfully on a multi-tiered serving platter, mixing them with other autumnal treats like mini pies or cookies for a bountiful and visually appealing dessert spread.
- Edible “Nest” Presentation: Create a rustic “nest” on a large serving plate using shredded coconut (perhaps tinted green) or a bed of crumbled graham crackers, upon which your turkeys can rest.
- Charming Party Favors: Once fully set, individually wrap each cake pop in a small cellophane bag tied with a festive ribbon. This transforms them into adorable party favors or thoughtful hostess gifts.
Smart Make-Ahead and Storage Solutions
One of the most practical benefits of making Turkey Cake Pops is their excellent make-ahead potential, a true lifesaver during the often-hectic holiday season. This flexibility allows you to prepare components in advance, reducing stress on the day of your event.
- Freezing Cake Balls: The plain cake balls (before dipping and decorating) can be frozen for up to a month. Store them in an airtight container, separated by parchment paper, to prevent sticking. When you’re ready to proceed, simply thaw them slightly in the refrigerator for about 30 minutes before inserting sticks (if using) and dipping.
- Freezing Decorated Cake Pops: Fully decorated cake pops can also be frozen, though some condensation may occur upon thawing, potentially affecting delicate candy decorations. To freeze, ensure they are completely solid, then transfer them carefully to an airtight container. Thaw them gradually in the refrigerator.
- Refrigeration: Once decorated, your Turkey Cake Pops can be stored in an airtight container in the refrigerator for up to a week. This makes them a perfect dessert to prepare a few days ahead of your Thanksgiving celebration or any fall gathering.
These delightful Turkey Cake Pops are sure to become a cherished part of your holiday traditions. Their irresistible charm, delicious flavor, and ease of preparation make them a family favorite that everyone will look forward to year after year!
More Thanksgiving Dessert Recipes to Sweeten Your Holiday Feast
If you’re seeking to expand your Thanksgiving dessert repertoire beyond these charming Turkey Cake Pops, here are some other equally delicious and festive recipes that are guaranteed to bring joy to your holiday table:
- Sweet Potato Pie: Indulge in this effortlessly easy and utterly delicious classic. This homemade sweet potato pie recipe promises a velvety smooth texture and rich, comforting flavor that will impress every guest at your holiday meal.
- Caramel Apple Pie: Elevate the beloved apple pie with a luscious caramel twist! This recipe features an easy-to-make caramel apple pie filling that results in a perfectly balanced and irresistible dessert, ideal for any fall occasion.
- Double Layer Pumpkin Cheesecake: A true fall classic and a magnificent alternative to traditional pumpkin pie, particularly for avid cheesecake lovers! This rich, creamy, and beautifully layered dessert is the epitome of holiday indulgence.
- Mini Pecan Pumpkin Pies: Why choose between two holiday favorites when you can have both? These adorable, bite-sized pies offer the best of both pumpkin and pecan pie flavors in one perfect, individual serving, eliminating the need for tough dessert decisions!
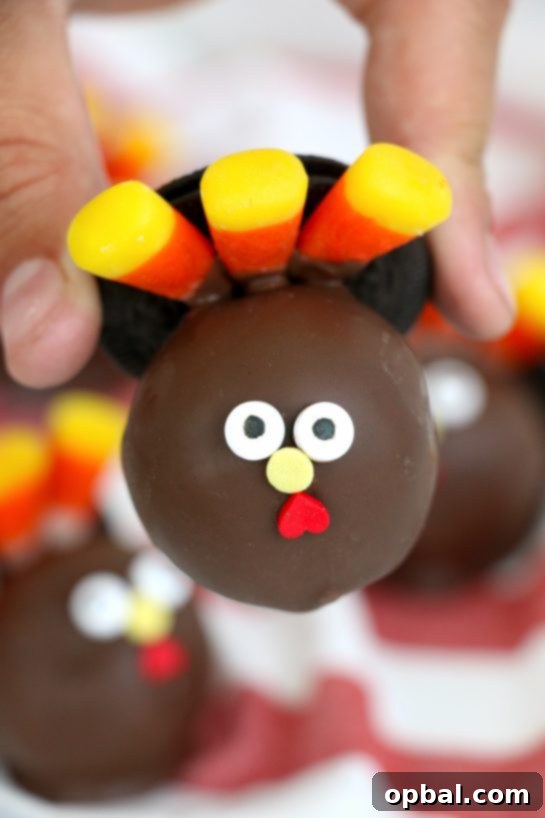
Turkey Cake Pops Recipe
Turkey Cake Pops are so fun to make and festive for fall! The entire family will enjoy these turkey pops for an easy Thanksgiving dessert recipe.
Pin Recipe
Prep Time
10 mins
Cook Time
30 mins
Freeze Time
2 hrs
Total Time
2 hrs 40 mins
Servings
28
Ingredients
- 1 box chocolate cake mix, prepared according to package instructions
- 3 tbsp white frosting
- 16 oz chocolate bark or melting chocolate
- 28 thin dark chocolate Oreos
- 84 candy corn candies
- 56 candy eyeballs
- 28 yellow candy balls (for noses)
- 28 heart sprinkles (for mouths)
- 28 cake pop sticks (optional, for serving)
Instructions
- Bake the chocolate cake according to directions on the box. Allow the cake to cool completely.
- Transfer the cooled cake to a large mixing bowl; crumble thoroughly with a fork until fine and even.
- Add the frosting and work it into the cake crumbs with your fingers/hands until it forms a cohesive, ball-like dough.
- Roll the cake dough into uniform 1-inch balls with your hands and place them on a baking sheet lined with parchment paper.
- Freeze the cake balls for at least 1 hour until firm. If using cake pop sticks, dip the tip of each stick in melted chocolate and insert it about halfway into a frozen cake ball, then freeze for a few extra minutes to allow the chocolate “glue” to set.
- Melt the chocolate bark in a microwave-safe bowl or cup that is deep enough for dipping the cake balls. Stir until smooth and no lumps remain.
- Using two forks (or holding the cake pop by its stick), dip each cake ball in the melted chocolate, ensuring it’s fully coated. Gently tap the fork or stick against the edge of the bowl to allow excess chocolate to drip off, creating a smooth finish. Place the dipped cake pop on a clean parchment-lined baking sheet to dry.
- BEFORE the chocolate hardens, immediately place one thin dark chocolate Oreo cookie on the backside of each cake pop. This will form the turkey’s body/tail. Press gently to ensure it adheres well to the still-wet chocolate.
- Carefully place the candy eyes, the yellow candy ball (for the nose), and the heart sprinkle (for the mouth) in their correct positions on the front of the cake pop. Tweezers can be very helpful for precise placement. If the chocolate sets too quickly, use a tiny dot of fresh melted chocolate as an edible adhesive for any decorations.
- Finally, dip the wide end of three candy corn pieces into melted chocolate and press them onto the Oreo cookie on each turkey to create the feathers. You may need to hold them in place for a few seconds until the chocolate sets enough to secure them upright.
- Chill the decorated cake pops again for at least 30 minutes in the refrigerator or freezer before serving to ensure everything is fully set and firm. Enjoy your festive Turkey Cake Pops!
Tried this recipe?
Let us know how it was in the comments!