
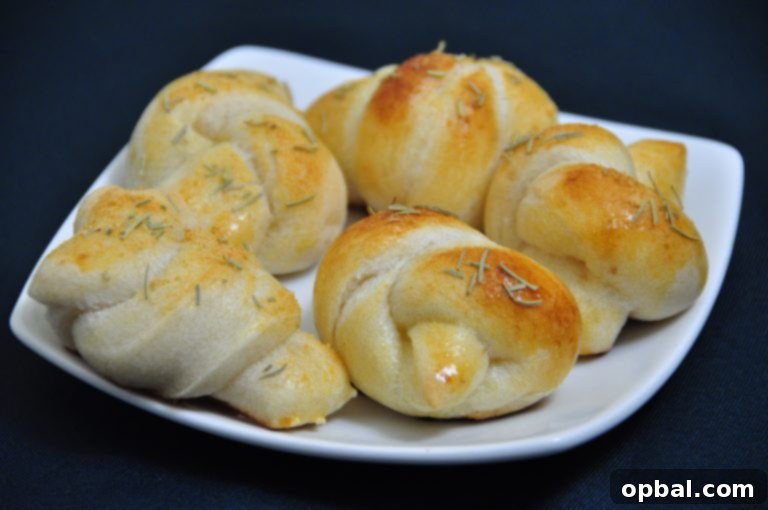
Irresistible Homemade Garlic Knots: Your Go-To Recipe for Savory Perfection
Prepare for a culinary journey with these mouthwatering Garlic Knots! Imagine soft, fluffy dough, rich with savory garlic flavor, drenched in a fragrant herb-infused butter. These aren’t just a side dish; they’re an experience – and they’re incredibly addictive!
Every bite of these homemade garlic knots promises a burst of flavor and a comforting texture that will leave you craving more. Perfect for pairing with almost any meal or simply enjoying as a delightful snack, they’re surprisingly easy to make and guaranteed to be a crowd-pleaser. Let’s dive into creating these little balls of buttery, garlicky goodness!
Recipe Type: Bread | Author: Ashley
Prep time: Approximately 45-60 minutes (active time)
Rise time: 1.5 – 4.5 hours (total for two rises)
Bake time: 12-15 minutes per batch
Total time: Approximately 2.5 – 5.5 hours (including all rise times)
Yields: 40 Garlic Knots
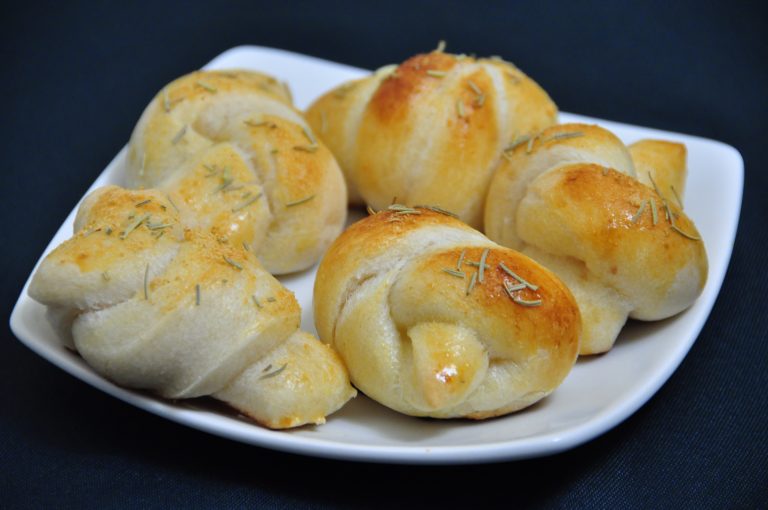
Why You’ll Love This Easy Garlic Knot Recipe
Forget complicated bread-making; this garlic knot recipe is designed for ease and maximum flavor. While all yeast breads require a little patience for the dough to rise, our method is relatively “quick” compared to many other bread recipes, getting you to delicious, warm knots faster. You’ll be amazed at how simple it is to achieve such a soft, fluffy texture with the perfect balance of garlic, herbs, and butter.
These versatile knots are more than just a complement to Italian night. They’re fantastic with a hearty soup, a crisp salad, a rich pasta dish, or even as an afternoon treat. And if you’re lucky enough to have any leftovers – though we doubt you will! – a quick warm-up in the microwave brings them back to life, almost as good as fresh from the oven.
Warning: You might want to have some mints on hand afterwards, because these garlic knots are generously flavored!
The Essential Ingredients for Perfect Garlic Knots
Crafting the perfect garlic knot starts with high-quality ingredients. This recipe yields a generous batch of approximately 40 knots, perfect for sharing, freezing, or simply indulging!
For the Dough (Yields approx. 40 Garlic Knots):
- 5½ cups All-Purpose Flour: The foundation of our soft and fluffy knots. All-purpose flour is versatile and creates a tender crumb, ideal for this type of bread.
- 1¾ cups Warm Water: Crucial for activating the yeast. Ensure it’s between 105-115°F (40-46°C) – too hot will kill the yeast, too cold won’t activate it, leading to a flat dough.
- ¼ cup Olive Oil: Adds richness, flavor, and helps keep the dough tender and moist, contributing to its wonderful chewiness.
- 1½ tablespoons Active Dry Yeast: The leavening agent that gives our knots their airy texture. Active dry yeast needs to be bloomed in warm liquid to ensure it’s alive and ready to work.
- 1 tablespoon Granulated Sugar: A touch of sweetness that also serves as vital food for the yeast, helping it activate robustly and the dough to rise beautifully.
- 1 teaspoon Sea Salt: Enhances the flavor of the bread, balances the sweetness, and helps regulate yeast activity, contributing significantly to the dough’s structure and elasticity.
For the Irresistible Garlic Coating:
This savory coating is what truly elevates our garlic knots, infusing them with an aromatic burst of flavor. While rosemary was tested, we found fresh Italian parsley offers a more classic and vibrant taste that perfectly complements the garlic, providing a fresh and herbaceous counterpoint.
- 2 tablespoons Olive Oil: Provides a smooth, luxurious base for the coating and adds a delicate, fruity depth that complements the butter and garlic.
- 2 tablespoons Unsalted Butter: Melts into a rich, luscious sauce that generously coats every crevice of the knots. Using unsalted butter allows you to precisely control the overall saltiness of your finished dish.
- 4 cloves of Garlic, finely minced: The undeniable star of the show! Finely minced garlic ensures its intense, pungent flavor is evenly distributed across every surface of the knots.
- ¼ cup Finely Chopped Fresh Italian Parsley: Adds a beautiful pop of green color and a fresh, herbaceous note that balances the richness of the butter and garlic. Fresh is absolutely key here for vibrant flavor and aroma.
Step-by-Step Instructions for Your Best Homemade Garlic Knots
Follow these detailed steps carefully to create garlic knots that are consistently soft, wonderfully chewy, and bursting with irresistible flavor. Patience during the rising stages is the paramount key to achieving baking success!
-
Prepare the Dough and First Rise:
Begin by accurately measuring the all-purpose flour into a large mixing bowl; set it aside for later use. In a large, 4-cup measuring cup or a separate small bowl, combine the warm water (it’s crucial to ensure its temperature is precisely between 105-115°F / 40-46°C), ¼ cup olive oil, active dry yeast, granulated sugar, and sea salt. Stir these ingredients gently until the yeast and sugar are fully dissolved. Allow this mixture to sit undisturbed for 5-10 minutes. You should observe it becoming foamy and bubbly, which is a clear indication that your yeast is active and healthy. Pour this activated yeast mixture over the flour in the large bowl and mix with a sturdy wooden spoon or, for greater ease, use a stand mixer fitted with a dough hook. Continue mixing until all of the flour is moistened and a shaggy, cohesive dough begins to form. Turn the dough out onto a lightly floured surface. Knead the dough vigorously for about 1 to 2 minutes. During kneading, if the dough feels excessively sticky, incorporate a very small amount of additional flour; if it’s too dry, add a tiny bit of water, a teaspoon at a time. Continue kneading until the dough achieves a soft, smooth consistency and is just slightly tacky to the touch. Lightly oil a clean large bowl. Transfer the kneaded dough into the oiled bowl, turning it over once to ensure its entire surface is coated with oil. Cover the bowl tightly with plastic wrap or a damp kitchen towel. Place the bowl in a warm, draft-free area of your kitchen – excellent spots include inside a slightly warm oven that’s turned off, or a sunny windowsill. Allow the dough to rise until it has visibly doubled in size. This crucial first rise can take anywhere from 1 to 3 hours, depending significantly on the warmth of your environment and the vitality of your yeast.
-
Shape the Dough into Strips:
Once your dough has successfully doubled in volume, gently punch it down to release the accumulated gases. This helps create a finer crumb. Then, divide the dough into two equal halves. Line three large baking sheets with parchment paper or silicone baking mats; set these prepared sheets aside. Prepare your workspace by lightly oiling a pastry mat or a clean countertop, ensuring your hands and a rolling pin are also lightly oiled. Take one half of the dough and gently press it down, flipping it over and repeating, to further release gases and flatten it slightly. Using your oiled rolling pin or simply your hands, carefully shape this piece of dough into a neat rectangle that measures approximately 5 inches by 16 inches and about ½-inch thick. Strive for an even thickness across the entire rectangle; this uniformity is key for consistent knot sizes and even baking. Using a pizza cutter or a sharp knife, precisely slice the rectangle into thin strips, each measuring about 5 inches long by ¾-inch wide.
-
Tie the Knots and Second Rise:
Lightly sprinkle the dough strips with a tiny amount of flour to prevent them from sticking to your hands or the work surface. Take each strip, one at a time, and gently roll it back and forth between your palms on the oiled surface to create an even, smooth rope. Then, with a simple motion, tie each rope into a basic knot. It doesn’t need to be an intricate knot – a loose loop with one end tucked through will work beautifully. Place each tied knot onto your prepared baking sheets, ensuring they are spaced approximately 1½ inches apart. This spacing is vital to allow ample room for their second rise without merging. Continue this process with all the remaining dough strips, and then repeat the entire shaping and tying process with the second half of your dough. Once all the knots are neatly arranged on the baking sheets, cover them loosely with a dry kitchen towel or cheesecloth. Place the baking sheets back in a warm, draft-free area for their critical second rise. During this stage, the knots should visibly double in size, becoming puffy, light, and almost marshmallow-like. This typically takes 45 minutes to 1.5 hours, depending on ambient conditions.
-
Preheat Your Oven:
Approximately 15-20 minutes before you anticipate the second rise to be complete, preheat your oven to 400 degrees F (200 degrees C). This ensures the oven reaches and maintains the correct baking temperature by the time your perfectly risen knots are ready to bake.
-
Bake to Golden Perfection:
Once the garlic knots have beautifully doubled in size after their second rise, carefully remove the towel covering them. Place one pan at a time into the preheated oven. Bake for 12 to 15 minutes, or until the knots achieve a desirable golden brown color on top and sound hollow when gently tapped on the bottom. Baking one pan at a time is highly recommended as it ensures even heat distribution and consistent baking results across all batches, leading to perfectly cooked and uniformly golden knots.
-
Prepare the Garlic Coating:
While your garlic knots are baking and filling your kitchen with an enticing aroma, it’s time to prepare the aromatic and flavorful coating. In a small saucepan, gently warm the 2 tablespoons of olive oil, 2 tablespoons of unsalted butter, and 4 cloves of finely minced garlic over low heat. Exercise caution to avoid burning the garlic; you merely want to warm it gently and allow its pungent fragrance to thoroughly infuse the oils and melted butter. Once the butter is fully melted and the garlic has become wonderfully fragrant (this usually takes about 2-3 minutes), promptly remove the saucepan from the heat. Stir in the ¼ cup of finely chopped fresh Italian parsley. Cover the saucepan and set it aside to allow all the delicious flavors to meld and deepen beautifully.
-
Coat and Serve:
As soon as you remove the golden-brown knots from the oven, while they are still wonderfully warm and aromatic, it’s the perfect moment to apply their signature coating. You have two excellent options: either generously brush each individual knot with the prepared garlic coating using a clean pastry brush, ensuring even coverage; or, for an even more thorough and immersive coating, place the warm knots in a large mixing bowl and pour the entire garlic coating over them, tossing gently until each knot is completely and thoroughly coated in the fragrant mixture. Season with additional sea salt to taste, if desired, to further enhance the flavors.
-
Enjoy Fresh and Warm:
These garlic knots are absolutely at their peak and best served warm, straight from the oven and freshly coated. Their soft, tender texture and vibrant garlic flavor are unparalleled when enjoyed immediately. For an even more indulgent experience, consider serving them alongside extra marinara sauce, a cheesy dip, or a robust pesto for dipping!
Pro Tips for Garlic Knot Success
- Check Your Yeast: Always ensure your active dry yeast is fresh and active. If your water, sugar, and yeast mixture doesn’t get foamy after 5-10 minutes, your yeast might be old or the water temperature was off (too hot kills it, too cold won’t activate it). Start with new yeast to avoid disappointment!
- Don’t Rush the Rise: The rising times are crucial for fluffy, airy knots. Don’t be tempted to cut them short. A warm, draft-free spot is ideal for consistent and robust rises.
- Kneading is Key: While not a long knead, ensuring the dough is soft and slightly tacky after kneading builds essential gluten structure for that perfect chewiness and elasticity. Avoid over-flouring during kneading, which can lead to tough knots.
- Even Thickness: When rolling out the dough rectangle, strive for consistent thickness across the entire sheet. This ensures all your knots bake evenly and have a similar, desirable texture.
- Fresh Herbs Make a Difference: While dried parsley can be used in a pinch, fresh Italian parsley provides a brighter, more aromatic flavor and a beautiful visual appeal that truly enhances the garlic coating. The difference is truly noticeable and worth the effort!
- Stand Mixer Helper: For convenience and less manual effort, a stand mixer fitted with a dough hook can handle the kneading process beautifully, making this recipe even easier and saving your arms!
Creative Serving Suggestions
While garlic knots are a classic accompaniment to Italian dishes, their versatility extends far beyond! Here are some ideas to inspire your next meal, gathering, or snack time:
- Italian Feast Essential: Serve them as the perfect sidekick to classic Italian dishes like spaghetti and meatballs, hearty lasagna, creamy chicken alfredo, or any rich tomato-based pasta sauce. They’re a must-have for an authentic Italian spread.
- Soup & Salad Companion: Transform a simple lunch or light dinner by pairing them with a warming bowl of minestrone, a velvety roasted tomato soup, or a crisp, fresh Caesar salad. They add a satisfying bready element that soaks up every last drop of flavor.
- Appetizer Perfection: Offer these golden-brown beauties with a side of warm marinara dipping sauce, a homemade pesto aioli, a spicy arrabiata dip, or even a sophisticated olive oil and balsamic vinegar dip for an elegant starter at your next gathering.
- BBQ Sidekick: Surprisingly versatile, garlic knots pair wonderfully with grilled chicken, juicy steak, or tender ribs, providing a comforting and flavorful bread option to your barbecue spread that guests will adore.
- Holiday Table Star: Their festive appearance, comforting nature, and universally loved flavor make them a welcome addition to holiday buffets or potlucks, sure to disappear quickly.
- Snack Attack Solution: Honestly, these are so utterly delicious, they disappear quickly on their own as a simple, satisfying, and incredibly addictive snack that’s hard to resist.
Storage and Reheating Tips for Leftover Garlic Knots
If by some culinary miracle you find yourself with leftover garlic knots (a truly rare occurrence!), here’s how to store and reheat them to enjoy their deliciousness later:
- Countertop Storage (Short Term): Freshly baked garlic knots are at their absolute best when consumed within 1-2 days. To maintain their characteristic softness and prevent them from drying out, place them in an airtight container or a large zip-top bag and store at room temperature.
- Refrigeration (Medium Term): For slightly longer storage, you can refrigerate them for up to 3-4 days. Be aware that refrigeration can sometimes alter the texture of bread products, making them a bit firmer, but they will still be delicious once reheated.
- Freezing for Later (Long Term): Garlic knots freeze exceptionally well, making them perfect for meal prepping or ensuring you always have access to fresh-baked flavor! Allow them to cool completely after baking and coating. For best results, individually wrap each knot tightly in plastic wrap, then place the wrapped knots in an airtight freezer bag or container. They can be stored in the freezer for up to 2-3 months without significant loss of quality or flavor.
- Reheating Instructions:
- From Countertop/Fridge: For a quick reheat, microwave individual knots for 15-30 seconds until they are warm and soft. For a crispier exterior reminiscent of fresh-baked, pop them into a preheated oven (350°F / 175°C) for 5-7 minutes.
- From Freezer: There’s no need to thaw! Place the frozen knots directly onto a baking sheet in a preheated oven (350°F / 175°C) for 10-15 minutes, or until they are heated through, soft in the center, and lightly crispy on the outside. For ultimate convenience, you can microwave them for 30-60 seconds to soften them, then finish them in the oven for a few minutes to crisp up the exterior beautifully.
Frequently Asked Questions About Homemade Garlic Knots
- Can I use instant yeast instead of active dry yeast for this recipe?
- Yes, you can! If using instant yeast, you can typically mix it directly with the flour and other dry ingredients, skipping the initial proofing step in warm water. However, for this recipe, we still recommend adding it to the warm water mixture along with the sugar and oil to ensure it’s active and to follow the instructions for consistent and optimal results. The amount would generally remain the same.
- My dough isn’t rising. What could have gone wrong?
- Several common factors can inhibit dough rising, which is often the biggest concern for new bread bakers:
- Water Temperature: The most common culprit! Your water might have been too hot (which unfortunately kills the yeast) or too cold (which won’t activate it sufficiently). Always aim for a precise temperature range of 105-115°F (40-46°C).
- Expired Yeast: Yeast has a definite shelf life. If your yeast mixture doesn’t get visibly foamy and bubbly after 5-10 minutes in the warm water and sugar, it’s highly likely that your yeast is old or inactive. It’s best to start with a fresh batch of yeast.
- Cold Environment: Dough needs a warm, draft-free environment to rise properly. If your kitchen is too cool, the rise will be very slow, sluggish, or may not happen at all. Try placing it in a warm, turned-off oven or a sunny spot.
Ensuring you use fresh yeast, accurate water temperature, and a warm rising environment are crucial for success.
- Can I prepare the dough ahead of time and bake later?
- Absolutely! This recipe is wonderful for make-ahead convenience. After the first rise, gently punch down the dough to deflate it, place it back in the oiled bowl, cover it tightly with plastic wrap, and refrigerate it overnight (it can be stored in the fridge for up to 24 hours). When you’re ready to bake, remove the dough from the refrigerator, let it come to room temperature for about 30-60 minutes, and then proceed with shaping the knots and the second rise as directed in the recipe.
- Is it okay to use dried herbs for the garlic coating instead of fresh parsley?
- While fresh Italian parsley is highly recommended for its vibrant flavor, aromatic qualities, and beautiful color (which significantly enhance the overall appeal and taste), you can certainly use dried parsley in a pinch. If substituting, use about 1 tablespoon of dried parsley for every ¼ cup of fresh, as dried herbs are more concentrated. Just keep in mind that the overall fresh taste and bright aroma of the coating will be less intense with dried herbs.
- How can I adapt this recipe to be vegan-friendly?
- Making this garlic knot recipe vegan is quite simple and delicious! Ensure that the ¼ cup of olive oil specified for the dough is used as written. For the irresistible garlic coating, simply substitute the 2 tablespoons of unsalted butter with an equal amount of a high-quality vegan butter or plant-based margarine. All other ingredients listed in this recipe are naturally plant-based, making this an easy and delightful vegan adaptation!
Bake Your Own Batch of Bliss Today!
There’s nothing quite like the aroma of freshly baked bread filling your home, especially when it’s these glorious, buttery, and incredibly flavorful garlic knots. This recipe offers a straightforward path to achieving bakery-quality results right in your own kitchen, even if you’re new to bread making. Whether you’re serving them with a hearty Italian meal, as a delightful appetizer that will impress your guests, or simply as a comforting snack to satisfy your cravings, these homemade garlic knots are sure to become a beloved and frequently requested staple in your culinary repertoire.
So, gather your ingredients, follow our simple yet detailed steps, and prepare to impress your taste buds (and anyone lucky enough to share them with you) with these irresistible golden morsels. Happy baking!