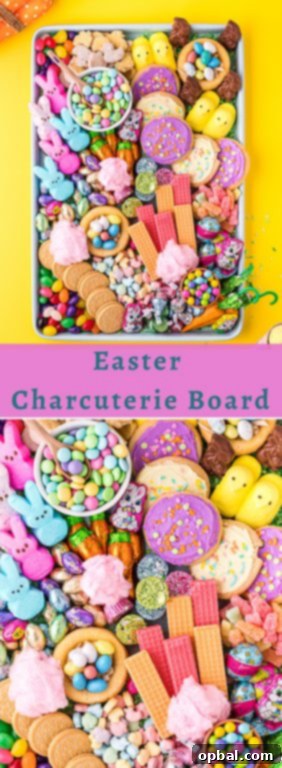
Sweet & Simple: Crafting the Ultimate DIY Easter Charcuterie Board
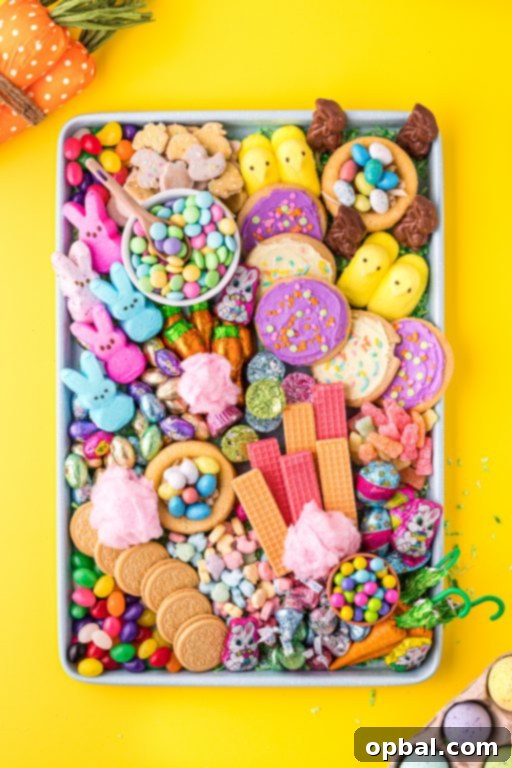
Easter celebrations are often synonymous with elaborate meals and countless appetizers. But what if you could simplify your pre-dinner spread without sacrificing charm or deliciousness? Introducing the delightful Easter Charcuterie Board – a vibrant, stress-free grazing platter that promises to be the centerpiece of your holiday gathering. Forget the endless cooking; embrace a beautifully arranged assortment of festive sweets and treats that will enchant both children and adults alike.
This year, elevate your Easter brunch or dinner with a show-stopping display of colorful candies, cookies, and seasonal delights. It’s more than just a snack board; it’s an interactive experience that invites everyone to gather, graze, and make sweet memories.
Why an Easter Charcuterie Board is Your Holiday Secret Weapon
In an age dominated by visual appeal on platforms like Pinterest and Instagram, charcuterie boards have risen to fame for their artistic presentation and effortless appeal. An Easter-themed board takes this concept to the next level, making it particularly perfect for holiday snacking and entertaining. Here’s why this idea is a game-changer for your Easter celebration:
- Effortless Entertaining: Say goodbye to juggling multiple hot appetizers. A charcuterie board can be prepared mostly in advance, freeing you up to enjoy your guests and the festive atmosphere.
- Visually Stunning: The pastel hues and playful shapes of Easter candies naturally lend themselves to a breathtaking display. It’s an edible work of art that instantly brightens any table.
- Kid-Friendly Fun: Children are naturally drawn to colorful sweets, and having an entire board dedicated to them is a dream come true. They’ll love picking their favorite treats, making it a truly engaging experience.
- Customizable for All Tastes: While this guide focuses on a sweet board, the concept is incredibly flexible. You can tailor it to include various textures, flavors, and even some healthier options if desired.
- Perfect for Grazing: Whether it’s a pre-dinner snack, a post-brunch dessert, or simply an all-day grazing station, an Easter charcuterie board offers continuous enjoyment without the formality of a sit-down course.
This simple yet impressive idea is a lifesaver for hosts and a delight for guests. Get ready to create a board that will undoubtedly be the talk of your Easter gathering!
Planning Your Perfect Easter Sweet Board
Creating a memorable Easter charcuterie board starts with a little planning. Think about your theme, color palette, and the variety of treats you want to include to ensure a balanced and appealing spread.
Choosing Your Board or Platter
The foundation of your charcuterie board is, well, the board itself! You don’t need anything fancy or expensive.
- Wooden Boards: Classic and rustic, a large wooden cutting board or serving platter provides a beautiful backdrop.
- Slate Boards: Elegant and modern, slate offers a sleek contrast to colorful candies.
- Baking Sheets: For a budget-friendly and easy-cleanup option, a large cookie sheet lined with parchment paper works perfectly.
- Thrift Store Finds: Keep an eye out at local thrift stores or home goods shops like Target, Walmart, or HomeGoods for unique and affordable trays and platters.
Choose a size appropriate for your guest count. A larger surface allows for more variety and less crowding.
The Essential Sweet Elements
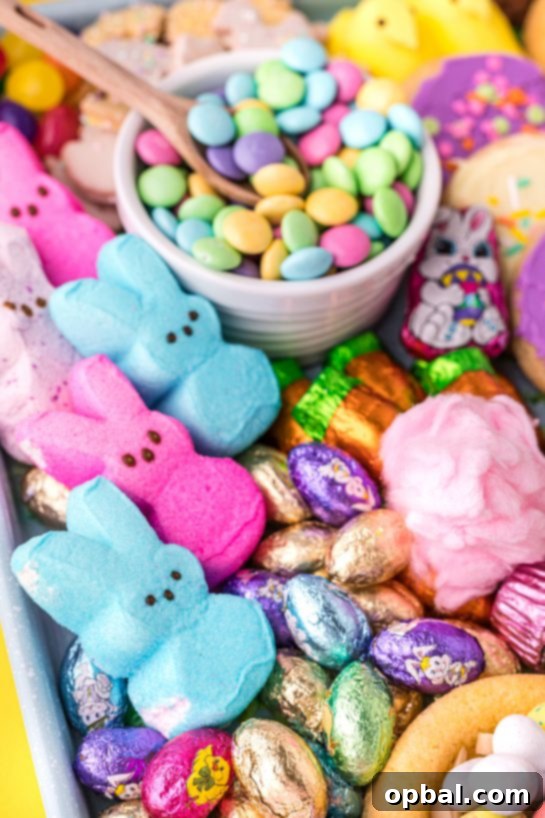
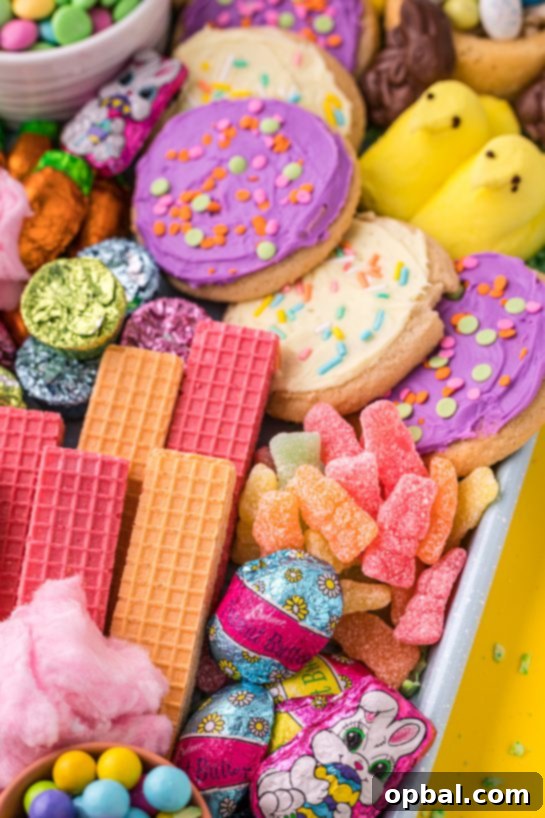
The beauty of an Easter charcuterie board lies in its variety of colors, textures, and flavors. Focus on an abundance of pastel-colored candies and treats that evoke the joy of spring. Here’s a comprehensive list of what you’ll need, along with suggested quantities to inspire your creation:
What to Buy for Your Easter Charcuterie Board
Gathering your ingredients is the most exciting part! We’ve put together a list of delightful Easter-themed sweets, many of which are readily available online for convenience.
- Milk Chocolate Spring M&M’s: Approximately 2 cups. A classic choice with festive pastel colors. (Find them here)
- Palmer Chocolate Easter Mix: Approximately 2 cups. A mix of foil-wrapped chocolates in various Easter shapes. (Find them here)
- Sixlets Easter Edition: Approximately 1 cup. Small, candy-coated chocolate spheres in soft Easter shades. (Find them here)
- Sweet Tarts: Approximately 1 cup. For a tangy burst of flavor and bright colors. (Find them here)
- Hershey Kisses: Approximately 1 cup. Always a crowd-pleaser, available in special spring editions. (Find them here)
- Jelly Beans: Approximately 1 cup. A quintessential Easter candy, offering a rainbow of flavors. (Find them here)
- Iced Spring Animal Crackers: Approximately 1 cup. Cute animal shapes with sweet frosting. (Find them here)
- Almond Slices: Approximately ½ cup. Great for adding texture or creating “bird’s nests.” (Find them here)
- Robin Eggs Malted Candy: Approximately ½ cup. A traditional Easter favorite, perfect for nests. (Find them here)
- Sour Patch Bunnies: Approximately ½ cup. For those who enjoy a sour kick with their sweet. (Find them here)
- Reese’s Spring Edition: 10-12 pieces. Peanut butter goodness in festive shapes. (Find them here)
- Peeps (Bunnies and Birds): 9 pieces. Soft, marshmallowy iconic Easter treats. (Find them here)
- Vanilla and Strawberry Wafers: 6 pieces. Light, crispy, and colorful. (Find them here)
- Golden Oreo’s: 6 pieces. A creamy, crunchy addition that everyone loves. (Find them here)
- Frosted Sugar Cookies: 5-6 pieces. Large, soft cookies, easily customizable.
- Milk Chocolate Bunnies: 4 pieces. Small to medium-sized chocolate bunnies for a classic touch.
- Lindt Chocolate Carrots: 3-4 pieces. Elegant and delicious chocolate in a festive shape.
- Cotton Candy: 3 portions. Perfect for creating fluffy “bunny tails.”
- Vanilla Dessert Shells: 2 pieces. These can serve as charming edible “nests.”
- Green Shredded Coconut (optional): For decorative “grass.”
- Large Tray or Cookie Sheet: The canvas for your edible masterpiece.
Step-by-Step Guide to Assembling Your Easter Charcuterie Board
Putting together your board is an enjoyable, creative process. There’s no right or wrong way, but these steps will help you achieve a stunning, balanced presentation.
Easter Charcuterie Board
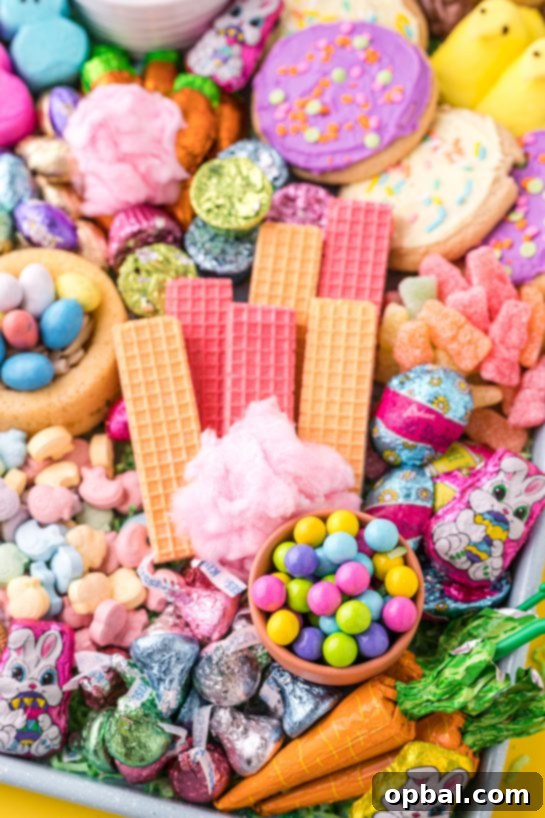
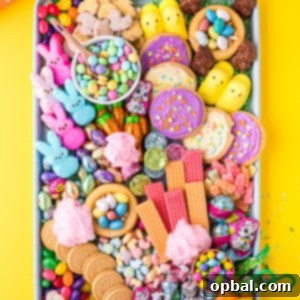
Learn how to make a beautiful Easter Charcuterie Board! Rather than cooking up a ton of appetizers alongside your ham and side dishes, put together this simple pre-dinner grazing board instead!
Prep Time: 30 mins
Total Time: 30 mins
Servings: 10
Ingredients
- 2 cups Milk Chocolate Spring M&M’s
- 2 cups Palmer Chocolate Easter Mix
- 1 cup Sixlets Easter Edition
- 1 cup Sweet Tarts
- 1 cup Hershey Kisses
- 1 cup Jelly Beans
- 1 cup Iced Spring Animal Crackers
- ½ cup Almond Slices
- ½ cup Robin Eggs Malted Candy
- ½ cup Sour Patch Bunnies
- 10-12 Reese’s Spring Edition
- 9 Peeps- Bunnies and Birds
- 6 Vanilla and Strawberry Wafers
- 6 Golden Oreo’s
- 5-6 Frosted Sugar Cookies
- 4 Milk Chocolate bunnies
- 3-4 Lindt Chocolate Carrots
- 3 Cotton Candy (for bunny tails)
- 2 Vanilla Dessert Shells
- Large Tray or Cookie Sheet
Instructions
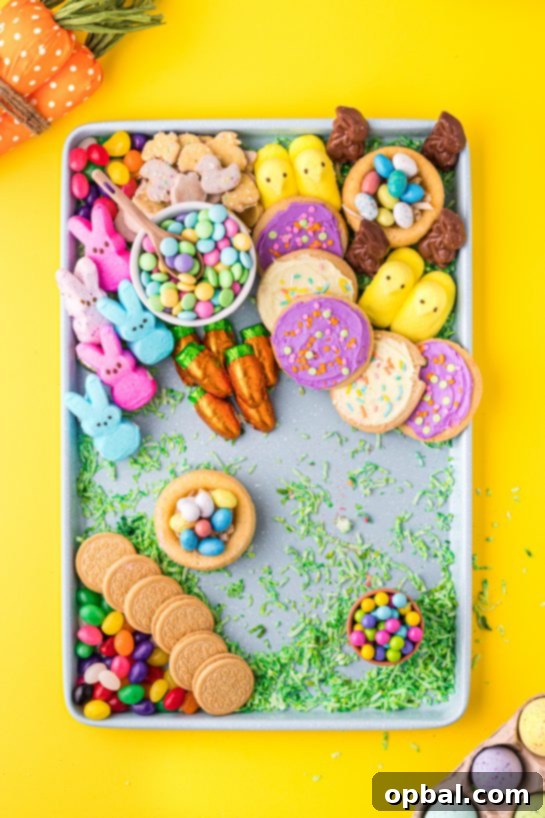
- Grab a large tray or a large cookie sheet. If using a cookie sheet, line it with parchment paper for easy cleanup.
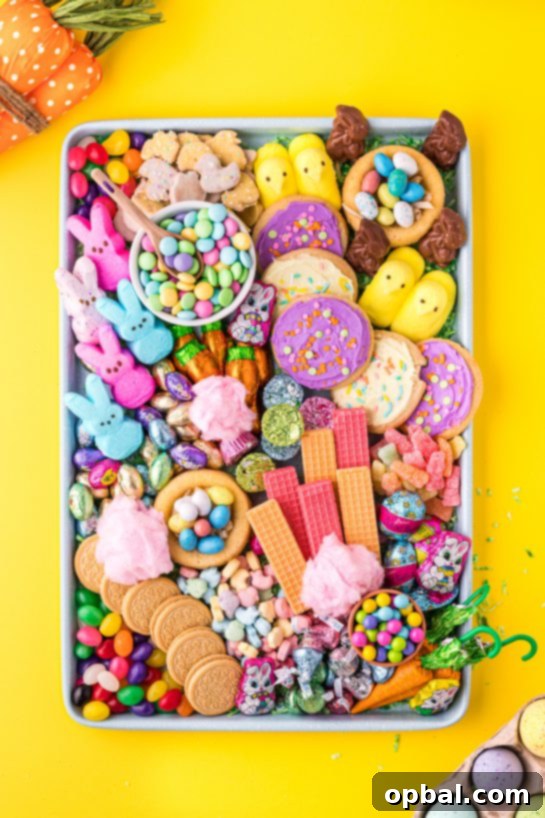
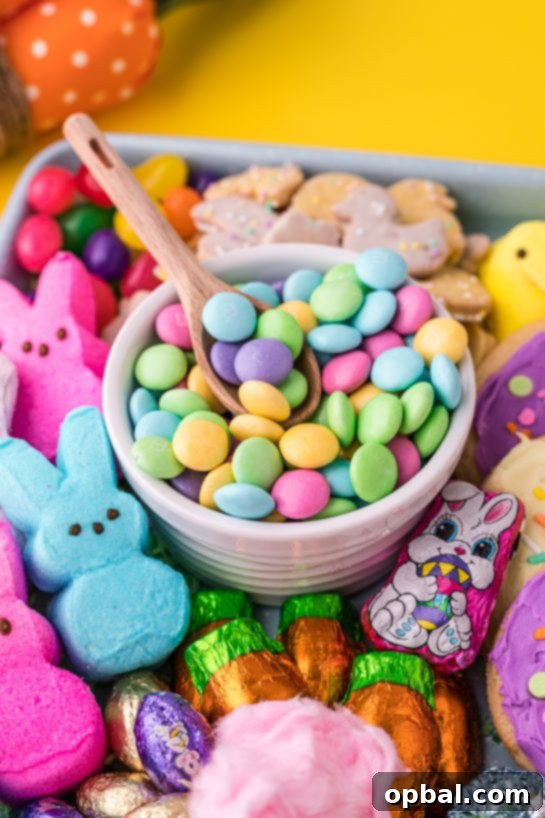
- Begin by placing two small to medium-sized bowls onto your board. Fill these bowls with smaller candies like M&M’s, jelly beans, or Sixlets. These bowls act as anchors and help create structure.
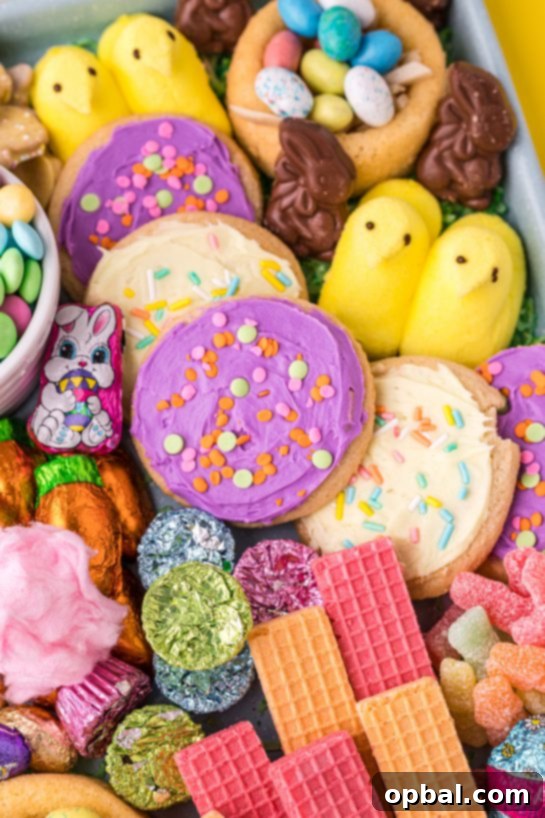
- Next, add your larger items. Strategically place cookies (like frosted sugar cookies and Golden Oreos), Peeps, and milk chocolate bunnies around the bowls, ensuring a good distribution across the board.
- Once the main items and bowls are in place, fill in all remaining gaps and spaces with the rest of your favorite Easter candies. Arrange them by color, shape, or texture to create visual interest. Don’t be afraid to pile them high!
Notes
For more detailed tips and creative ideas, see the section below: “Expert Tips for a Stunning Easter Board.”
Expert Tips for a Stunning Easter Board
Beyond simply placing items on a board, these tips will help you elevate your Easter charcuterie to an unforgettable visual and culinary experience.
Creating a Festive Base
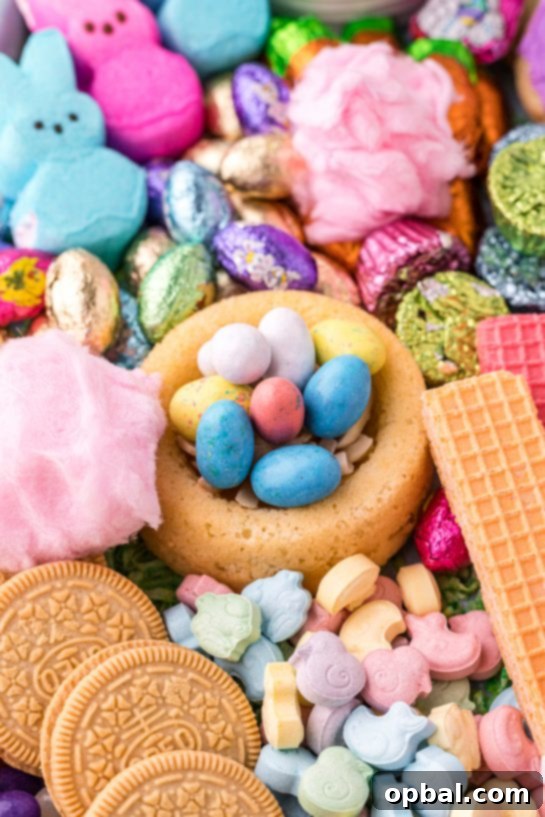
To make your board truly pop, consider starting with a decorative base. You can use green shredded paper to mimic grass, or get creative with shredded coconut. To dye coconut green:
- Place shredded coconut in a Ziplock bag.
- Add a few drops of green food coloring.
- Seal the bag and shake until the coconut is evenly colored.
This dyed coconut can be stored in a sealed container for up to three weeks, making it a great prep-ahead option. While not strictly necessary, it adds a wonderful festive touch that enhances the “Easter garden” feel of your board.
Using Food as Decorative Accents
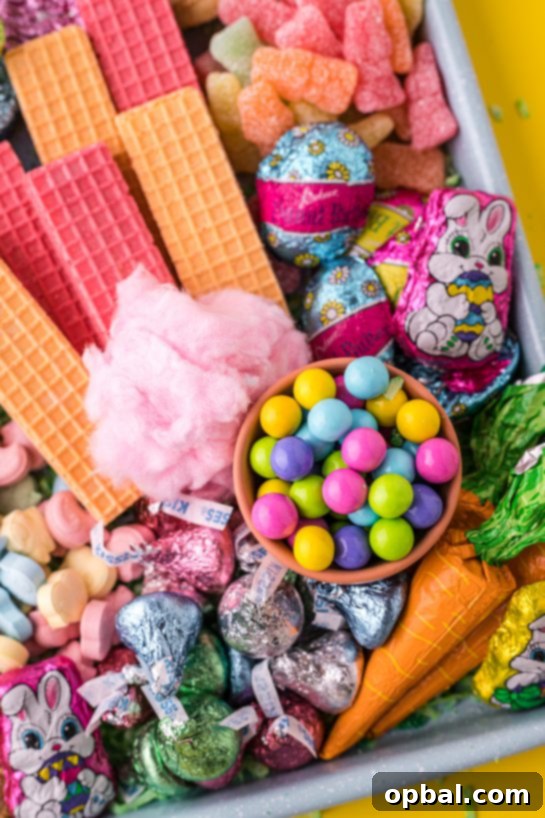
Think beyond just filling space; use your food items to create small, charming scenes. For example, vanilla dessert shells can be transformed into adorable bird’s nests. Simply place a few almond slices inside the shell, then top with classic Robin Eggs Malted Candy. These small, thoughtful details make a big statement and add a whimsical touch that guests will adore.
Customizing Your Baked Goods
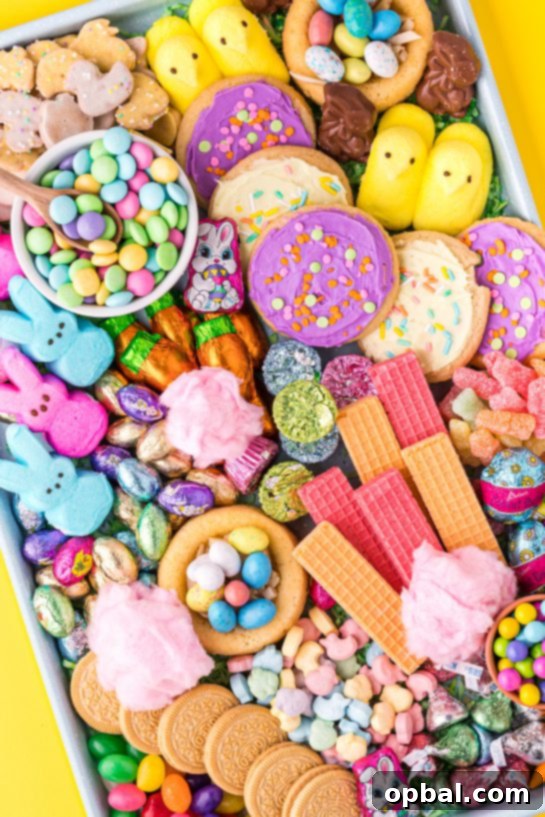
If you can’t find frosted sugar cookies in the exact colors you desire at your local grocery store, don’t fret! Simply purchase plain sugar cookies and a container of white frosting. You can then easily dye the frosting any pastel color using food coloring to match your board’s theme perfectly. This is a fun, quick, and cost-effective way to ensure all your treats tie together aesthetically.
Thinking Beyond Traditional Easter Candy
While classic Easter candies are a must, don’t limit yourself to just the holiday aisle. First, decide on a color theme – for Easter, pastel shades are usually ideal. Then, stroll down the regular cookie and candy aisles. Look for items that match your chosen pastel palette, regardless of whether they’re specifically “Easter-themed.” Vanilla wafers, Golden Oreos, and various gummy candies can often come in lovely light colors that blend seamlessly with your spring theme.
Achieving Visual Harmony and Abundance
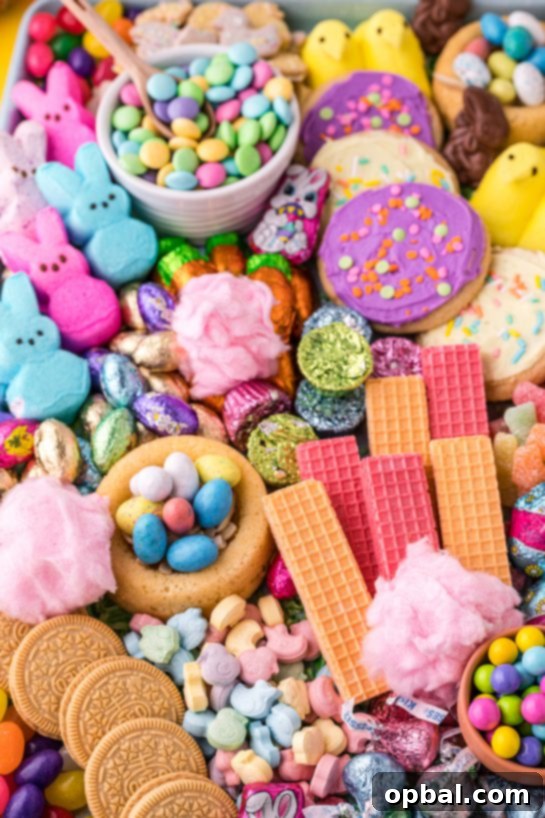
The key to a truly stunning charcuterie board is making it look abundant and inviting.
- Vary Heights and Textures: Use small bowls to add height, and arrange taller items like wafer cookies standing up. Mix crunchy elements with soft, chewy ones.
- Fill Every Gap: Don’t leave any empty spaces. Once your larger items are placed, use smaller candies, nuts, or chocolate pieces to fill in all the nooks and crannies. This creates a sense of lavishness and ensures every inch of your board is appealing.
- Group Similar Items: While variety is good, grouping small piles of similar candies together can be more visually impactful than scattering them individually.
- Consider Small Dipping Sauces (Optional): For a sweet board, small ramekins of fruit dip or chocolate sauce can add another layer of indulgence, particularly if you include some fresh fruit or plain cookies.
Prep Ahead for Stress-Free Enjoyment
One of the greatest advantages of a charcuterie board is the ability to prepare much of it in advance. Wash and dry any fresh fruits, dye your shredded coconut, and gather all your candies the day before. On Easter morning, it’s just a matter of assembly, allowing you more time to spend with loved ones.
Serving Your Easter Charcuterie Board
Once your masterpiece is complete, decide on the best time to serve it. An Easter charcuterie board is incredibly versatile:
- Pre-Dinner Grazing: Offer it as a light snack before your main Easter meal to keep appetites at bay in a delightful way.
- Easter Brunch Centerpiece: It makes a fantastic sweet addition to any brunch spread, complementing savory items beautifully.
- Dessert Extravaganza: After your main course, bring out the board as a decadent dessert, allowing guests to pick and choose their sweet finales.
- Casual Get-Together: For a more relaxed Easter gathering, the board can be the main event, encouraging continuous snacking and conversation.
Remember to place your board in a cool spot away from direct sunlight, especially if you have chocolate items, to prevent melting.
Make This Easter Unforgettable with a DIY Charcuterie Board
The Easter charcuterie board is more than just a collection of sweets; it’s a celebration of color, creativity, and the joy of sharing. By following these tips and letting your imagination guide you, you can craft a board that’s not only delicious but also a feast for the eyes. It’s an opportunity to create something beautiful, simple, and utterly unforgettable for your family and friends this holiday season. So, gather your favorite treats, unleash your inner artist, and get ready to enjoy a stress-free and spectacular Easter! Happy Easter to you all!