
Unveiling the Art of Decorating Valentine’s Day Conversation Heart Cookies

Valentine’s Day is a time for sharing love, and what better way to express your affection than with beautifully decorated, homemade cookies? This year, we’re diving into the delightful world of sugar cookie decorating, focusing on a timeless classic: conversation heart cookies. These charming treats, adorned with playful messages, are not only delicious but also incredibly fun to make and personalize. Using vibrant royal icing, you’ll transform simple sugar cookies into edible tokens of love, perfect for gifting to friends, family, or your special someone. Get ready to unleash your inner pastry artist and create a batch of cookies that are as sweet to look at as they are to eat.
What Makes Royal Icing the Perfect Choice for Decorated Sugar Cookies?

For aspiring cookie decorators, understanding royal icing is key. Royal icing is a unique and versatile decorating medium made primarily from powdered sugar, meringue powder (or fresh egg whites), and water, often enhanced with coloring and flavoring. What sets it apart from traditional frostings is its ability to dry to a hard, smooth finish. This characteristic is crucial for creating intricate designs, allowing layers of color and fine details to stand out without smudging. It essentially turns your cookies into tiny, edible canvases, making it the preferred choice for professional-looking decorated sugar cookies, including our adorable conversation hearts.
Unlike soft, fluffy buttercreams or glazes, royal icing creates a protective shell that not only preserves the cookie but also allows for easy stacking and transportation without damage. This durability makes it ideal for holiday baking, especially when you plan to share your creations. Whether you’re outlining delicate patterns or flooding large areas with color, royal icing offers unparalleled precision and a polished look that elevates simple cookies into true works of art. It’s the secret weapon behind those perfect, picture-worthy cookie designs you see online and in bakeries.

One of the most important aspects of working with royal icing is understanding its different consistencies: piping and flood. Piping consistency is thicker, akin to toothpaste, and is used for outlining the edges of your cookies, creating borders, and adding intricate details or writing. This thicker consistency holds its shape beautifully. Flood consistency, on the other hand, is thinner, similar to honey or shampoo, and is used to fill in larger areas within your piped outline. It spreads smoothly and evenly, creating a seamless, vibrant base layer.
Achieving these different consistencies is simpler than you might think. Both are made from the same base ingredients; you merely adjust the amount of water. To go from a thick piping consistency to a thinner flood consistency, you gradually add small amounts of water, mixing thoroughly until you reach the desired flow. This control over consistency is what gives decorators the power to execute a wide range of designs, from simple color blocks to elaborate edible art. Once decorated, royal icing cookies typically require about 6-8 hours to dry completely, ensuring a firm, durable finish.
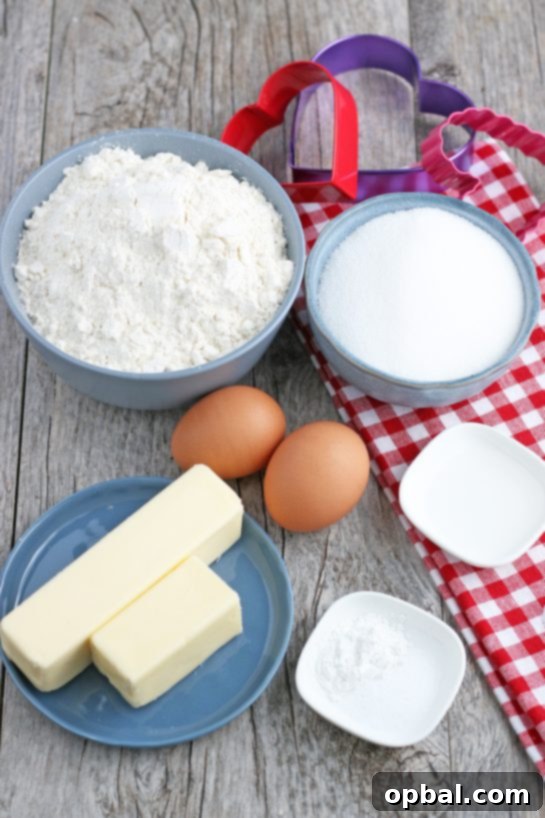
Essential Ingredients for Your Valentine’s Sugar Cookies
Every great decorated cookie starts with a perfectly baked sugar cookie base. Our recipe yields cookies that are delightfully soft, hold their shape well, and provide a sturdy foundation for royal icing. Here’s what you’ll need to gather:
- 2 ½ cups all-purpose flour
- 1 teaspoon baking powder
- ½ teaspoon salt
- ¾ cup (1 ½ sticks) unsalted butter, softened
- 1 cup granulated sugar
- 2 large eggs, room temperature
- 1 teaspoon almond or vanilla extract
Using softened unsalted butter is crucial for achieving a light and fluffy texture when creamed with sugar. Room temperature eggs also integrate better into the batter, ensuring a smooth, emulsified dough. The choice between almond or vanilla extract allows you to customize the flavor profile of your cookies, with almond offering a distinct, classic sugar cookie taste.
Crafting Your Vibrant Royal Icing
The beauty of conversation heart cookies lies in their colorful, expressive messages, all made possible with royal icing. Here’s a list of the simple ingredients required to make this magical decorating medium:
- 4 cups powdered sugar
- 3 tablespoons meringue powder
- 6-9 tablespoons water, room temperature
- Gel Food Coloring (for vibrant hues)
Meringue powder is a fantastic ingredient as it provides stability to the icing, helps it dry hard, and is a safe alternative to raw egg whites for many home bakers. Gel food colorings are highly recommended over liquid food colorings because they produce vibrant, intense colors without adding excessive moisture, which could alter the icing’s consistency. This allows you to achieve those bright, pastel shades characteristic of classic conversation hearts.
Step-by-Step Guide to Baking Perfect Valentine’s Day Sugar Cookies

Making these delightful Valentine’s Day cookies is a rewarding process, and the sugar cookie base is incredibly versatile. You can adapt this recipe for any season, shape, or theme throughout the year! Today, of course, our focus is on creating perfect heart-shaped canvases for our conversation heart designs.
- In a small bowl, thoroughly whisk together the all-purpose flour, baking powder, and salt. Set this dry mixture aside.
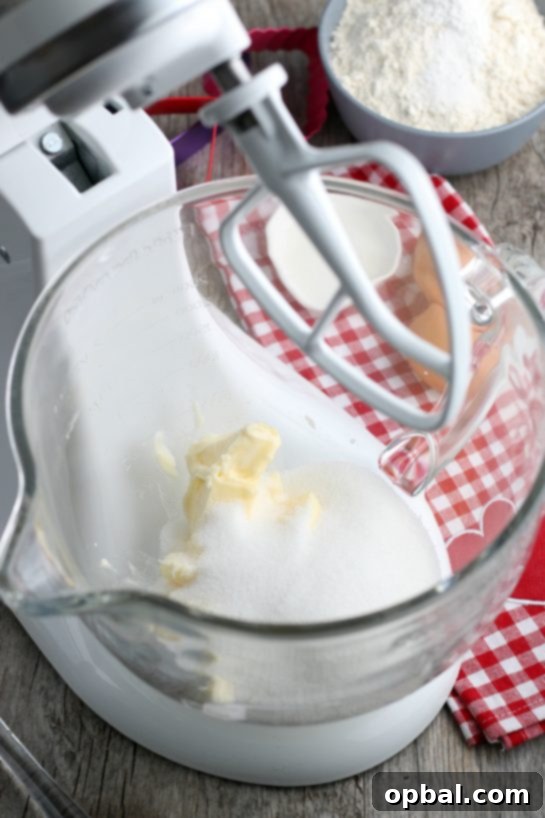
- In a large mixing bowl, preferably using a stand mixer with a paddle attachment, cream together the softened unsalted butter and granulated sugar until the mixture is light, fluffy, and pale in color. This usually takes about 2-3 minutes, ensuring air is incorporated for tender cookies.
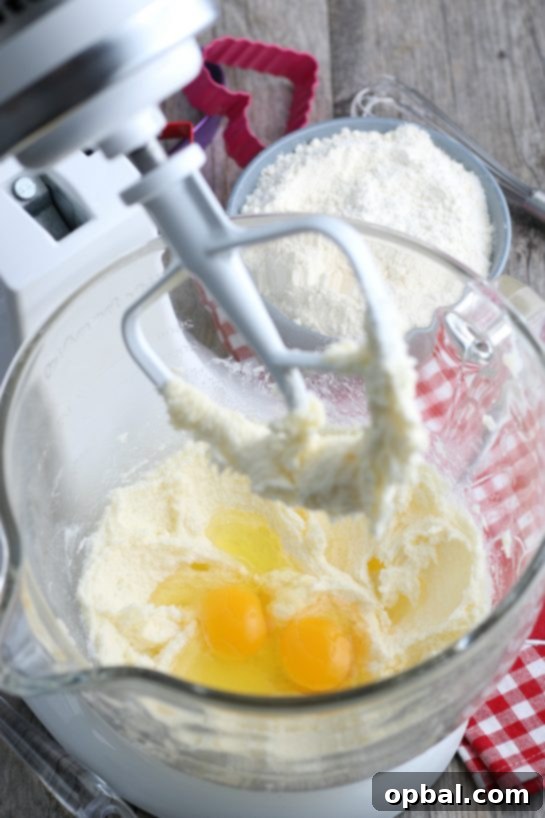
- Add the eggs, one at a time, beating well after each addition until fully incorporated. Stir in the almond or vanilla extract until the mixture is creamy and well combined.
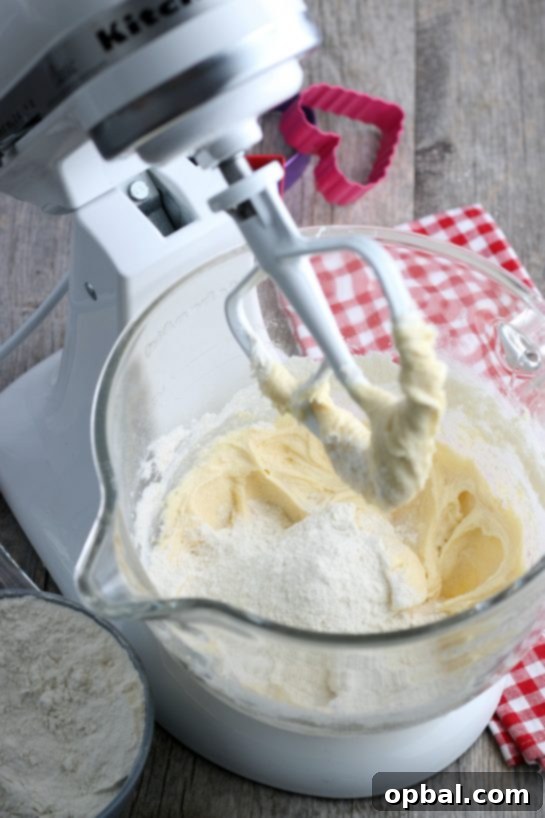
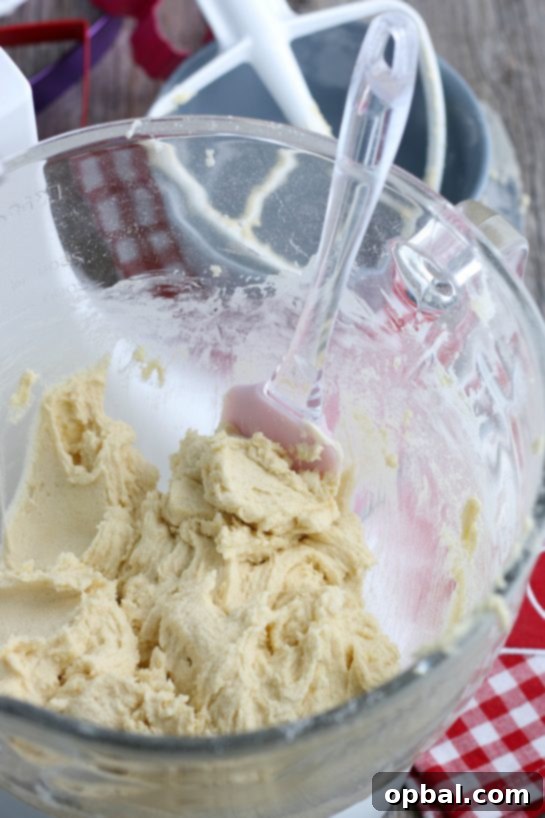
- Gradually add the reserved flour mixture to the wet ingredients, beating on low speed until just combined. Be careful not to overbeat the dough, as this can lead to tough cookies. Stop mixing as soon as no streaks of flour remain.
- Gently gather the dough, flatten it slightly into a disc, and wrap it tightly in plastic wrap. For best results, freeze the dough for about 20 minutes or chill it in the refrigerator for at least 2 hours. This crucial step prevents the cookies from spreading excessively during baking.
- Once the dough is chilled, preheat your oven to 375 degrees F (190 degrees C).
- Line your baking sheets with parchment paper or silicone baking mats to prevent sticking and promote even baking.
- On a lightly floured surface, roll out the chilled dough to an even thickness of about ⅛ inch. Use a heart-shaped cookie cutter to cut out your cookies. Re-roll any scraps gently, being careful not to overwork the dough.
- Carefully transfer the cut-out cookies to the prepared baking sheets, leaving a small space between each cookie.
- Bake for 6-8 minutes, or until the edges are lightly golden brown and the centers are just set. Baking times can vary, so keep a close eye on them.
- Allow the cookies to cool on the baking sheet for a few minutes before transferring them to a wire rack to cool completely. Ensure they are completely cool before you begin decorating.
Pro Tip: The Importance of Chilling Your Dough!
Never skip the chilling step! This isn’t just a suggestion; it’s a vital part of achieving beautifully shaped and delicious cookies. Chilling the dough solidifies the butter, which prevents the cookies from spreading too much in the oven, ensuring your heart shapes remain crisp and defined. It also makes the dough much easier to handle, roll out, and cut. If you want perfectly shaped Valentine’s cookies that hold up to intricate decorating, make sure to chill your dough as described above!
Mastering the Art of Royal Icing: From Powder to Perfection
Now that your cookies are baked and cooled, it’s time to create the star of the show: royal icing. This section guides you through making the icing and achieving the ideal consistencies for outlining, flooding, and writing.
- In a large bowl of a stand mixer fitted with a whisk attachment, whisk together the powdered sugar and meringue powder on low speed for about 30 seconds to ensure they are well combined and free of lumps.
- Gradually add water, one tablespoon at a time, mixing on low speed until you reach the desired consistency. You will need different consistencies for outlining, flooding, and writing, so aim for a thick, pipeable consistency first before thinning it further.
Expert Tips for Decorating Cookies with Flawless Royal Icing
Achieving beautifully decorated cookies takes a bit of practice, but with these tips, you’ll be creating professional-looking conversation hearts in no time:
- Coloring Strategy: It’s much easier to achieve consistent and matching colors if you separate a batch of thick royal icing into smaller bowls and tint them with gel food coloring *before* thinning them to different consistencies. This way, your piping and flood icing for the same color will be perfectly matched.
- Consistency is Key: Slowly add water, drop by drop, to reach your desired consistency. For outlining and writing, the icing should be thick enough to hold a definite line, similar to the texture of toothpaste. For flooding, it needs to be thinner, like honey or shampoo, allowing it to spread smoothly and self-level. Test the consistency by drawing a line; if it melts back into itself within 10-15 seconds, it’s typically good for flooding.
- Thickening the Icing: If you accidentally make your icing too thin, avoid adding more powdered sugar to individual small batches, as this can change the flavor and texture. Instead, keep a small portion of your initial, uncolored thick icing aside. You can use a few tablespoons of this thick base to gradually thicken an overly thin batch.
- Tools of the Trade: While plastic bags with trimmed corners can work in a pinch, professional piping bags with small round tips (like PME #1.5, #2, or Wilton #2, #3) offer much more precision and control, leading to cleaner lines and more refined details.
- The Outline and Flood Technique: Start by outlining the edge of your cookie with the thicker, piping consistency icing. Allow this outline to set for a few minutes (5-10 minutes) to create a barrier. Then, use the matching color in a flood consistency to fill in the middle. Use a scribe tool or a toothpick to gently guide the icing to the edges and pop any air bubbles.
- Achieving a Smooth Finish: After flooding, gently tap the cookie on your work surface a few times. This helps the icing settle, spread evenly, and releases any trapped air bubbles, resulting in a perfectly smooth surface.
- Wet-on-Wet for Seamless Designs: If you want the writing or additional details (like small dots or hearts) to meld seamlessly into the base color, apply them while the flooded base layer is still wet. This technique creates a beautiful, flat surface. If you want raised designs, allow the base layer to dry completely first.

Spark Your Creativity: Ideas for Conversation Heart Messages
Struggling to come up with the perfect message for your conversation heart cookies? The beauty of these treats is their ability to convey simple, sweet sentiments. While classic sayings are always a hit, feel free to get creative and personalize them for your recipients! Here are some beloved and fun ideas to get you started:
- LOVE
- KISS ME
- HUGS
- XOXO
- CUTIE PIE
- BE MINE
- SWEET PEA
- BFF
- CRUSH
- SOUL MATE
- CUTE
- ONLY YOU
- TRUE LOVE
- TEXT ME
- CALL ME
- MY LOVE
- FOREVER
- YOU ROCK
- HOT STUFF
Don’t hesitate to invent your own unique phrases, inside jokes, or names for an extra personal touch. The possibilities are endless when it comes to expressing your feelings through these adorable edible messages!

More Delightful Valentine’s Day Treats to Share
If your love for baking extends beyond conversation heart cookies, here are a few more fantastic Valentine’s Day recipes to sweeten the season:
- Sugar Cookie Popcorn – A fun and easy snack, perfect for school parties or a cozy movie night.
- Cupid’s Crunch Chex Mix – This festive party mix is an absolute favorite for its irresistible blend of sweet and crunchy textures, making it ideal for sharing.
- Copycat Frosted Swig Sugar Cookies – Beautifully soft and topped with a creamy frosting, these cookies are a delightful treat for any holiday or celebration.
- Molten Chocolate Lava Cakes – Indulge the chocolate lovers in your life with these decadent, gooey-centered desserts, perfect for a romantic dinner.
- Brown Sugar M&M Blondies – These chewy blondies are incredibly simple to make and packed with colorful M&M’s, offering a delightful burst of flavor in every bite.
- 2 ½ cups all-purpose flour
- 1 teaspoon baking powder
- ½ teaspoon salt
- ¾ cup (1 ½ sticks) unsalted butter, softened
- 1 cup granulated sugar
- 2 large eggs, room temperature
- 1 teaspoon almond or vanilla extract
- For the Royal Icing:
- 4 cups powdered sugar
- 3 tablespoons meringue powder
- 6-9 tablespoons water, room temperature
- Gel Food Coloring
- In a small bowl, whisk together flour, baking powder and salt. Set aside.
- In a large bowl, cream together butter and sugar until light and fluffy, about 2-3 minutes.
- Add eggs and extract and beat until creamy and well combined.
- Gradually add the flour mixture, beating well after each addition. Do not overbeat.
- Wrap dough in a piece of plastic wrap, then freeze for about 20 minutes or chill in the refrigerator for at least 2 hours.
- Preheat oven to 375 degrees F (190°C).
- Line a baking sheet with parchment paper or a silicone mat.
- Roll dough out to ⅛ inch thickness, then cut with a heart-shaped cookie cutter.
- Place cookies on the prepared baking sheet and bake for 6-8 minutes, or until the cookie bottoms are lightly golden brown.
- Cool on a wire rack completely before decorating.
- In a large bowl of a stand mixer, whisk together powdered sugar and meringue powder on low for 30 seconds.
- Add water one tablespoon at a time, mixing until desired consistency is reached. Remember you’ll need different consistencies for outlining, flooding, and writing.
- Divide the thick royal icing into separate bowls. Tint each bowl with your desired gel food colors.
- Thin a portion of each color for outlining (toothpaste consistency) and another portion for flooding (honey consistency).
- Transfer the outlining icing to a decorator bag fitted with a small round tip (#2 or #3).
- Outline the edges of each cookie, then immediately fill the inside with the corresponding flood icing.
- Gently shake or tap the cookie to help the icing spread evenly and remove air bubbles.
- Allow the flood icing to dry completely (6-8 hours or overnight) before adding written messages, unless you are doing a wet-on-wet technique.
- For writing, use a contrasting color of royal icing (e.g., red) thinned to piping consistency, in a decorator bag fitted with a very small round tip (#1 or #2). Pipe your desired conversation heart messages onto the dried cookies.