

Indulge in Sweet Simplicity: Easy 5-Ingredient Ice Cream Cannoli Cones Recipe
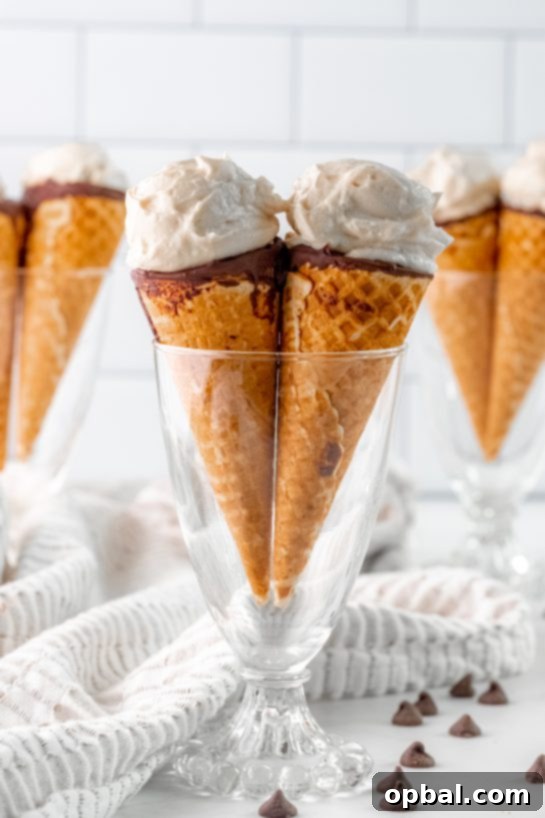
Prepare to fall in love with a dessert that perfectly marries convenience with classic Italian flavors: our irresistible Ice Cream Cannoli Cones. This ingenious recipe takes the beloved cannoli and reinvents it into a delightful, easy-to-handle cone form, resembling a scoop of ice cream. It’s an adorable twist that eliminates the time-consuming process of frying traditional cannoli shells, making it an accessible indulgence for any home baker, regardless of their frying fears!
These aren’t just any dessert cones; they feature a lusciously creamy filling bursting with authentic cannoli flavor. The best part? The rich, satisfying cannoli cream requires only five simple ingredients, coming together in mere minutes. While they might look like your favorite frozen treat, these cones are actually a creamy, chilled dessert that can be enjoyed year-round, making them a versatile star for any gathering, from backyard barbecues to festive holiday feasts.
Why These Ice Cream Cannoli Cones Are a Dessert Game Changer
Traditional cannoli, while undeniably delicious, often comes with a reputation for being intricate and laborious to prepare. The delicate frying of the pastry shells can be intimidating for many, not to mention the mess and specialized equipment involved. This recipe for Ice Cream Cannoli Cones completely sidesteps that challenge. By utilizing readily available waffle or sugar cones, we transform a classic into an incredibly simple, no-bake (for the shells) marvel.
Our goal was to create a dessert that captures the essence of a traditional cannoli – the sweet, creamy ricotta filling, often flecked with chocolate and a hint of citrus – without any of the hassle. And we’ve succeeded! These cones deliver all the satisfying textures and flavors you crave in a cannoli, encased in a crisp, sweet cone that offers a delightful crunch with every bite. It’s the perfect solution for anyone who adores Italian desserts but prefers a streamlined, stress-free approach to baking.
The Magic of a 5-Ingredient Cannoli Cream
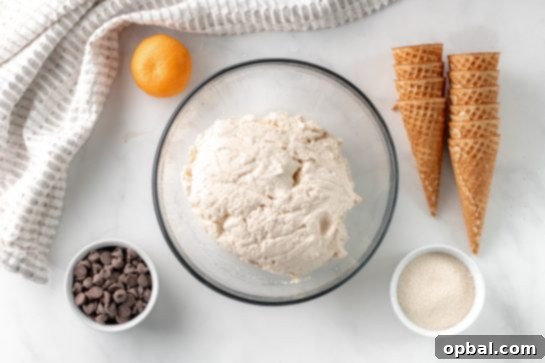
The heart of these Ice Cream Cannoli Cones lies in their incredibly simple yet profoundly flavorful cream. Forget lengthy ingredient lists or complex techniques; this recipe is built on just five core components, each playing a crucial role in creating that signature cannoli taste and texture. You’ll need:
- Ricotta Cheese: The foundation of any authentic cannoli cream, providing a wonderfully rich and slightly grainy texture. For the best results, ensure you use whole milk ricotta and drain it thoroughly to prevent a watery filling.
- Raw Cane Sugar (or Granulated Sugar): To sweeten the ricotta to perfection, balancing its inherent tang.
- Chocolate Chips: Classic mini chocolate chips are folded into the cream, adding delightful pockets of melty goodness and a touch of indulgence.
- Vanilla Extract: A staple in most desserts, vanilla enhances all the other flavors, adding warmth and depth.
- Orange Zest: This is often the secret ingredient that elevates cannoli cream from good to exceptional. The bright, fragrant zest of half to one orange adds a subtle citrus note that is truly authentic and irresistible.
These ingredients are simply mixed together, creating a harmonious blend that is both comforting and sophisticated. The simplicity means you can whip up a batch of this delicious cream in minutes, ready to fill your cones and delight your guests.
A Treat for Every Season and Celebration
One of the most appealing aspects of these Ice Cream Cannoli Cones is their incredible versatility. While the “ice cream” in their name might suggest a summer treat, their creamy, chilled nature makes them perfect all year long. Imagine them:
- For Summer Gatherings: A refreshing alternative to actual ice cream, they’re easy to serve and a guaranteed crowd-pleaser at cookouts or pool parties. Just remember to keep them well-chilled before serving!
- Autumn/Fall Delights: As the weather cools, these cones maintain their appeal. You can even infuse the cream with fall spices like cinnamon or nutmeg, or try a Pumpkin Spice Latte Ice Cream Stuffed Cannoli variation for a seasonal twist.
- Festive Holiday Fare: Adorned with seasonal sprinkles, these make fantastic holiday desserts for Christmas, Thanksgiving, or even Valentine’s Day. They offer a lighter, yet still indulgent, option compared to heavier holiday pies and cakes.
- Birthday Parties & Special Occasions: Their fun, cone-shaped presentation makes them ideal for birthdays, anniversaries, baby showers, or bridal showers. They’re visually appealing and delight guests of all ages.
- Any Day Sweet Craving: Sometimes, you just need a sweet pick-me-up. These cannoli cones are so easy to make, they can be a spontaneous treat for yourself or to share with loved ones.

Customization and Creative Toppings
While the classic Ice Cream Cannoli Cone is perfect as is, it also serves as a fantastic canvas for your creativity. Feel free to experiment with various additions to both the cream and the toppings to match your taste or the occasion:
- Extra Chocolate Chips: An obvious but always welcome addition! Sprinkle extra mini chocolate chips on top of the filled cones for more chocolatey goodness and visual appeal.
- Chopped Nuts: Toasted pistachios are a traditional cannoli topping and add a wonderful crunch and nutty flavor. Almonds or walnuts could also be delicious.
- Fresh Fruit: Fresh raspberries or candied cherries can provide a beautiful pop of color and a contrasting tartness to the sweet cream.
- Citrus Zest: Beyond orange, a touch of lemon zest can add another layer of bright flavor to the ricotta cream.
- Spices: A pinch of cinnamon, nutmeg, or even a tiny bit of cardamom can add warmth and complexity, especially for fall-themed cones.
- Different Chocolates: Instead of semi-sweet chocolate chips, try dark chocolate, white chocolate, or even a mix. You can also drizzle melted chocolate over the finished cones for an elegant touch.
- Sprinkles: For parties or holidays, colored sprinkles are an easy way to customize your cones and make them extra festive.
These simple additions can transform your cannoli cones into an endless array of personalized treats, ensuring there’s a perfect version for everyone to enjoy. Their versatility makes them a staple for any dessert lover’s repertoire.

Pro Tips for Perfect Cannoli Cones
Achieving cannoli cone perfection is surprisingly simple, especially with a few helpful tips:
- Drain Your Ricotta: This is arguably the most crucial step for truly luscious cannoli cream. Ricotta cheese often contains excess moisture, which can make your filling watery. To prevent this, place your ricotta in a cheesecloth-lined colander over a bowl and let it drain in the refrigerator for at least a few hours, or even overnight. This ensures a thick, creamy, and stable filling.
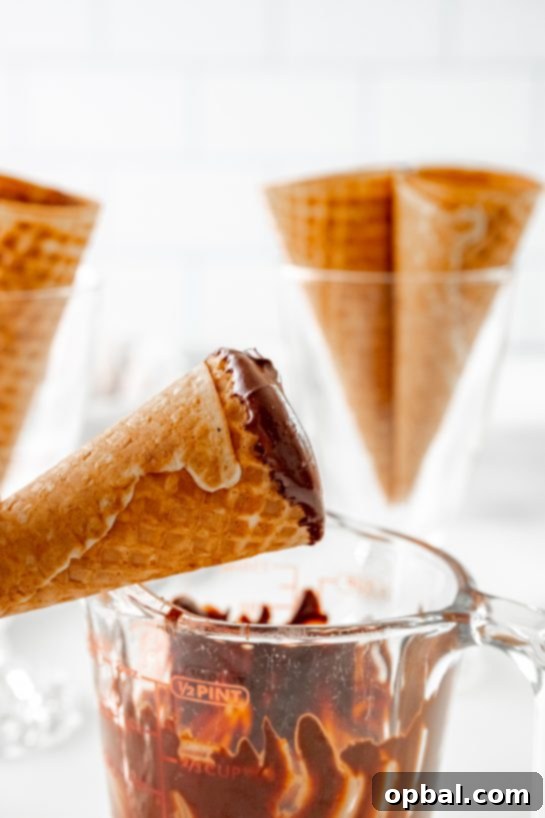
- Melted Chocolate Base: Just like those beloved Nutty Buddy cones, lining the bottom of your waffle cones with melted chocolate not only prevents the cream from making the cone soggy but also adds an extra layer of deliciousness and textural contrast.
- Rim Dip: Dipping the rim of each cone in melted chocolate, then optionally in sprinkles or chopped nuts, adds a professional finish and makes them even more appealing.
- Filling Methods: You have a couple of options for filling. An ice cream scoop works wonderfully for creating that classic “ice cream” look, especially for the top layer. Alternatively, a frosting piping bag with your favorite tip offers a more precise and elegant fill, allowing for decorative swirls.
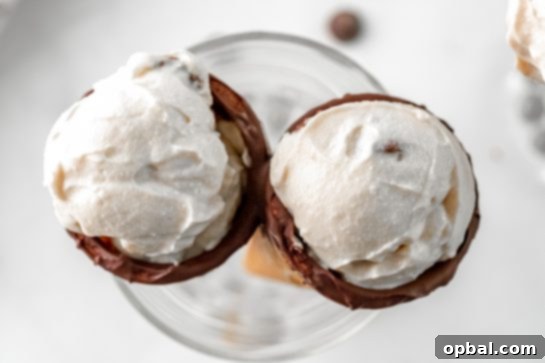
- Presentation Matters: To showcase your beautiful creations, consider using an ice cream cone holder. If you don’t have one, glasses filled with chocolate chips, rice, or coffee beans can hold the cones upright beautifully and add to the aesthetic.
- Chill Time: While the filling is enjoyable immediately, a brief chill in the refrigerator allows the flavors to meld and the cream to set slightly, enhancing its texture.
Follow these simple guidelines, and you’ll be serving up picture-perfect Ice Cream Cannoli Cones that taste as incredible as they look.
Embracing Inclusivity: The Vegan Cannoli Twist
For those following a vegan diet, or simply looking for a dairy-free alternative, you don’t have to miss out on the joy of these cannoli cones! Making a delicious vegan ricotta is simpler than you might think and serves as a fantastic base for your dairy-free cannoli cream.
Creating Your Own Vegan Ricotta
The secret lies in curdling soy milk to create a ricotta-like texture. Here’s how:
- Ingredients: You’ll need three 32-ounce containers of plain soy milk (ensure it’s just soy and water, without added thickeners or sugars for best results) and 7 tablespoons of apple cider vinegar or lemon juice. Lemon juice tends to leave less of an aftertaste.
- Process: Gently heat the soy milk in a large pot until it’s almost boiling, then remove it from the heat. Stir in the vinegar or lemon juice thoroughly. Let the mixture sit for at least 10 minutes to curdle. For maximum curdling and a firmer texture, you can refrigerate it for a few hours or even overnight.
- Straining: Line a colander with cheesecloth or a thin linen and place it over a large pot or bowl. Slowly pour the curdled soy mixture into the cheesecloth. Allow the liquid to drain for at least an hour, or overnight in the refrigerator. You can even place a plate on top of the curdled mixture to help press out more liquid.
- Finishing: Squeeze out any remaining liquid from the cheesecloth. The remaining pulp is your homemade vegan ricotta! Use 24 ounces for your cannoli cream and store any extra in the refrigerator for 2-3 days.
Once you have your vegan ricotta, proceed with the main cannoli cream recipe, substituting the dairy ricotta with your homemade vegan version. The result is a delightfully creamy, plant-based cannoli filling that everyone can enjoy.


Frequently Asked Questions (FAQs)
Can I add other flavors to the cannoli cream?
Absolutely! The ricotta base is incredibly versatile. You can easily experiment with different flavorings. Cocoa powder, almond extract, or even a touch of espresso powder work wonderfully to create new flavor profiles. Consider adding finely chopped candied fruit for a more traditional Italian touch, or a swirl of caramel for an extra decadent treat.
Can I make these Ice Cream Cannoli Cones ahead of time?
Yes, to a certain extent. The cannoli cream can be prepared and stored in an airtight container in the refrigerator for up to 2-3 days. For the best texture, we recommend filling the cones closer to serving time (within a few hours) to prevent the cones from becoming soggy. If you do fill them ahead, consider the melted chocolate lining at the bottom to help maintain crispness.
How should I store leftover cannoli cones?
If you have any leftovers (which is unlikely!), store them in an airtight container in the refrigerator. They are best enjoyed within 1-2 days. The cones might soften slightly over time, but the flavor will still be fantastic.
What type of cones work best for this recipe?
Waffle cones or sugar cones both work perfectly. Waffle cones tend to be a bit larger and offer a slightly softer, chewier texture, while sugar cones are typically smaller and have a crisper bite. Choose whichever you prefer!
Is it possible to use other cheeses besides ricotta?
While ricotta is the traditional choice for cannoli, you could experiment with alternatives for a different flavor and texture profile. Mascarpone cheese would yield a much richer, smoother, and denser cream. Cream cheese could also work for a tangier, firmer filling, though it would diverge significantly from the classic cannoli taste.

Ice Cream Cannoli Cones Recipe

Author: Ashley
Ice Cream Cannoli Cones recipe is an adorable twist on the classic Italian dessert recipe! The cannoli cream is super easy to make with just 5 ingredients!
Rating: 5 out of 5 stars (based on 3 votes)
Print Recipe |
Pin Recipe
Prep Time: 15 mins
Total Time: 15 mins
Yields: 10 servings
Ingredients
- 24 Ounces ricotta cheese
- 12 Tablespoons chocolate chips (6 tablespoons for ricotta and 6 tablespoons for the cones – melted for bottom and rim)
- 1/2 Cup raw cane sugar (or regular granulated sugar)
- 1 Tablespoon vanilla extract
- Zest of ½-1 orange
Optional Vegan Ricotta
- 3 (32-ounce) containers of plain soy milk (soy and water only)
- 7 Tablespoons apple cider vinegar or lemon juice
Instructions
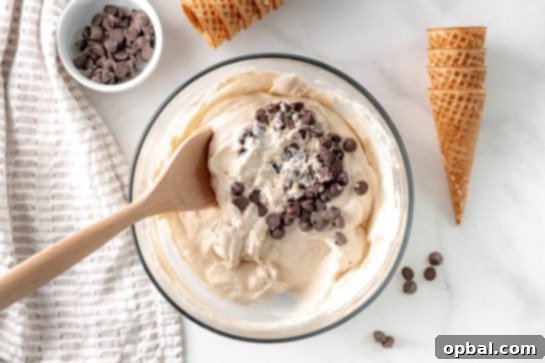
- Using an electric mixer or a large mixing bowl and spoon, add the ricotta cheese, sugar, orange zest, and vanilla extract. Mix well to ensure the sugar is thoroughly incorporated.
- Fold in 6 tablespoons of chocolate chips and mix together using a spatula or spoon. Cover and set aside.
- Take the remaining 6 tablespoons of chocolate chips and melt them by placing them in a microwave for 30 seconds at a time, stirring after each interval until smooth.
- Take each waffle or sugar cone and dip its rim into the melted chocolate to coat.
- Fill the bottom of each ice cream cone with a small amount of melted chocolate (similar to store-bought Nutty Buddy cones).
- There are two methods to fill each of the cones with cannoli cream. One method is to use an ice cream scoop. Fill the cone with cannoli cream using the scooper or a spoon, then use the ice cream scooper for the very top layer to achieve that classic ice cream cone look. The second method is to use a frosting piping bag and fill it using your favorite piping tip for a more refined appearance.
- Place extra chocolate chips on top of the filled cones. (optional, but highly recommended for better presentation and taste).
- For presentation, you can use an ice cream cone holder or place two cones upright in glasses filled with chocolate chips, rice, or coffee beans for stability.
Instructions for the Vegan Ricotta
- Take the three 32-ounce containers of plain soy milk and pour them into a large pot.
- Bring the soy milk to almost a boil, then remove it from the heat.
- Add the vinegar or lemon juice and stir well. Let the mixture sit for at least 10 minutes (or longer, even overnight in the refrigerator) to allow it to curdle fully.
- Set up a large pot with a colander inside, and line the colander with cheesecloth or a thin linen. Slowly pour the curdled soy mixture into the cheesecloth until the pot is empty.
- Optional: Place a dish on top of the cheesecloth-lined curdled mixture to help squeeze out all the liquid more efficiently.
- Let the liquid drain for at least an hour (or place it in the refrigerator overnight for best results).
- Squeeze out any remaining liquid from the cheesecloth. Remove the pulp (your vegan ricotta) and place it in a separate bowl.
- Use the desired amount of “vegan ricotta” for your cannoli (approximately 24 ounces) and place any remaining amount in an airtight container in the refrigerator for up to 2-3 days.
Notes
FAQ’s:
Can I add other flavors?
Yes, use the ricotta as a base and get creative! Cocoa powder, almond extract, or even a touch of coffee work very well. Any flavor can be added to customize these cones to your preference.
Can I lay them flat instead of upright?
Yes, the cannoli filling should be thick enough to hold its shape even when laid on its side, making them versatile for different serving styles.
Tried this recipe? Let us know how it was!

Conclusion: Your New Go-To Easy Italian Dessert
These Ice Cream Cannoli Cones truly embody the best of both worlds: the beloved flavors of a classic Italian cannoli combined with the simple, fun presentation of an ice cream cone. Whether you’re a seasoned baker or a novice in the kitchen, this 5-ingredient recipe is designed for ease, allowing you to create a stunning and delicious dessert without the stress. From impromptu sweet cravings to elaborate holiday spreads, these cones are guaranteed to bring smiles and satisfy any sweet tooth.
So, why wait? Gather your simple ingredients, embark on this delightful culinary adventure, and discover your new favorite way to enjoy cannoli. Don’t forget to get creative with toppings and share your delicious creations with family and friends. Buon appetito!