
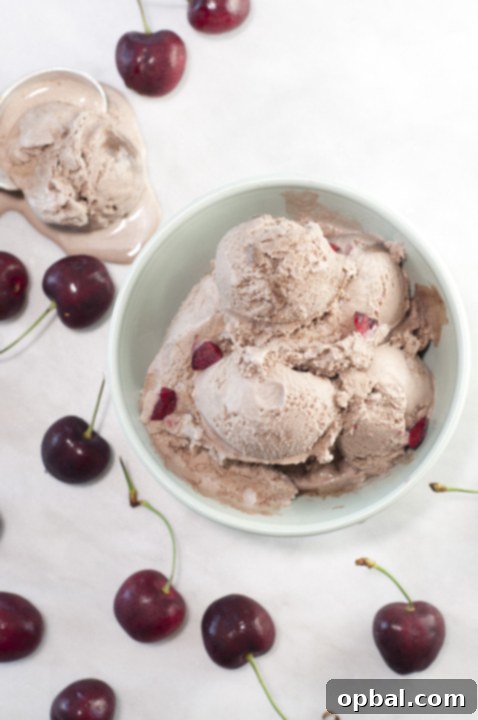
Indulge in Decadence: The Ultimate Homemade Chocolate Cherry Ice Cream Recipe
There are few culinary pairings as timeless and universally adored as chocolate and cherry. This exquisite combination marries the deep, sometimes bittersweet allure of rich cocoa with the vibrant, tart-sweet burst of ripe cherries. For many, like myself, it’s a dynamic duo that transforms individually pleasant flavors into an irresistible symphony. While I might not always reach for a plain bar of chocolate or a bowl of cherries on their own, combine them in a luxurious frozen dessert like this homemade Chocolate Cherry Ice Cream, and my resistance crumbles instantly.
The inspiration for this particular treat came from my husband, a true cherry enthusiast. Watching his eyes light up at the sight of perfectly ripe, seasonal cherries in the market sparked the idea to create something truly special for him. The thought of transforming those plump, juicy gems into a creamy, chocolate-infused ice cream was simply too tempting to ignore. The result was nothing short of spectacular: a rich, velvety chocolate ice cream base studded with sweet, tender cherries, each bite a delightful contrast of textures and flavors. With cherries at their absolute peak this time of year, there’s no better moment to embark on this delicious adventure and create your own batch of this sensational Chocolate Cherry Ice Cream.
I’m so glad you’re here! Discover more delicious inspiration and recipes by following along on Pinterest!
The Irresistible Allure of Chocolate and Cherry
What is it about chocolate and cherry that creates such a magical harmony? It’s a dance of contrasting yet complementary notes. The complex, sometimes bitter undertones of quality chocolate provide a sophisticated backdrop, while the bright, fruity acidity and sweetness of cherries cut through the richness, preventing the dessert from being overwhelmingly heavy. This balance is particularly wonderful in ice cream, where the cold temperature enhances the distinct flavors, making each element sing. From classic Black Forest cakes to elegant truffles, this pairing has captivated palates for centuries, and for good reason. It’s a sophisticated flavor profile that appeals to both chocolate purists and fruit lovers alike.
Why Homemade Ice Cream Reigns Supreme
While store-bought ice cream offers convenience, there’s an undeniable superiority to homemade versions. Making ice cream from scratch allows for unparalleled control over the quality of ingredients, ensuring you use the freshest cream, eggs, and, most importantly, the ripest seasonal fruit. You can adjust the sweetness to your preference, select your favorite type of chocolate, and avoid any artificial flavors or preservatives often found in commercial products. The texture of homemade ice cream is often creamier, richer, and more luxurious, melting in your mouth in a way mass-produced varieties simply can’t replicate. Furthermore, there’s immense satisfaction in crafting such a decadent dessert with your own hands, knowing exactly what went into it and anticipating the sheer delight of serving it to friends and family. It transforms a simple dessert into an experience, a true labor of love that is deeply appreciated.
The Secret to Perfect Cherries
The success of this Chocolate Cherry Ice Cream hinges significantly on the quality of your cherries. Opt for fresh, plump, and vibrant cherries that are firm to the touch. Sweet cherries like Bing or Rainier are excellent choices, offering a delightful natural sweetness that pairs wonderfully with dark chocolate. If you prefer a slightly tarter profile, varieties like Montmorency can be used, though you might want to adjust the sugar in the cherry mixture accordingly. Pitting cherries can be a bit tedious, but it’s a crucial step for a smooth, enjoyable ice cream experience. A cherry pitter makes this task quick and easy, but a small paring knife or even a sturdy straw can also do the trick. The brief cooking process with a touch of sugar and rum (or water) creates a delightful syrupy concoction that intensifies their flavor and ensures they remain tender when frozen, adding bursts of fruity goodness throughout the rich chocolate base.
Crafting Your Decadent Chocolate Base
This recipe employs a classic custard base, which is the secret to its incredibly creamy texture. Tempering the egg yolks carefully with the warm milk and sugar mixture is a vital step; it prevents the eggs from scrambling and ensures a smooth, luscious foundation. Cooking this mixture to 168 degrees F, as indicated by a candy thermometer, achieves the perfect consistency and ensures food safety. Don’t rush this process; gentle heat and constant stirring are key. Once the custard is ready, the quality of chocolate you use will profoundly impact the final flavor. Opt for high-quality semisweet and unsweetened chocolates – they provide the depth and complexity that elevates this ice cream from good to extraordinary. The addition of butter further enhances the silkiness and richness of the chocolate base. After combining these elements, a quick puree in a blender ensures an utterly smooth, lump-free chocolate mixture. Finally, stirring in heavy cream and vanilla extract rounds out the flavors, creating a base that is both intensely chocolatey and exquisitely balanced.
Patience is a virtue when making ice cream. The extensive chilling time, both for the cherry syrup and the chocolate base, is not merely a suggestion but a crucial step. Properly chilled mixtures churn more efficiently and result in a finer, smoother ice cream texture. Rushing this step can lead to a less creamy, more icy end product. Plan ahead, allowing ample time for everything to cool down thoroughly, even overnight if possible. When it comes to churning, ensure your ice cream maker’s bowl is frozen solid according to the manufacturer’s instructions. Adding the prepared cherries towards the end of the churning process ensures they remain distinct pieces rather than being completely pulverized, providing delightful textural contrast.
Serving Suggestions and Creative Variations
Once your Chocolate Cherry Ice Cream has frozen to perfection, the serving possibilities are endless. Enjoy it simply scooped into a chilled bowl, allowing its rich flavors to take center stage. For an extra touch of indulgence, garnish with a dollop of fresh whipped cream, a sprinkle of chocolate shavings, or a few extra fresh cherries. It also makes an incredible accompaniment to a warm brownie or a slice of rich chocolate cake, creating an unforgettable dessert experience. For a sophisticated twist, consider drizzling a small amount of cherry liqueur (Kirsch) over each serving, enhancing the cherry notes. You could also experiment with adding a handful of chopped toasted almonds or pecans during the last few minutes of churning for a nutty crunch.
This ice cream is truly the perfect treat for your summer barbecues, garden parties, or simply a quiet evening indulgence. While it requires a bit of a time investment to prepare, the spectacular end result is truly impressive and will be savored by anyone who appreciates a truly high-quality, homemade dessert. Next time I host chocolate lovers, this ice cream will undoubtedly be on the menu, ensuring it receives the full appreciation it deserves!
Homemade Ice Cream Recipes You Might Also Enjoy:
- Cookies and Cream Ice Cream
- Caramel Macchiato Ice Cream
- Cocoa Pebbles Ice Cream Cake
Chocolate Cherry Ice Cream
Rich and incredibly decadent, this homemade Chocolate Cherry Ice Cream recipe is the perfect sweet treat to cool you down this summer!
Ingredients
- 1 1/3 cups halved pitted cherries (about 13 ounces whole cherries)
- 1/2 cup plus 2 tablespoons sugar
- 1/2 cup dark rum (or you can use water)
- 1 1/2 cups whole milk
- 4 large egg yolks
- 3 ounces semisweet chocolate, chopped
- 1 ounce unsweetened chocolate, chopped
- 1 tablespoon unsalted butter
- 3/4 cup heavy cream
- 1 1/2 teaspoons vanilla extract
Instructions
- Put the cherries, 2 tablespoons sugar, and the rum (or water) in a medium saucepan. Cook over medium-high heat, stirring occasionally, until the mixture becomes syrupy, which should take about 15-20 minutes. Remove from the heat and allow it to cool completely, then transfer to the refrigerator until very cold, for about 2-3 hours.
- In the meantime, combine the milk and the remaining 1/2 cup sugar in another saucepan. Heat over medium-low heat, whisking constantly until the sugar completely dissolves.
- Whisk the egg yolks thoroughly in a small bowl until pale and slightly thickened.
- Gradually whisk about 1/2 cup of the warm milk mixture into the egg yolks to temper them. Then, slowly pour the tempered egg mixture back into the saucepan with the remaining milk. Cook and stir constantly over medium-low heat until the mixture thickens enough to coat the back of a spoon and registers 168 degrees F (75 degrees C) on a candy thermometer, about 15 minutes. Do not boil.
- Remove the custard from the heat. Immediately add the semisweet chocolate, unsweetened chocolate, and butter. Stir gently or let stand for about 5 minutes until the chocolate melts, then stir until smooth and fully incorporated.
- Transfer the warm chocolate mixture to a blender and puree until it is perfectly smooth. Pour the mixture into a large bowl and stir in the heavy cream and vanilla extract. Cover the bowl and refrigerate until thoroughly chilled, ideally for 2-3 hours or even overnight.
- Churn the chilled chocolate mixture in an ice cream maker according to the manufacturer’s instructions.
- While the ice cream churns, strain the cold cherry mixture, reserving the delicious cherry syrup separately. When the ice cream is very thick and almost fully churned, add the strained cherries to the ice cream maker and continue churning for another minute or two until they are well incorporated.
- Transfer the churned ice cream to a freezer-safe container. Drizzle in the reserved cherry syrup and gently swirl it through the ice cream with a spoon for beautiful streaks of cherry flavor. Cover tightly and freeze until firm, which will take at least 4 hours, or preferably overnight, for the best texture.
Recipe source: Food Network Kitchen