
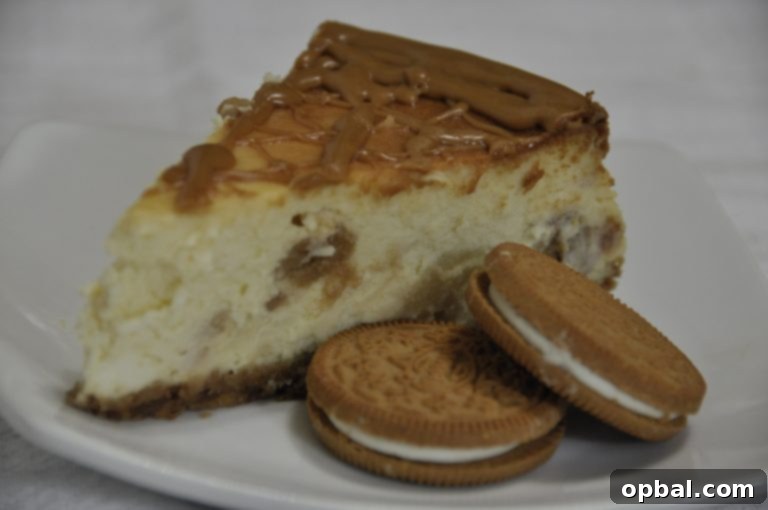
Decadent Gingerbread Cheesecake with Biscoff Drizzle: Your Ultimate Homemade Recipe
Prepare to embark on a culinary journey that promises pure indulgence with our extraordinary Gingerbread Cheesecake. This recipe takes the beloved classic to new heights, featuring a uniquely spiced crust made from gingerbread-flavored cookies and a luxurious drizzle of creamy Biscoff spread. It’s a dessert that’s not just a treat for the taste buds but also a feast for the eyes, perfect for any special occasion or simply to satisfy your deepest cheesecake cravings.
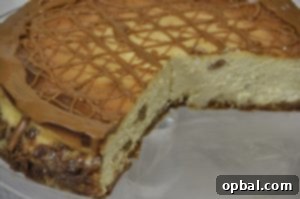
My Maiden Voyage into Cheesecake Baking: A Culinary Adventure Begins
Every culinary enthusiast has that one dish they’ve always wanted to conquer. For me, it was the magnificent cheesecake. The sheer thought of creating a perfectly creamy, richly flavored, and beautifully set cheesecake from scratch was both thrilling and slightly daunting. For what felt like an eternity, I had harbored the desire to undertake a trial cheesecake run, to truly test my baking mettle against this iconic dessert. The universe, it seems, was listening.
The turning point arrived quite unexpectedly. As I was tidying my kitchen, delving into the forgotten corners of my cabinets, I made a delightful discovery: a pristine springform pan, tucked away and completely unbeknownst to me! It was as if fate itself had presented me with the perfect opportunity. With this newfound tool in hand and a surge of inspiration, I decided this was my moment. Not just to bake a cheesecake, but to boldly venture into creating my very own custom recipe. Some might call it impulsive; I call it living life deliciously on the edge.
Crafting the Perfect Crust: The Unsung Hero of Every Cheesecake
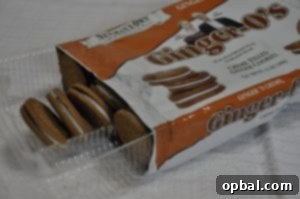
A cheesecake is only as good as its foundation, and for this gingerbread delight, I knew the crust had to be exceptional. For years, my secret indulgence has been Newman’s Own Ginger-O’s. These delightful gingerbread-flavored cookies, often found in the organic section of specialty grocery stores like Wegmans, possess a unique spice and crunch that, to me, far surpasses the ubiquitous Oreo. And trust me, for anyone who knows my fervent love for Oreos, that’s truly saying something! It was a no-brainer to elevate these personal favorites by transforming them into the foundational crust for my inaugural cheesecake.
Navigating the Water Bath Dilemma: A Common Pitfall and Its Solution
My first attempt, while largely successful, was not without its learning curves. Like many aspiring cheesecake bakers, I followed the popular recommendation to bake the cheesecake in a water bath, believing it would ensure a perfectly smooth, crack-free top. However, this method proved to be my one significant misstep. Despite my best efforts to wrap the springform pan securely, keeping water from seeping through the foil-wrapped base proved virtually impossible. The result? A disappointingly soggy crust – a true tragedy for any cheesecake connoisseur!
Thankfully, resourcefulness kicked in. I managed to salvage the crust by carefully drying it out. This involved placing the cheesecake back into the oven at a low temperature of 275°F (135°C) for several 10-minute intervals. Between each interval, I allowed the cheesecake to cool slightly with the oven door ajar. While this rescue mission was successful, I can confidently state that preventing a soggy crust in the first place is by far the superior approach. Learning from this experience, I’ve adopted a much more reliable method to achieve that desirable humidity without compromising the crispness of the crust.
Mastering the Art of No-Crack Cheesecake: My Recommended Baking Method
Based on my trial-and-error, I wholeheartedly recommend an alternative baking method that provides the necessary humidity for a smooth cheesecake top without the risk of a soggy crust. Instead of submerging your springform pan directly in a water bath, simply place your cheesecake on the middle rack of your oven. On the bottom shelf, position a shallow pan filled with water. This clever technique allows the steam to circulate within the oven, creating a humid environment that helps prevent cracks in the cheesecake’s surface, all while keeping your precious crust dry and perfectly crisp. This indirect humidity method is a game-changer for achieving professional-looking results in your homemade gingerbread cheesecake.
This method not only simplifies the baking process but also significantly reduces the stress associated with potential water leakage. The consistent, gentle heat distribution, coupled with the ambient moisture, ensures your cheesecake bakes evenly, resulting in that coveted creamy texture throughout. Say goodbye to the struggles of wrapping and unwrapping pans, and hello to a foolproof way to achieve cheesecake perfection.
The Sweetest Burden: When Cheesecake Becomes a Solo Affair
There’s an ironic twist to every baker’s tale, and mine involved a crucial oversight regarding my very own Mr. Wishes. The one element I utterly failed to consider beforehand was his distinct lack of enthusiasm for cheesecake. Do the math, or allow me to do it for you, especially if you share my mild aversion to numerical challenges: I was left to contend with this entire, gloriously delicious, and undeniably rich cheesecake all by myself. Typically, my philosophy in such situations leans heavily towards, “More for me!” However, when you’ve indulged in cheesecake for six consecutive nights, even the most passionate dessert lover begins to question their life choices.
Let’s just say my body, after a week of this delightful overindulgence, was not sending me thank-you notes. It was a delicious struggle, a test of will against the creamy, spiced goodness. Yet, the experience wasn’t entirely solitary. I managed to share a single, coveted piece with my wonderful mother. Her verdict? Without hesitation, she declared it the best cheesecake she had ever tasted. And if you’re skeptical, feel free to ask her yourself – her endorsement is unwavering! This affirmation made all the solitary eating (and the subsequent need for a food detox) entirely worthwhile. It’s truly a testament to how wonderful this homemade gingerbread cheesecake with Biscoff spread truly is.
Embracing Flavor: The Wisdom of Julia Child
Before we dive into the much-anticipated recipe, I want to impart a crucial piece of culinary wisdom, one often overlooked in our health-conscious world: don’t be afraid of a little fat. As the legendary Julia Child so eloquently put it, “Fat gives things flavor.” In the realm of decadent desserts like this gingerbread cheesecake, fat is not just an ingredient; it’s the very essence of richness, creaminess, and the unforgettable taste that makes every bite an experience. Embrace it, savor it, and understand that sometimes, indulgence is simply part of a life well-lived.
This gingerbread cheesecake is a perfect example of how the right balance of fats—from the cream cheese to the buttery crust and the luxurious Biscoff spread—creates a symphony of flavors and textures that simply cannot be replicated otherwise. It’s about enjoying quality over quantity, and truly appreciating the depth of flavor that well-chosen ingredients bring to your table.
Your Ultimate Gingerbread Cheesecake with Biscoff Drizzle Recipe
Ready to create this show-stopping dessert? This recipe for a homemade gingerbread cheesecake, featuring a delightful ginger cookie crust and a decadent Biscoff spread drizzle, is designed to guide you through every step, ensuring a perfect, crack-free, and utterly delicious outcome.
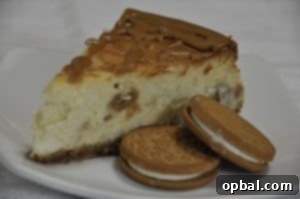
Ingredients:
- For the Gingerbread Cookie Crust:
- 2 cups (about 250g) Newman’s Own Ginger-O’s (or your favorite gingerbread cookies), finely crushed
- 1/2 cup (113g) unsalted butter, melted
- 2 tablespoons granulated sugar (optional, for extra sweetness)
- For the Gingerbread Cheesecake Filling:
- 3 (8-ounce) packages full-fat cream cheese, softened at room temperature
- 1 1/4 cups (250g) granulated sugar
- 1/4 cup (60ml) heavy cream
- 1 tablespoon all-purpose flour
- 2 large eggs, at room temperature
- 1 large egg yolk, at room temperature
- 1 teaspoon vanilla extract
- 1 teaspoon ground ginger
- 1/2 teaspoon ground cinnamon
- 1/4 teaspoon ground nutmeg
- Pinch of ground cloves
- For the Biscoff Drizzle:
- 1/2 cup (120g) Lotus Biscoff Spread, warmed slightly for drizzling consistency
- Optional Garnish:
- Whipped cream
- Extra crushed gingerbread cookies
- Fresh ginger slices or candied ginger
Instructions:
- Prepare the Crust: Preheat your oven to 350°F (175°C). In a medium bowl, combine the finely crushed gingerbread cookies, melted butter, and optional granulated sugar. Press the mixture evenly into the bottom of a 9-inch springform pan. For best results and to prevent a soggy crust, brush the crust lightly with egg white before baking.
- Pre-bake the Crust: Bake the crust for 10-12 minutes, or until it’s set and lightly golden. Remove from the oven and let it cool completely on a wire rack while you prepare the filling. Reduce oven temperature to 325°F (160°C).
- Prepare the Indirect Water Bath: While the crust cools, place a shallow pan filled with about an inch of water on the bottom rack of your oven. This will create the necessary humidity for a crack-free cheesecake without direct contact.
- Make the Cheesecake Filling: In a large mixing bowl, using an electric mixer on medium speed, beat the softened cream cheese until smooth and creamy, about 2-3 minutes. Scrape down the sides of the bowl.
- Add Sugar and Cream: Gradually add the granulated sugar to the cream cheese, beating until just combined and smooth. Do not overmix. Stir in the heavy cream and all-purpose flour until fully incorporated.
- Incorporate Eggs and Spices: Add the eggs and egg yolk one at a time, mixing on low speed until just combined after each addition. Be careful not to incorporate too much air into the batter. Stir in the vanilla extract, ground ginger, cinnamon, nutmeg, and cloves until evenly distributed.
- Assemble and Bake: Pour the cheesecake filling over the cooled crust in the springform pan. Gently tap the pan on the counter a few times to release any air bubbles.
- Bake the Cheesecake: Carefully place the springform pan on the middle rack of your preheated oven (above the water pan). Bake for 60-75 minutes, or until the edges are set but the center still jiggles slightly when gently shaken. Avoid opening the oven door during the first 30 minutes of baking.
- Cooling Process (Crucial for No Cracks): Once baked, turn off the oven, but leave the cheesecake inside with the oven door slightly ajar. Let it cool gradually in the oven for at least 1 hour, or until completely cool. This slow cooling prevents sudden temperature changes that can cause cracks.
- Chill Thoroughly: Remove the cheesecake from the oven and run a thin, sharp knife around the edge of the pan to prevent sticking as it cools further and shrinks. Once it’s at room temperature, cover it loosely with plastic wrap and refrigerate for at least 6-8 hours, or preferably overnight, for the best texture and flavor.
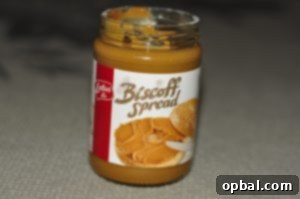
- Add Biscoff Drizzle: Just before serving, gently warm the Biscoff spread until it’s of drizzling consistency. Drizzle generously over the top of the chilled gingerbread cheesecake.
- Serve and Enjoy: Remove the sides of the springform pan. Slice the gingerbread cheesecake with a warm, clean knife (wiping the knife between slices) and serve. Garnish with whipped cream, extra crushed cookies, or fresh ginger if desired.
Expert Tips for Cheesecake Perfection: Your Guide to Flawless Baking
Achieving a perfect homemade cheesecake, particularly one as rich and flavorful as this gingerbread rendition, requires attention to detail. Here are some indispensable tips to ensure your baking journey is smooth and your final product is nothing short of magnificent:
- Softened Cream Cheese is Key: Always ensure your full-fat cream cheese is completely softened to room temperature before mixing. This is perhaps the most critical tip! Cold cream cheese will result in a lumpy batter, which in turn leads to a grainy, uneven cheesecake texture. The best method is to leave it out on the counter for at least an hour or two. If time is short, unwrap the cream cheese from all packaging, place it in a microwave-safe bowl, and microwave on high for 10-second intervals, checking and flipping after each, until just soft but not warm or melted.
- Room Temperature Eggs: Like cream cheese, eggs should also be at room temperature. This allows them to incorporate more evenly into the batter, preventing overmixing and ensuring a smooth, consistent emulsion. If you forget to take them out, place them in a bowl of warm (not hot) water for 5-10 minutes.
- Gentle Mixing Speed: When combining ingredients, always use a medium-low speed on your electric mixer. Overmixing, especially after adding eggs, incorporates too much air into the batter. This air expands rapidly during baking, causing the cheesecake to puff up and then crack and sink as it cools. Mix only until just combined.
- No Peeking During Baking: Resist the urge to open the oven door during the baking process, especially within the first 30 minutes. Sudden fluctuations in temperature can cause the cheesecake to crack. Trust the timing and the visual cues of the indirect water bath method.
- The Slow Cool-Down: Once the baking time has ended, turn off the oven but do not remove the cheesecake immediately. Instead, leave the oven door slightly ajar and let the cheesecake cool gradually inside the oven. This slow, controlled cooling is crucial for preventing cracks by allowing the cheesecake to adjust to the temperature change gently.
- Preventing Edge Cracks: After the cheesecake has cooled in the oven for about 15-20 minutes, remove it and run a sharp, thin knife around the inner edge of the springform pan. This releases the cheesecake from the pan as it continues to cool and shrink, preventing tension that can lead to cracks on the surface. Then, return it to the oven for the remainder of the cooling period.
- Fully Chill Before Refrigeration: Ensure your baked cheesecake is completely cool at room temperature before transferring it to the refrigerator. Placing a warm cheesecake directly into the fridge can trap moisture, leading to a soggy texture and condensation on the surface.
- Aluminum Foil for Easy Release: If you plan to remove the cheesecake from the base of your springform pan for presentation after it’s baked and chilled, line the base with aluminum foil before pressing in the crust. This creates a non-stick layer that makes transferring the finished cheesecake much easier.
Share Your Cheesecake Journey!
What’s your all-time favorite cheesecake recipe or a unique twist you’ve tried? We’d love to hear about your culinary adventures and discoveries. Feel free to leave a comment below and share your best cheesecake tips, or even a link to your favorite blog post or recipe. Happy baking!